Table of Contents
This is an old revision of the document!

REF: Engine Mechanicals - Sub-04G
Slack tube testing on a 1998 1250S model
This testing was done to see the changes in crankcase pressure using a homemade slack tube while changing some variables.
Note:
Testing was done while the bike was sitting still (no load)
The stock 1200 engine has been upgraded to 1250cc with the stock S model ignition (not tweak-able) with the double blip timing cup.
It also has a Buell crankshaft assembly with the cupped flywheel ends.
The oil pump is the 2007 Sportster gerotor pump.
The first test was on a cold startup with used umbrella valves. Just testing the waters using black coffee as a liquid media.
The second and future tests were done at operating temp (200F), technically the way it should be and with green food coloring and water in the tube.
In reading the numbers, you'll see the readings in the left and right legs change.
However, the measurement change in each leg is only actually half of the affected height of liquid moved.
To be accurate, take the reading from the left leg between zero reference and the height of the liquid and multiply it by 2 to get total increase/decrease in vacuum.
Likewise you can add zero to the liquid height on both tubes and get the same result.
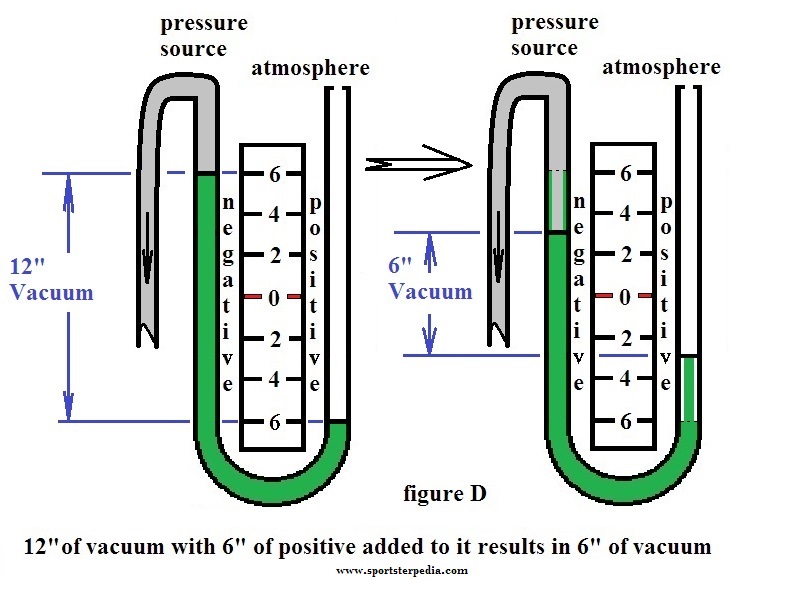
In the drawing below (left);
A rise in vacuum pressure of 6“ of water (left leg) has a total of 12” in rise as the water has traveled in both legs.
Then, on the right;
An addition of 3“ of positive pressure exerted (6” in actual height) on downstroke still yields a balance of 6“ of total vacuum from the engine (showing 3” on left leg).
In this example, the total pressure in the crankcase is still negative but with not as much pressure as it was at the last upstroke.
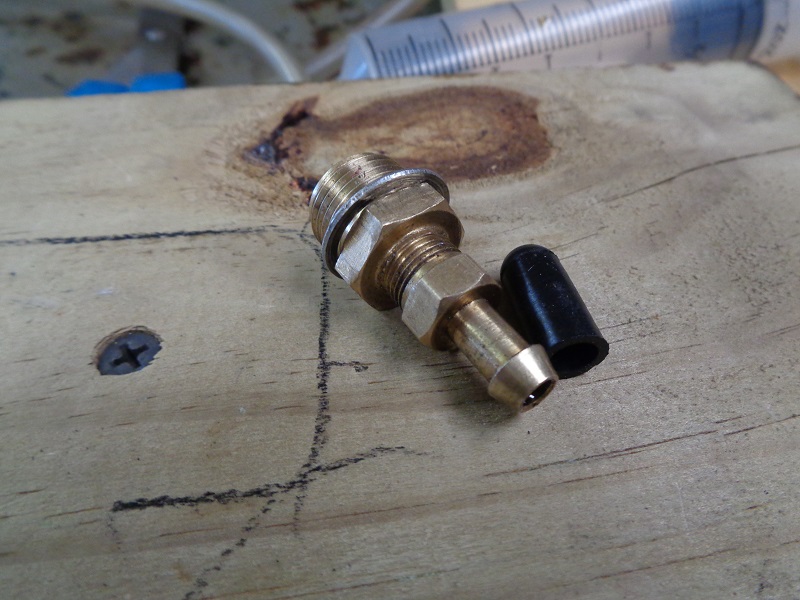
For this testing, a slack tube was made using an 1/8” hose barb fitting plugged into the timing plug hole with a length of 1/8“ clear hose to the instrument.
The build article is here for it's construction.
Anti-seize was not used on the hose fitting initially and later it was used with no difference in the results.
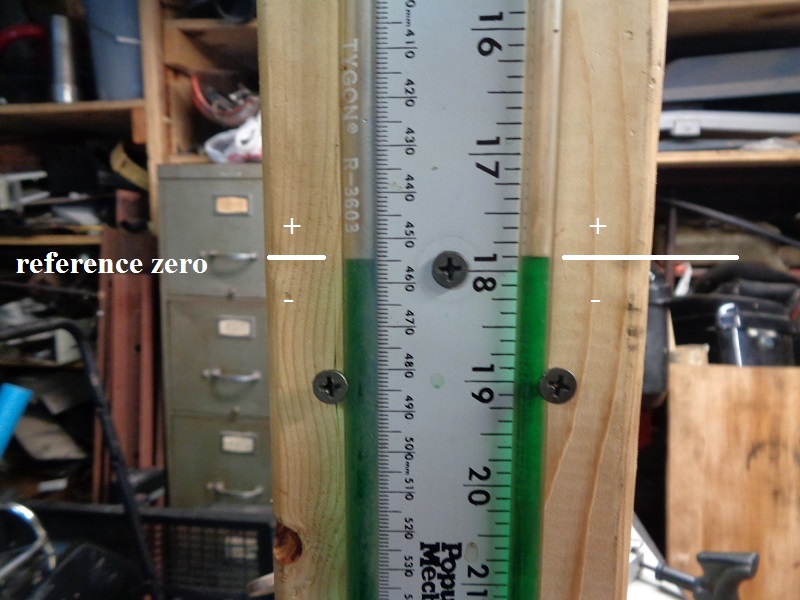
Using a ruler instead of graduations each direction from reference zero will work fine. You just have to do some math to get the readings.
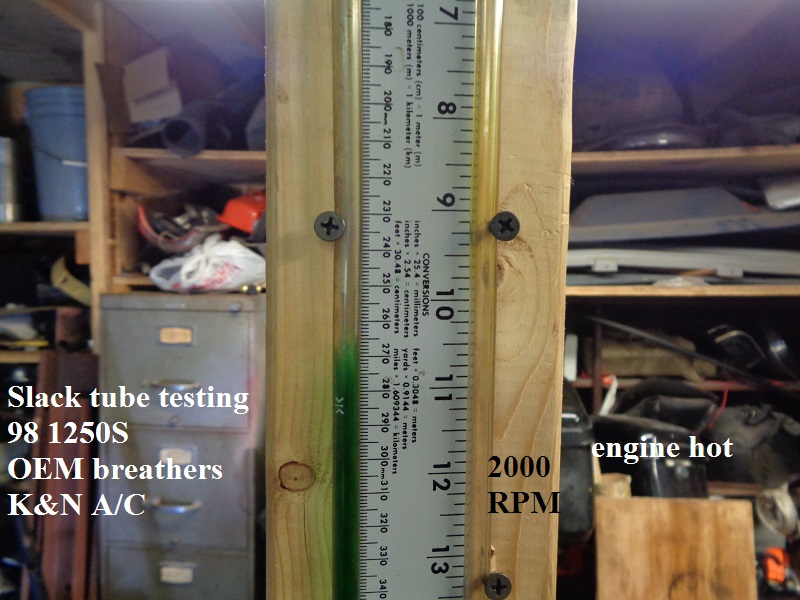
All testing done with green coloring below was done with 36” ruler with reference zero at 18-1/8“ on the ruler as shown below.

Testing from cold startup
An initial test was done at cold startup just to see where the measurements would fall.
The engine was warmed just enough to shut the enrichener off and testing began.
Ideal testing, of course, is a full operating temperature so this portion of testing is just for reference only.
The rings will seal better on a hot test and the results will change from these readings.
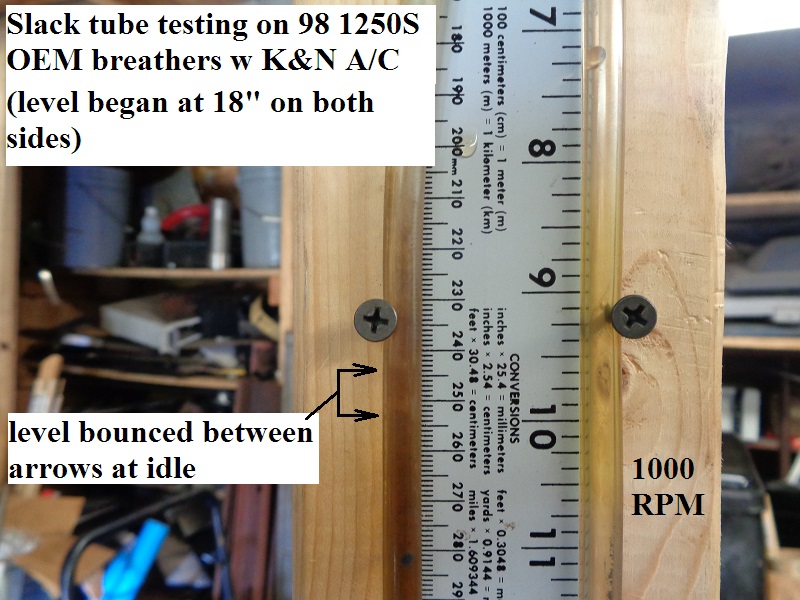
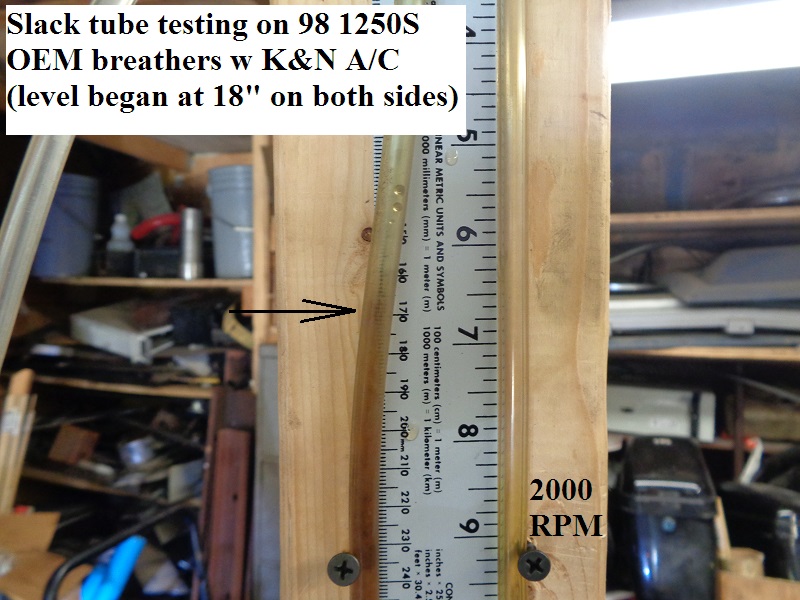
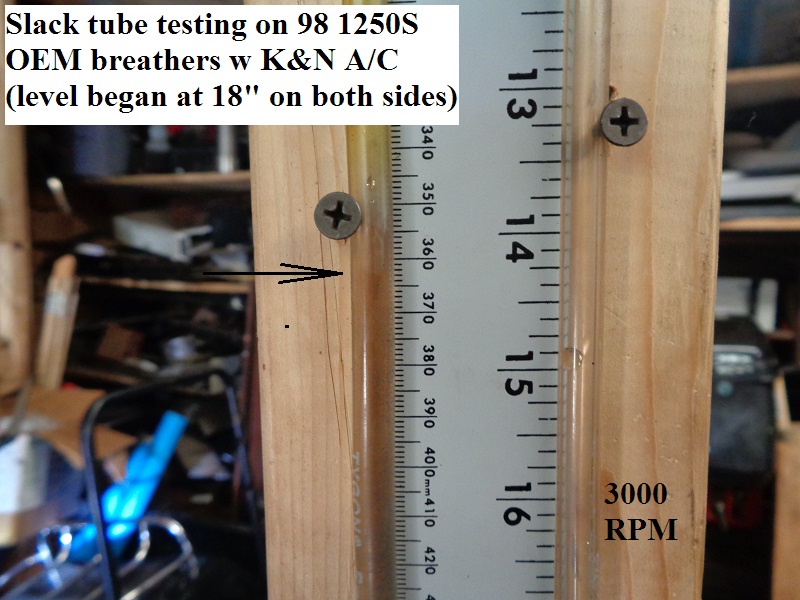
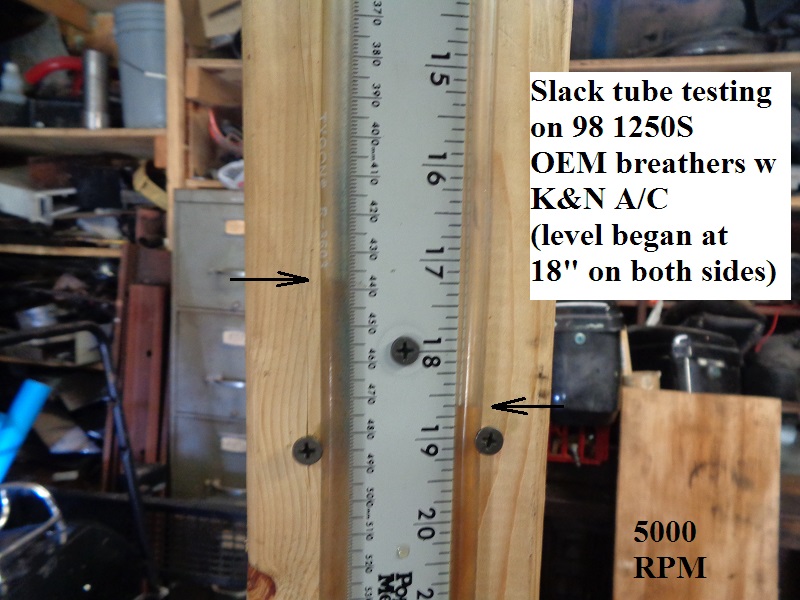
The level began at 18” on the ruler on both legs. There was about a 3/8“ fluctuation at idle but was stable thru the rest of the testing.
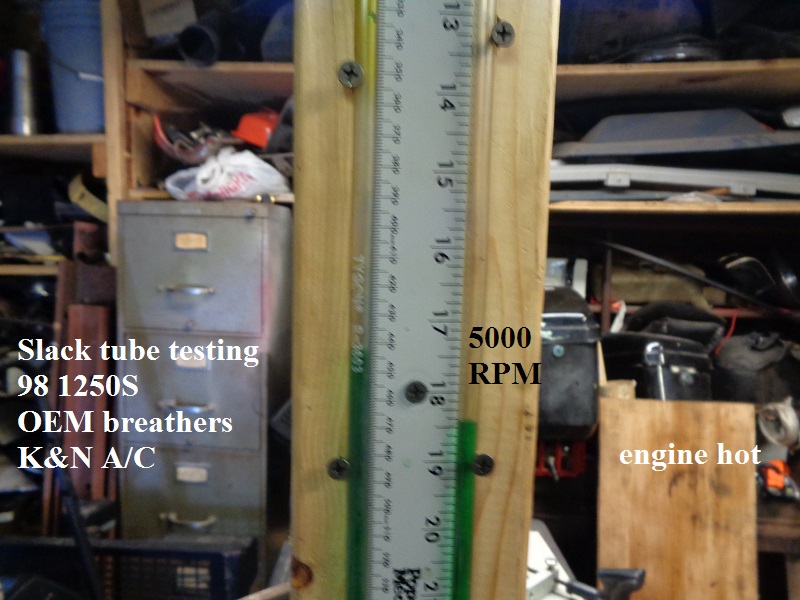
Below are the results from 1000-5000 RPM.
As you can see, the coffee doesn't show up well in the pics which is why green food coloring in water was used in later testing.

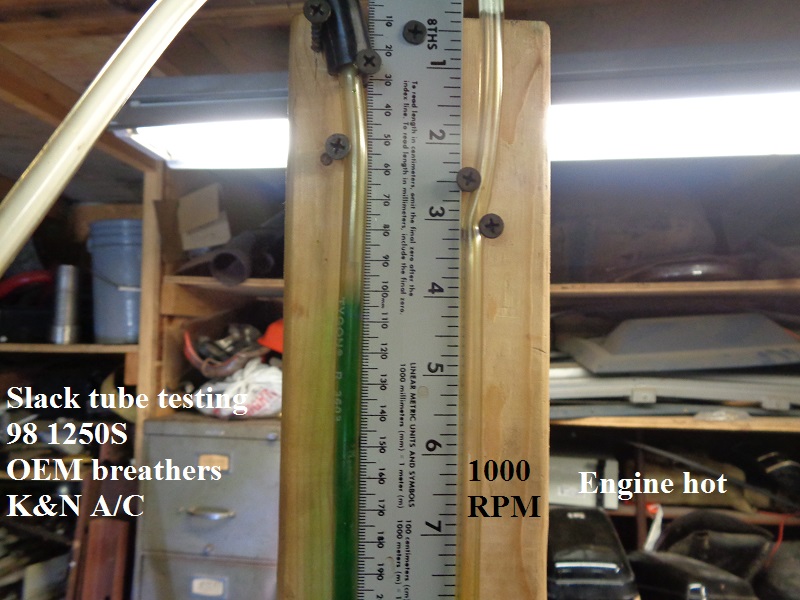
All future testing was done with the engine up to operating temperature with oil temp at 200°F.
Initial Test (engine at operating temp)
This is the first official test that was done with the engine up to temp.
Green food coloring in tap water was used as the liquid media.
The umbrella valves were in used state. The front umbrella had about 6 months use.


Test after replacing the umbrellas
Upon removal of the old umbrellas, the rear one was a little stiffer than the front but still would bend over (just not as much as the front would).
The front was just as flimsy as a new one.
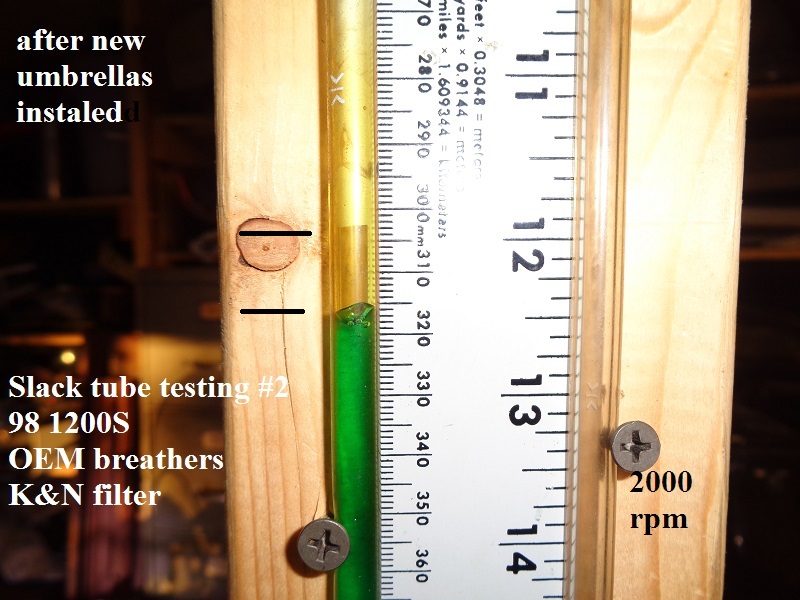
The results show about a 3-1/4” reduction in vacuum at idle in the left leg (6-1/2“ of water column) with a new umbrella in each rocker box.
The engine seemed to lope a little better at idle although there wasn't a seat of the pants difference on the road.
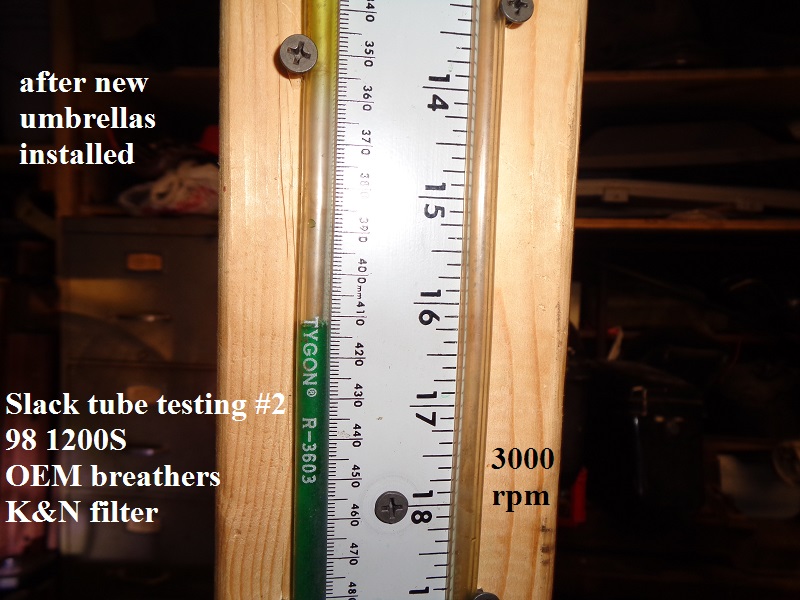
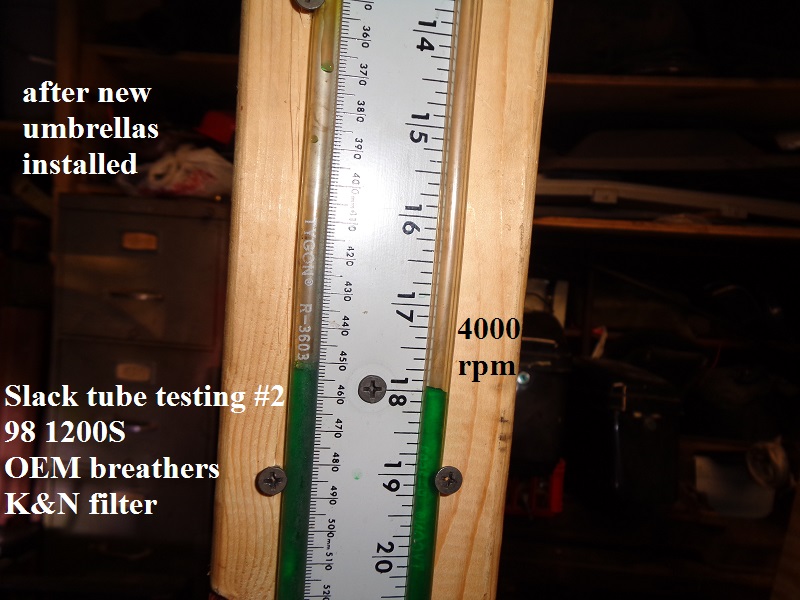
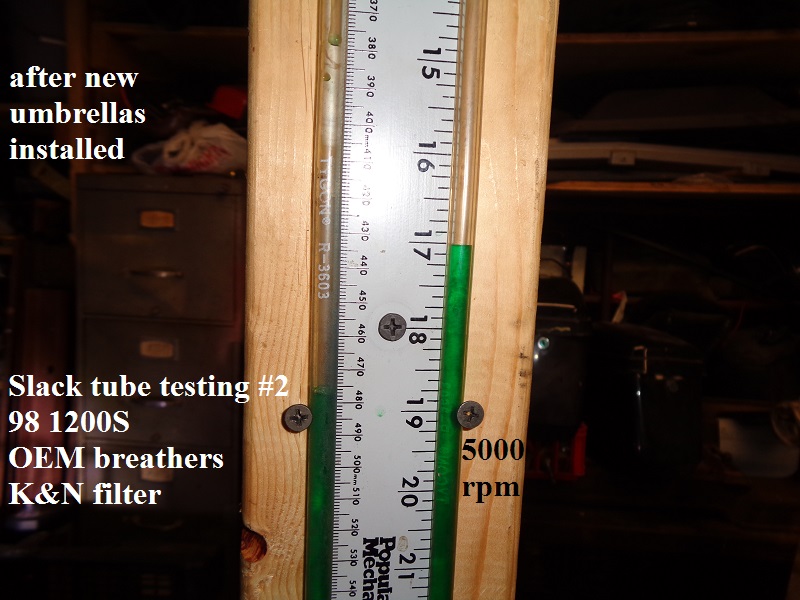
And the engine is now going to positive pressure around 4200 rpm.
At both 1000 and 2000 RPM, there was not a fast changing variance in the measurement (as was in the previous test mostly at idle).
The variant level is still about a 1/4” up and down but it rises and falls slower now.
There was no noticeable sign of wetsumping or oil puking out the breathers even before any of this testing began.