Table of Contents
EVO: Primary Drive & Clutch
Primary Drive Design
The Primary Drive is responsible to transfer the crankshaft rotations (generated from the pistons, rods & flywheel) thru the Clutch to the Transmisison. The engine sprocket transfers engine power into the primary chain which turns the clutch assembly. The clutch assembly, when engaged, transfers engine power into the transmission on the mainshaft. (The transmission gears, along with final drive sprockets and chain or belt, transfers that engine power to the rear wheel.)
On the 1986-1990 models, the clutch assembly, at the transmission end of the primary chain, incorporates the rotor/stator assembly, while on the 1991-later models, the rotor/stator assembly was moved to be incorporated with the engine sprocket at the crankshaft end of the primary chain. This upgraded design allows the rotor to spin faster (at the same engine rpm) than it could previously when it was incorporated with the clutch at the transmission end of the primary chain.
The tension on the primary chain, rotating between the engine sprocket & the clutch sprocket, is controlled by an adjustable 'shoe'. This nylon shoe rides against the bottom length of the chain and reduces the slack as the upper length of the chain transfers engine power. Too little slack in the chain and it will bind in its rotation. Too much slack and the chain will slap as the engine decelerates and then accelerates.
Primary Cover Differences
The 1986-1990 cover uses a round, screw-in, primary chain inspection cover with a 'chevy symbol' indentation to unscrew it. It also used a relatively small, round, screw-in clutch adjustment cover, which also used the 'chevy symbol' tool.
On the 1991-1993 cover, the primary chain inspection cover is also round, but is mounted with two screws. Likewise, the small clutch adjustment cover is round and mounted by two screws.
On the 1994-2003 cover, the primary chain inspection cover is still round using two screws to mount it. But, the clutch adjustment cover is the large Derby Cover (4-bolt) that allowed the Ball&Ramp assembly to be removed without removing the cover. The 'bump' of the cover where the starter is mounted is flat-topped.
Note: The primary cover from '94-'03 can be retro fitted back to 1991-93 models, but the Ball&Ramp assembly must be changed to the '94-'03 version. As mentioned above, the '94-'03 models use the large derby cover which will also be needed. The internal clutch parts are the same back to 1991 and the clutch cables are compatible (but need to be checked for length). The primary cover gasket is the same for 1991-2003 models.1)
With the Rubbermount models, starting in 2004-later, the cover has a rectangular primary chain inspection cover, held in place by two screws. The clutch adjustment cover is the large Derby Cover, but it is mounted with 6 bolts. The 'bump' of the cover where the starter is mounted is rounded at the top. The polished covers on the 2004-2005 models have the same part number, 25430-04, but the 2006-later engines use part number 25430-06. IMPORTANT NOTE: The 2004-2006 covers may all have the same Internal Casting # 34951-04 which can be confusing, because the shifter shaft is different in 2006-later. See this Transmission section of the Sportsterpedia for details.
Over the years, the primary cover has been available in different finishes (polished Aluminum, rough Aluminum, Chrome, Black, etc.) with different part numbers for those variations.
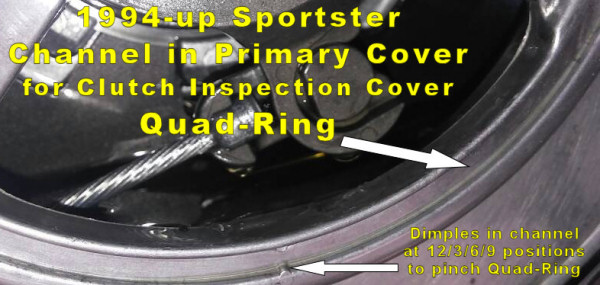
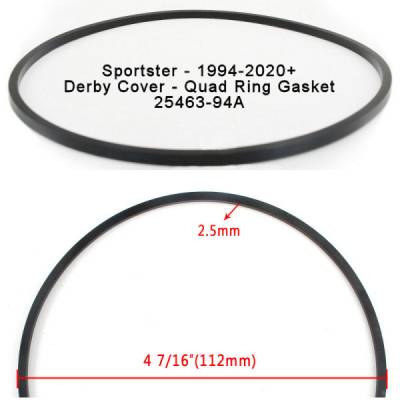
Quad-Ring - Clutch Inspection Cover
From 1994-later the Clutch Inspection Cover (AKA: Derby Cover) has had a sealing ring, often referred to as the Quad-Ring. It is circular, but its cross-section profile is not round like an o-ring, but rather four-sided flat. The quad-ring P/N is 25463-94A. See discussion at https://www.xlforum.net/forum/sportster-motorcycle-forum/sportster-motorcycle-drivetrain/sportster-motorcycle-transmission-clutch-primary-secondary-drive/183554-clutch-cover-gasket?t=1974683
Primary Chain - Tensioner
Part Numbers
| Primary Chain Adjuster - 1986-1990 - Parts Obsolete Primary Chain Adjuster - 1991-2003 - 39975-90A (upgrade in 2001+) Primary Chain Adjuster - 2004-later — uses 40039-02C |
| 1986-90 Primary Chain Tensioner Parts 39973-86 - Steel Carrier Plate 40018-86 - Pivot Stud 40019-86 - Spring for Tension 39966-80 - Pad against Chain 3250 ——- Threaded Stud - for Adjustment | 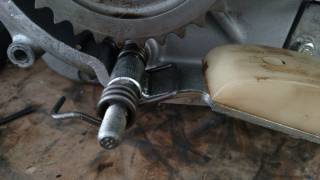 2) 2) |
| 91-later XLH Primary Chain Tensioner - Manually Adjustable 3) </sup> |
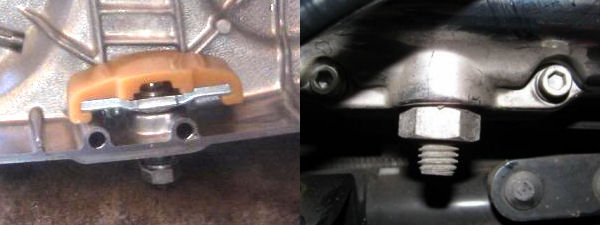 |
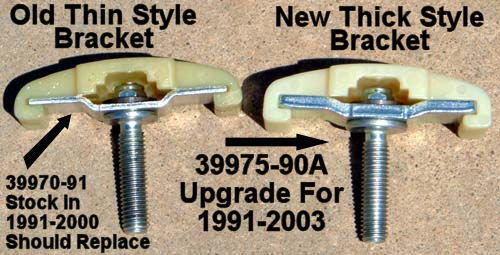 | 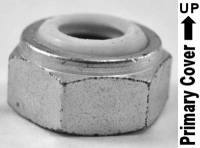 1991-later Sportsters Primary Chain Adjuster Nut P/N 7804 This nut has a special extended nylon face4) which seals against the Primary Cover TO PREVENT LEAKS Avoid Common Nylon-insert Nuts |
| Upgrade 39975-90A should be used in place of 1991-2000 stock Chain Tensioner. 2001-2003 models had the -90A part as factory OEM stock. 5) </sup> |
Primary Chain - Tension Adjustment
- Place the bike on a lift
- Remove the Primary Chain inspection cover
- Remove the spark plugs
- Put the bike in 5th gear
- Rotate the rear tire to cause the Primary Chain
to rotate past the inspection hole
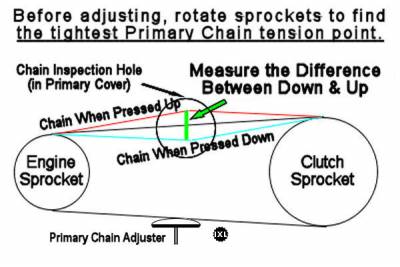
Rotate the chain fully around its length to find the spot that has the tightest tension. This is the point at which you must set the minimum play (or looseness). The initial primary chain vertical free play may be slightly tight from the factory since they use precision measurements.
On a cold engine (left overnight), the overall movement of the chain from pressed down to pressed up must be 3/8“ to 1/2”. On a hot engine, the recommendation is 1/4“ to 3/8”. By finding & using the tightest tension point and using the looser specification, you will avoid overtightening, which might otherwise occur. An overtightened primary chain will cause whining and excessive wear of the sprocket bearings ( SEE HERE ).
| Vertical Play in Upper Primary Chain | Although the 1986-1990 models have a rotational mount for the primary chain shoe and the 1991-later models use a fixed T-mount, the tension adjustment for all models accomplishes the same goal and is performed in the same way. |
||
|---|---|---|---|
| All Years | Cold Adj | Hot Adj | |
| 3/8“ to 1/2” | 1/4“ to 3/8” | ||
The adjustment of the chain tension is made using the Primary Chain Adjuster, mounted to the bottom of the Primary Cover. The adjuster mounting bolt extends through the Primary Cover to allow adjusting the tension without removing the cover. The adjuster bolt has a lock nut to keep the adjustment from changing. The adjuster has a nylon shoe atop it that rides against the loose side of the primary chain to take up excess slack. By loose side is meant the bottom path of the chain because the upper chain path is the one that transmits power to the clutch/transmission when accelerating. When decelerating in gear, the bottom side chain path is tight against the shoe because the engine is braking the bike motion thru the clutch/transmission.
To make the adjustment, hold the bolt steady and loosen the lock nut. Turn the bolt clockwise (viewed from below) to reduce (or tighten) the amount of chain free play or CCW to increase the free play. Once the adjustment is correct, hold the bolt steady & tighten the lock nut.
Sprocket & Chain Specs
| 1986-1990 | 1991-2003 | ||||
|---|---|---|---|---|---|
| 883 & 1100/1200 | 883 & 1200 | ||||
| Part Description | Spec | PartNo | - | Spec | PartNo |
| Primary Chain | 94 Links | 40005-57B | 94 Links | 40005-57B | |
| Crankshaft Sprocket | 34 Teeth | 40235-74 | 35 Teeth | 40235-89B | |
| Clutch Sprocket | 59 Teeth | 36791-84 | 56 Teeth | 36790-91 | |
| 2004-later 883 | 2004-later 1200 | ||||
|---|---|---|---|---|---|
| Part Description | Spec | PartNo | - | Spec | PartNo |
| Primary Chain | 94 Links | 40005-57B | 96 Links | 40147-04 | |
| Crankshaft Sprocket | 34 Teeth | 40241-02A | 38 Teeth | 40290-04A | |
| Clutch Sprocket | 57 Teeth | 36790-04 | 57 Teeth | 36790-04 | |
| Some Int'l 883 models use the 1200 model parts | |||||
Sprocket Torquing
When disassembling or re-installing the Engine Sprocket (Rotor), Primary Chain and Clutch Basket, use the following information:
| Nut Description | Nut Size | Tightening Torque | Where | Notes | |
|---|---|---|---|---|---|
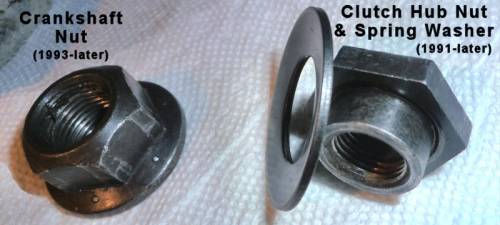
| Engine Sprocket Nut (Crankshaft) , right hand threads all years. | |||||
| 1991-1997 Models | 1-1/8“ Nut | 150-165ft-lbs | at Rotor Assy | *HD Tech Tip 211 – September 16, 2005 Flywheel Sprocket Shaft Nut Torque Update The flywheel (engine) sprocket shaft nut torque for 2004 & later Sportsters and 2003 & later Buell XB models has been changed. The torque has been increased from 190-210 to 240-260 ft lbs. Remember to clean the threads and generously apply LOCTITE Threadlocker 262 (red) onto the threads of the engine sprocket shaft. |
|
| 1998-2003 Models | 1-1/8” Nut | 190-210ft-lbs | at Rotor Assy | ||
| 2004+ Models | 1-1/8“ Nut | 240-260ft-lbs* | at Rotor Assy | ||
| 2017 Models | 1-1/8” Nut | 250ft-lbs 6) </sup> | at Rotor Assy | ||
| Transmission Main Shaft Nut (Clutch Hub) | |||||
| 1991-Later Models Left-hand Threads!! | 1-3/16“ Nut | 75ft-lbs | at Clutch Hub | Use only 2 or 3 drops of RED threadlocker on this nut |
|
| 2017 Models Left-hand Threads!! | 1-3/16” Nut | 50ft-lbs 7) </sup> | at Clutch Hub | Use only 2 or 3 drops of RED threadlocker on this nut |
|
If you can, use regular six-sided sockets which are less likely to slip and round off the edges of the nuts. Impact-type sockets may be too thick to fit. Metric equivalents that my work are 28mm and 30mm sockets.
When loosening or tightening these nuts, you will need to lock the hub & sprocket - Do not wedge the chain.
To remove the Transmission Main Shaft Nut (in the Clutch Hub), you need to remove the Clutch Release Assembly while the Clutch is still assembled. This keeps the Hub locked to the basket. The primary locking tool is used to keep the basket from rotating and therefore the nut can be removed from the hub while the clutch plates prevent the hub from rotating.
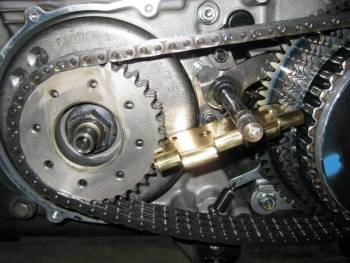
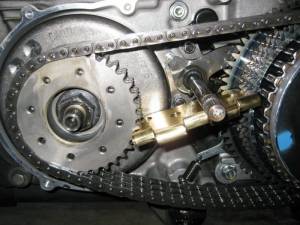
Buy a primary locking tool (bar) or use a closed 4“ BRASS hinge as a wedge between the sprockets. (Place the wedge so as not to put pressure on the shifter shaft)
There are also several 4 and 5 speed commercial & DIY primary locking tool examples in the tool section.
Removing the Primary Drive
91 and later models.
See also Replacing Stator Magnets in the tools section of the Sportsterpedia.
Note: Unless noted otherwise, the engine below is a 98 XL1200S that has been upgraded to 1250 with a Buell XB crankshaft and respective engine sprocket.
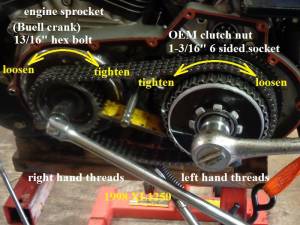
Loosen the nuts / bolts holding the engine sprocket and clutch basket on.
The engine sprocket has right hand threads and the clutch basket has left hand threads.
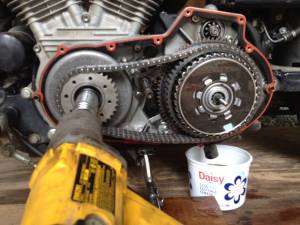
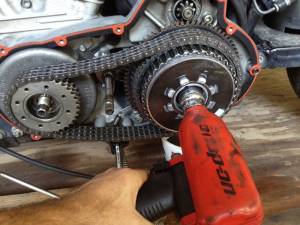
A reversible impact wrench has been used successfully to remove both the engine sprocket and the clutch basket nut.
However, it's been debatable whether you can accurately install them back to proper torque without using a torque wrench instead.
Whichever way you remove them, use regular six-sided sockets.
They are less likely to slip and round off the edges of the nuts. Impact-type sockets are likely too thick to fit.
Normally when loosening or tightening these nuts, you will need to lock the hub & sprocket - Do not wedge the chain.
You can buy a primary locking tool (bar) or use a closed 4” BRASS hinge as a wedge. Place the wedge so as not to put pressure on the shifter shaft
There are also several 4 and 5 speed primary locking tool examples in the tool section.
A closed 4“ BRASS hinge also works well to lock the sprockets and then you can use a pull bar and sockets / socket wrench.
The threads should have previously been assembled with red Loctite.
Using a propane torch (on the nut or bolt only) will heat up and melt / soften the Loctite somewhat to make removal easier.
Remove both fasteners holding them on before attempting to remove either.
Big socket wrenches or pullbars give you a lot more leverage to make removing the fasteners less strenuous.
Note:
The engine sprocket has right hand threads (lefty loosy-righty tighty)
The clutch basket has left hand threads (lefty tighty-righty loosy)
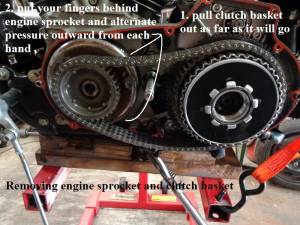
The engine sprocket and clutch hub should be removed as one unit.
Both have to come out together to some point since the chain will tighten and neither will budge at that point.
Once they are both moved out far enough, you may be able to get one or the other to come off without the other.
Once the sprocket and clutch basket is removed, you can gain access to the mounting screws for the stator.

