Table of Contents

REF: Service Procedures 45
Polishing Aluminum and Stainless Steel
See also An Introduction to Buffing and Polishing from the Caswell Inc. site.
Download their free PDF “The Buff Book”.
There's lots of good information there on polishing.
Caution:
Polishing metal with a rotary wheel is a nasty job. You don't want to do it inside the house or with good clothes on. 1)
An old shop apron helps keep some of the polishing compound off of you.
The polishing wheels pick up the compound and small specks of it will be flying everywhere with the wheels running at higher speeds.
Always wear eye protection when using power tools (respirator or at least a face shield). Gloves are also helpful especially if using a bench mounted buffering tool.
Stainless steel or aluminum can be polished to a finish that is almost like chrome.
Fabricate your own brackets, mounting tabs, sissy bars, pegs, and other small items on the bike,
Then polish them to a point you're happy with.
The stainless will last indefinitely while the chrome may chip or peel after some time if it is not a professional job.
If the stainless steel does get scratched up, just polish it again. 2)
The good thing about aluminum is the more you polish it, the more it shines.
And each time it's polished, it becomes a little more smooth. That means less places for oxidation to start.
If it's well polished the first time, you shouldn't have to re-do it again other than a quick spray and wipe from then on. 3)
Polished metal has a unique depth to it.
However, when polishing cast parts, watch out for subsurface air pockets (also known as porosity in the casting).
If you have any weather checking / pitting rough abrasives may uncover the subsurface porosity. 4)
There are hundreds of alloys of both aluminum and stainless, but all of them will oxidize at the surface.
The oxide layer is what protects the metal from further corrosion.
On previously polished parts, all you have to do is remove the oxide and get it smooth. 5)
If the part is just oxidized and gray (but smooth), you can use a buffer to put a final polish on it.
But if it is pitted or scratched, it must be smoothed out first. 6)
Buffing won't remove deep scratches or pits and will only make them stand out.
Polishing can take several hours but the payoff is some beautiful parts afterwards.
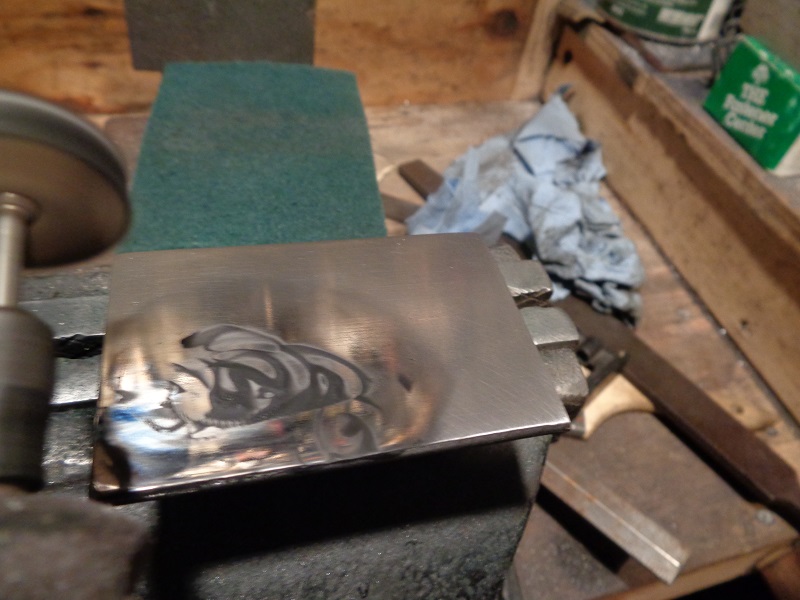
Smoothing out scratches and pits
If the piece has never been polished, then you should start with a course grade of abrasive and sand through the different stages progressing to a finer and finer grade as you go. 7)
Turn the piece and let each successive grade of abrasive cross the previous by 90°.
Mild spots can be wet sanded with Scotchbrite or 600 wet-dry sandpaper using dishwashing soap and water.
Sand for a while, then wipe it down and look closely.
If you can still see the pits or scratches through the dark or dull gray, then continue until they're gone. 8)
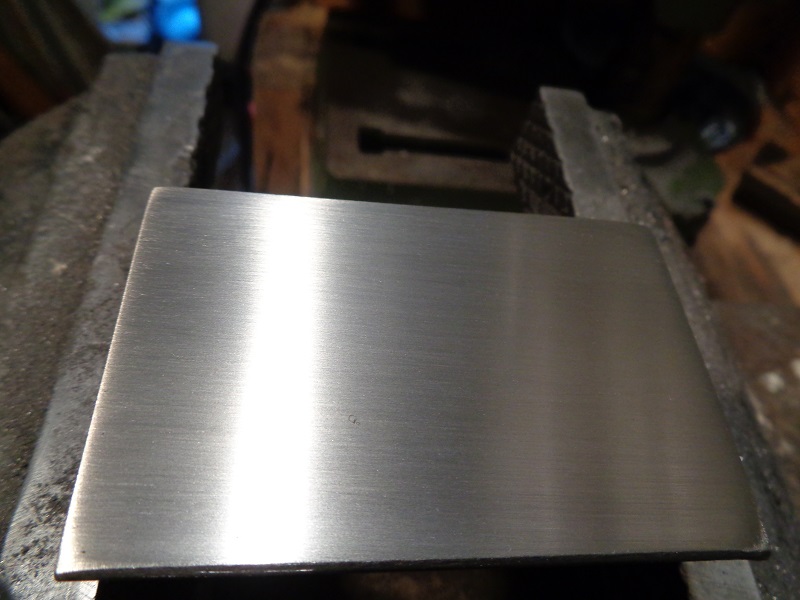
When you've got a uniform dull gray, you're ready to buff the part.
Don't worry too much about screw recesses and other hard to reach places, they don't show in the finished job if the edges are smooth. 9)
Sand blasting or bead blasting will work on carbon or stainless steel to remove rust and first layers.
However, blasting aluminum will make lots of pits and change the appearance of the casting.
It will also take longer to get all the media out of the crevices and any tiny place in a part. 10)
Buffing / polishing wheels
See more on Wheels and Pads in the Sportsterpedia.
Cloth and felt wheels are used a lot.
Sisal is aggressive.
Felt doesn't conform to the odd shapes of some motorcycle parts.
Use hard wheels for emery and soft wheels for rouge.
You can differentiate between hard and soft wheels by looking at the rings of stitching.
Fewer rings are softer (polishing).
More rings means harder (cutting). 11)
Polishing compounds
See more on Polishing Compounds in the Tools section of the Sportsterpedia.
The final polish is achieved by buffing it with a rotating wheel which has been loaded with a buffing compound.
These compounds are very fine abrasives, usually combined with wax in a bar form.
Coarse to fine: 12)
- Emery - aggressive, usually used on steel.
- Tripoli - usually used on brass.
- White compound - usually for fine polishing.
- Jeweler's Rouge - the finest, for a mirror finish.
Emery is good for a first cut on stainless or aluminum (to get what sanding didn't) followed by rouge.
You may be able to go directly from wet sanding to rouge. 13)
When it comes to applying polishing compound, the rule is 'little and often'. 14)
Too much compound will reduce the effectiveness of the cutting action.
And the surface will become too greasy (often seen as a black slick of compound appearing on the surface).
Apply compound to the wheel for 1/2 to 1 second. Any more is just a waste of compound.
 |
| Too much compound 15) |
Use one wheel for one type compound only: 16)
Applying different compounds to the same wheel will end up with a mixture of abrasive surfaces and metal deposits left over from previous polishing.
These microscopic particles will only scratch the surface and destroy any benefit gained by the next finer compound.
To remove excess compound from the work, apply a small amount of talc to the surface and the wheel and rebuff.
Polishing Technique
There are two basic buffing motions: 17)
- A cutting motion gives you a smooth, semi bright and uniform surface.
- The part should be moved against the direction of the wheel using medium to hard pressure.
- A polishing or coloring motion gives you a bright, shiny and clean looking surface.
- The part should be moved toward the direction of the wheel using medium to light pressure.
The pattern used has a lot to do with the finish also.
- Thinking along the way of sanding, you use round circles to cover a wide range of angles simultaneously.
- The circle pattern defeats the motions mentioned above.
- Within a circle, you are cutting on one side and coloring on the other side of the wheel.
- This doesn't produce a uniform finish and mostly ends with marks left in the finish from uneven technique.
Swirls
- Circular swirls cannot be generated if you use straight line movement (as in sanding wood along the grain) instead of circles or ovals. 18)
- Wheel or pad choice, technique, amount and type of compound, choice of machines and speeds, working material and etc. will all play a part in the finish (including swirls).
- Try running the wheel / pad at slower speeds if it is still leaving swirls.
- Keep the pressure real light.
- Let the compound do the work. Move slowly back and forth over the work piece.
Eliminating swirls:
If you get swirls in the surface in the final buffing stages; 19)
- Try wetting the part with a damp cloth, then dusting with a powder (Whiting, Talcum Powder or Corn Starch).
- Then buff the part until the swirls disappear.
Buffing to the final finish
Keep the wheel moving, periodically wipe off the wax smudge and look at the progress.
Spending too much time in one spot can discolor the area.
Different alloys require different compounds, speeds, and pressure.
It's OK to experiment. You won't hurt anything. 20)
Knowing when your done
When are you done?
That's entirely up to what finish you are wanting to achieve.
Any answer can be the right one.
You can dull it down with coarse abrasives for a satin finish. Or shine it up with finer ones for a 'like chrome' or mirror finish.
 21)
21)
It all depends on what look you are going for in deciding how you want to polish it. 22)
If you want to go to a mirror finish you need to take your time with it.
Take it to an ultra fine finish then get a cotton/ flannel wheel on a grinder and use metal rouge on a buff to a mirror finish.
It takes time and practice to get the correct results but you can finish any metal (even carbon steel) to look like chrome.
Applying the final sheen
You can wax the parts when you got them polished like you want them to keep them shiny longer. 23)
You can also follow up with some NevrDull, Mother's, 3M or most any liquid type polish for a quality shine. 24)
Keeping the Shine
You can clear coat parts to keep the luster for awhile. But the paint will eventually peel and have to be refinished.
Both stainless and aluminum will oxidize over time even after polishing.
Parts can be clear coating, as the factory did, but the finish won't last forever.
Instead of painting after polishing, you can simply polish it again every so often with a cotton cloth and a good polish. 25).
Examples of Polished Parts from the XLFORUM
See also Trying to Get a Mirror Finish on Stainless Steel in the Sportsterpedia.
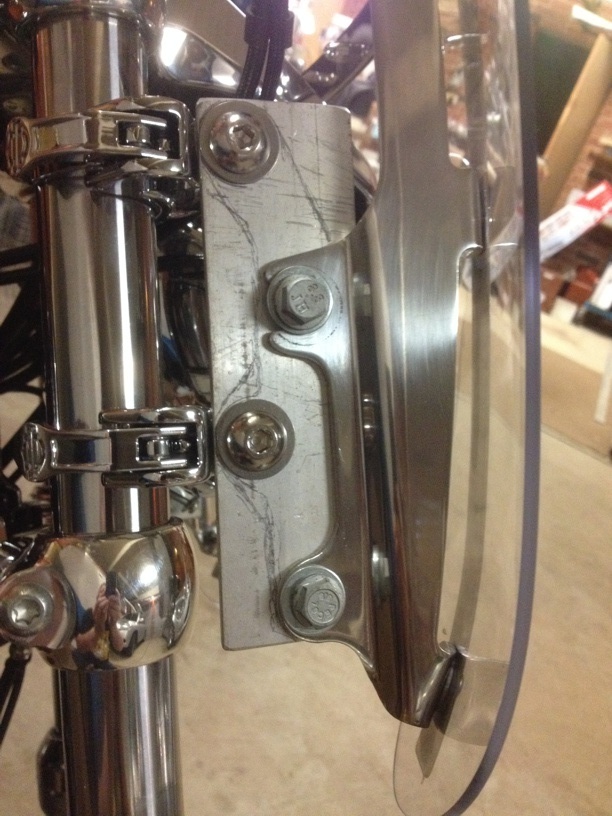
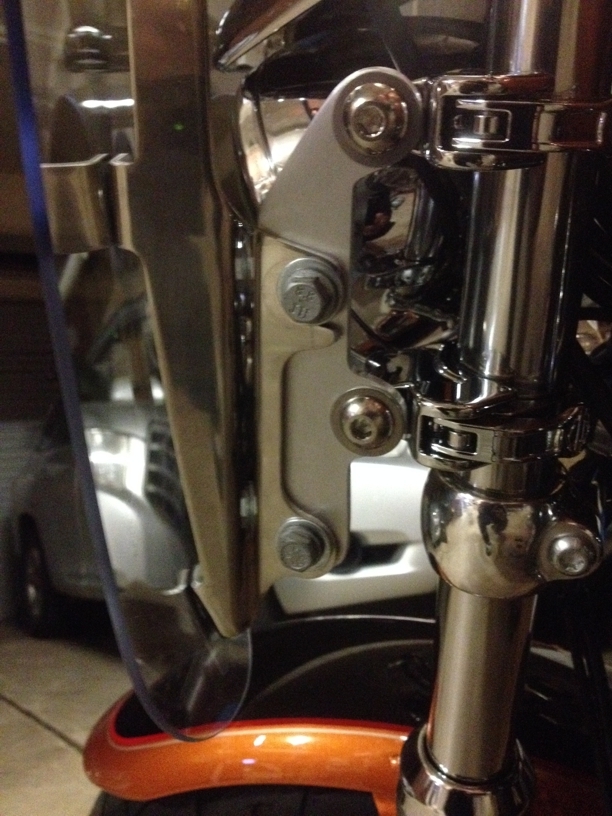
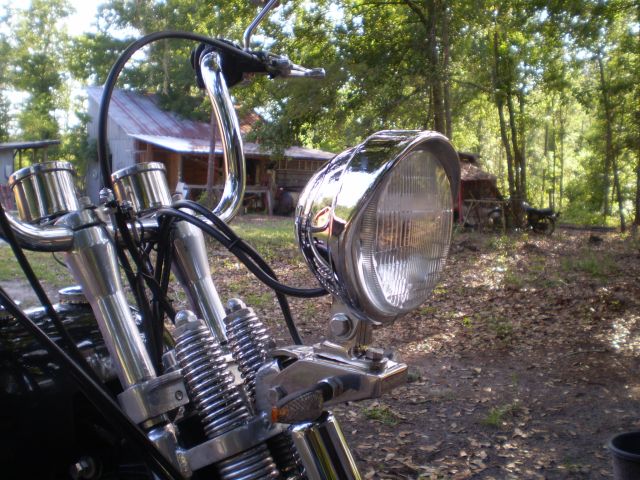
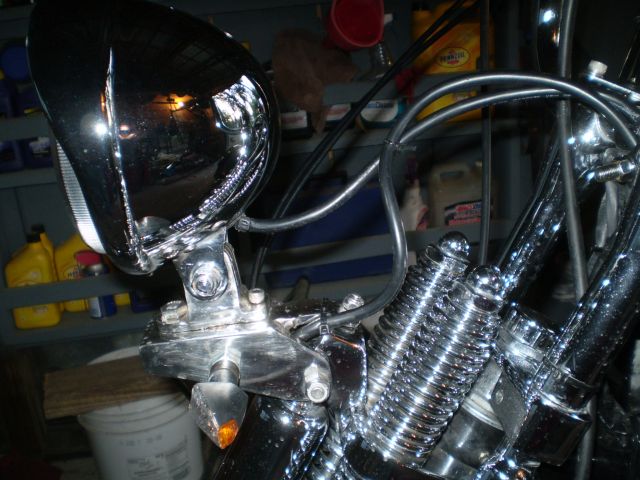
Headlights
The headlight mounting block and the brackets to bolt the headlight to the springer are fabbed from stainless steel.
They were polished with a Dremil tool and hard compound specifically for stainless steel.
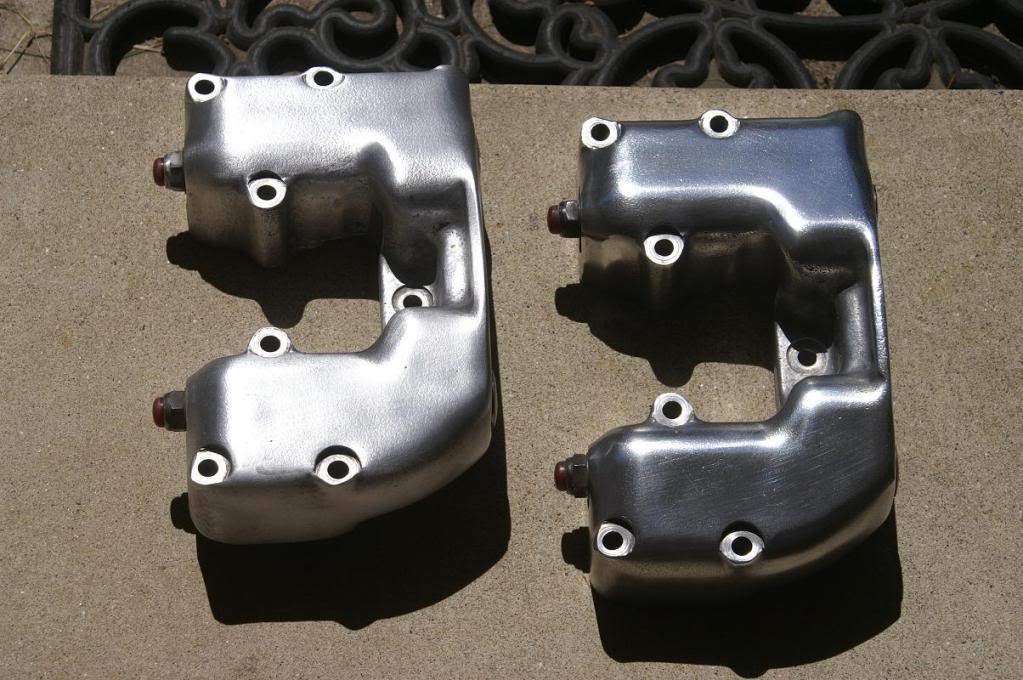
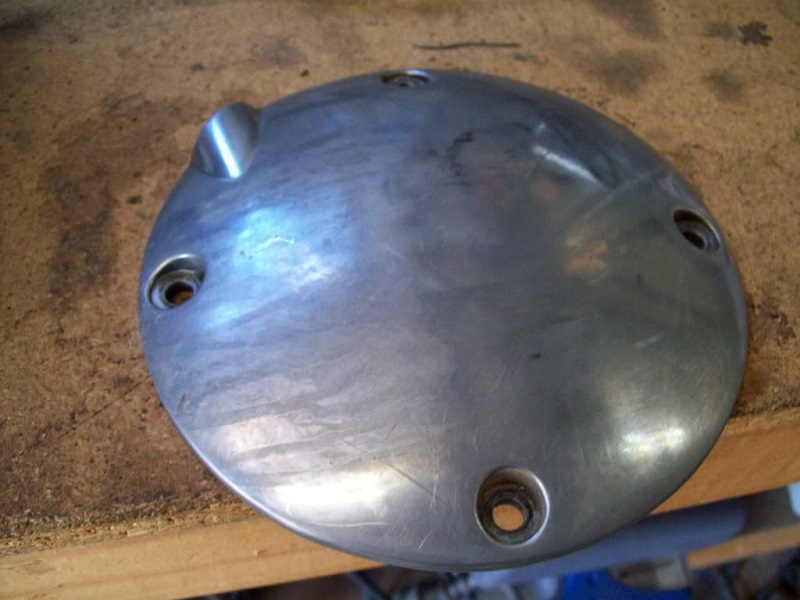
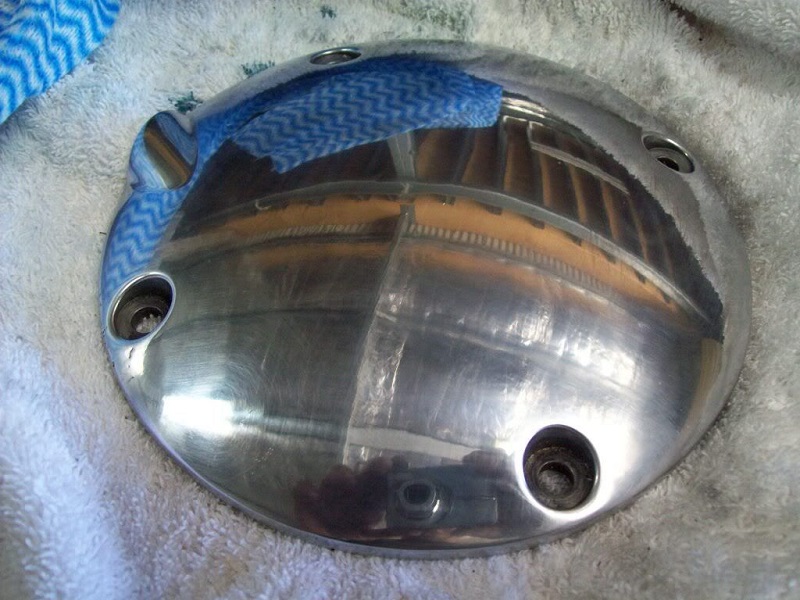
Rocker Boxes
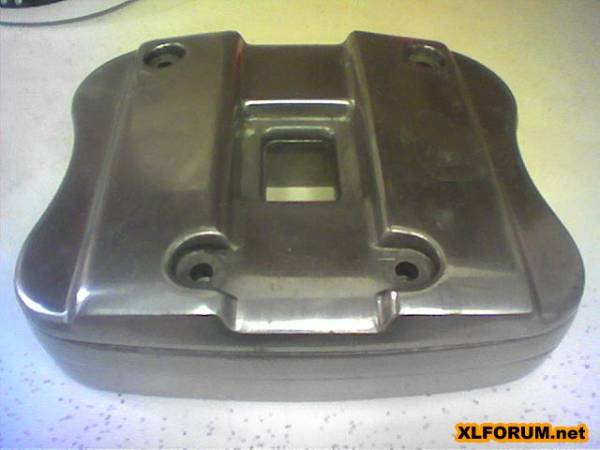 | 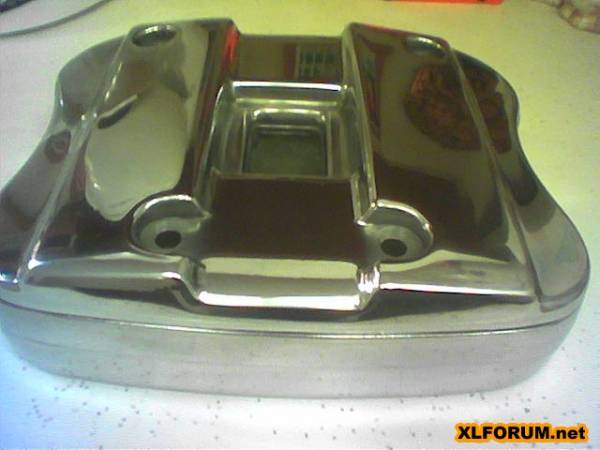 |  |
| Before - Removing oxidation - After 28) | After much scotch wheel, dry & wet sanding, Scotchbrite and steel wool 29) |
|
 |
| Ultra fine Scotchbrite on one side, followed by aluminum polish on the other: 30) |
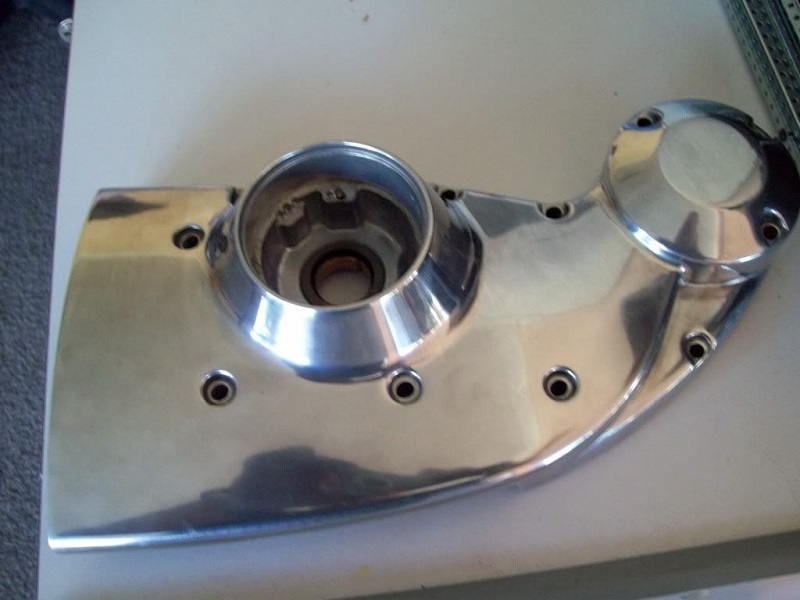
Primary Covers
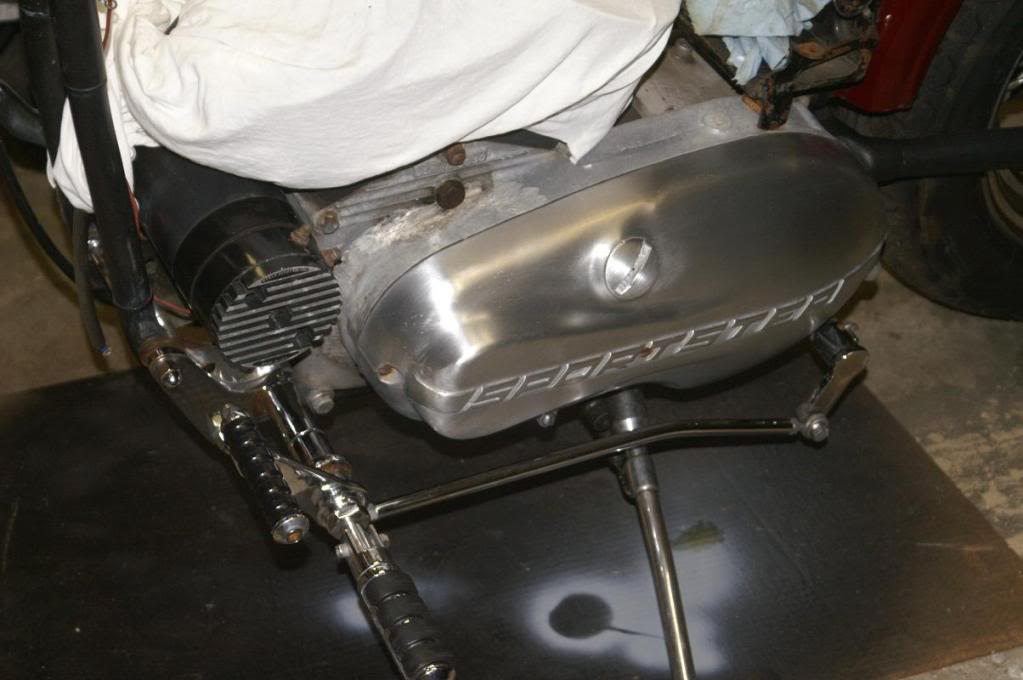 |  |
| Primary cover polished w/ Scotchbrite and dishwater, then with aluminum polish 31) |
|
This is an aluminum Evo derby cover, not chrome, but shined up nice.
 32)
32)  33)
33)
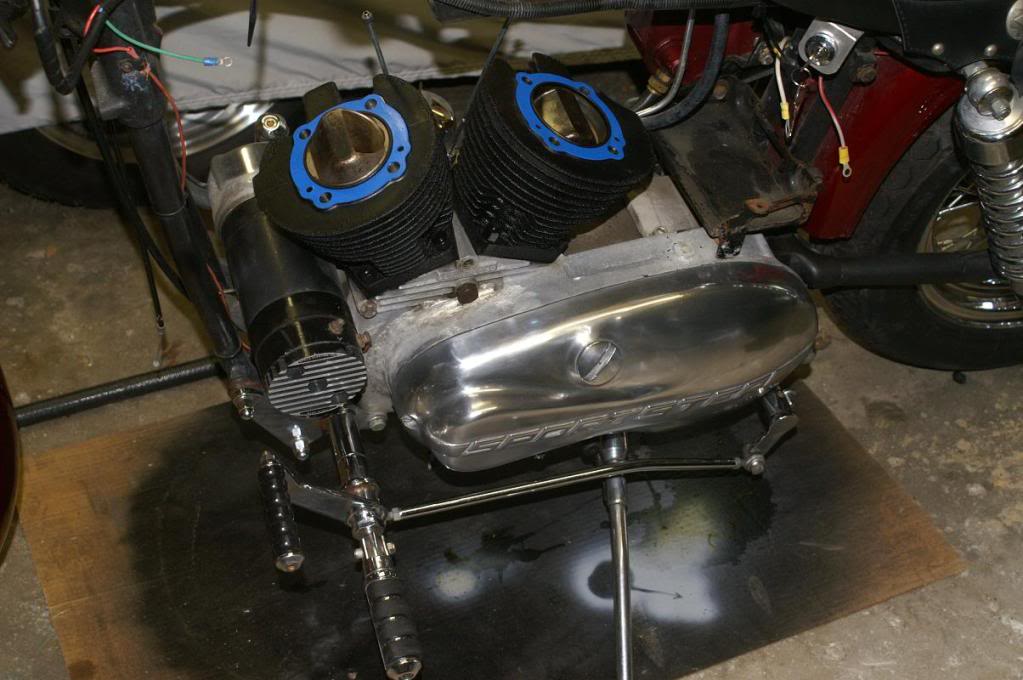
Cam / Gearcase Covers
This is also aluminum, not chrome but shines up nicely.
 34)
34)
Foot Controls
Shifter Linkage
This is not really a knife and never has been. It was made from some scrap 316 stainless steel angle iron.
It goes to the cross over shifter shaft. Shift peg is on the right side.
The stainless was sanded down smooth to about 400 grit and then polished with Dremel tool and metal polishing compound.
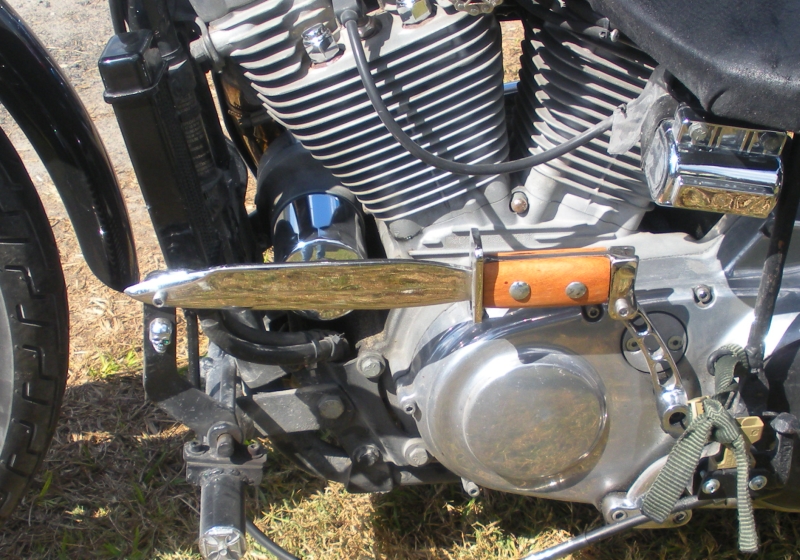 |
| Shifter linkage shaped like a knife 35) |
Forks
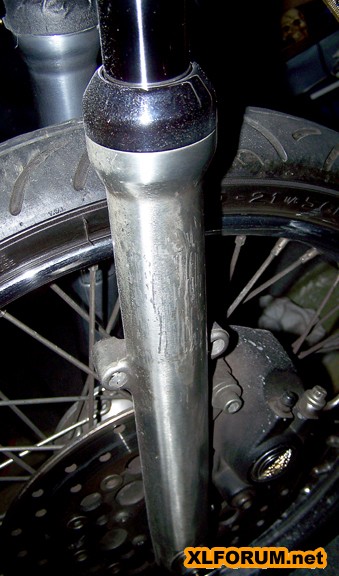 | 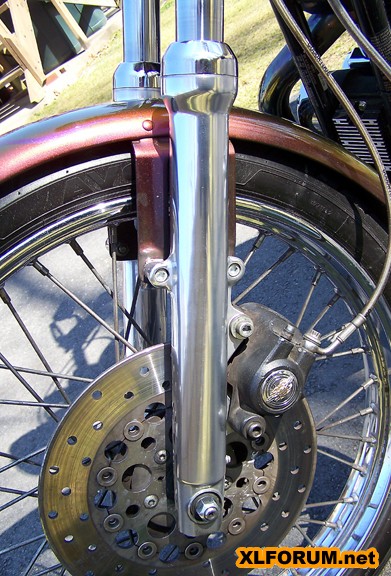 | 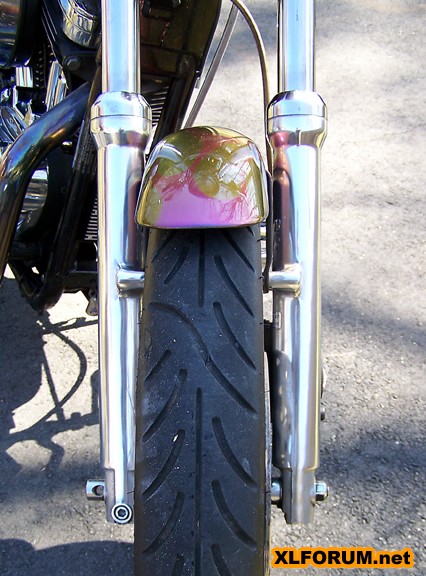 |
| Removing glue gum 36) | ||
Wheels
The axle spacer tubes for the Rocker wheel are made from stainless steel heavy wall tubing and polished to look like chrome.
| Polished stainless steel axle spacers 37) |