Table of Contents

REF: Engine Mechanicals - Sub-01D
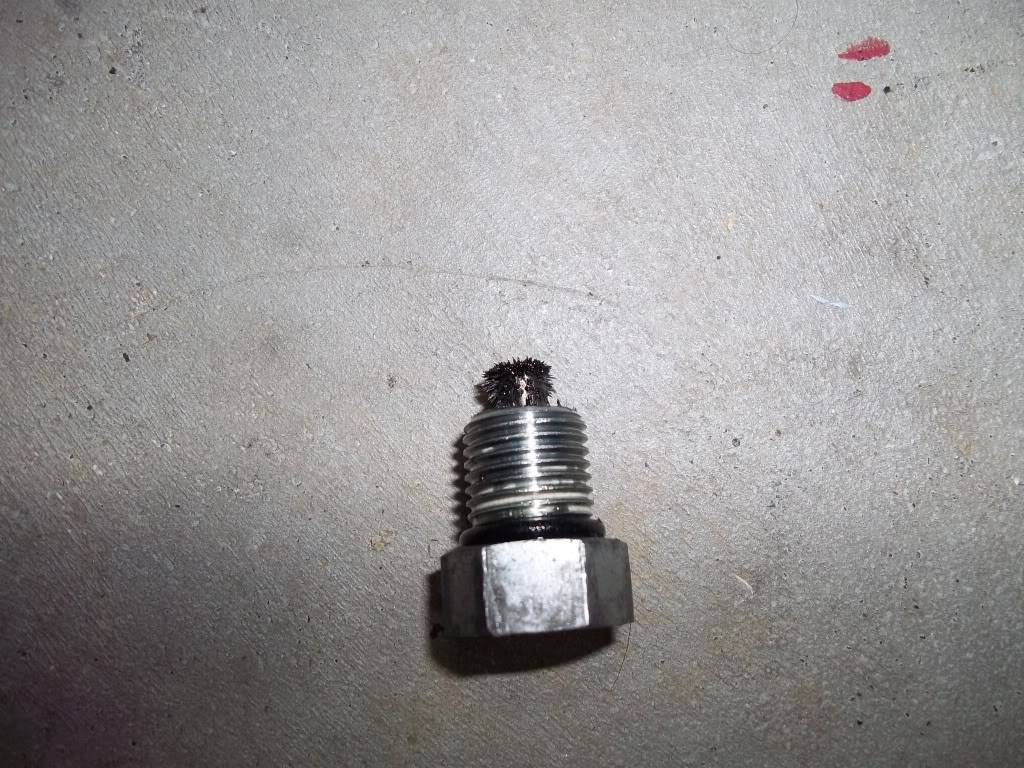
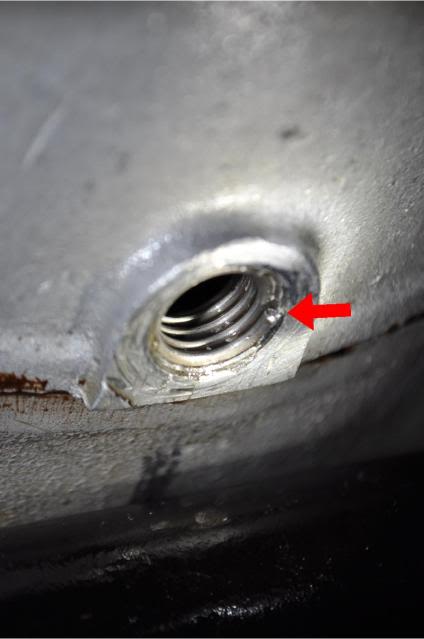
Leaking Oil From the Drain / Timing Plug
Timing Inspection Plug and Drain Plugs
- From the parts catalogs:
- Neither the 1957 nor 1959 parts catalog lists the timing hole inspection plug (704) as a replacement part even though it was factory installed on these engines.
This was added for parts order in 1961 by the parts catalog supplement 99451-61 with the illustration appearing in the 1963 full catalog.
1) 2) 3) 4) 5) 6) 7) 8) 9) 10) 11) 12)
| Year Model | Primary | Transmission | Crankcase | Timing Inspection | Oil Tank |
| 52-56 K Models 57-66 XL/XLH | - | 707 Plug 62702-52 Washer | 707 Plug | 704 Plug | 707 Plug 62702-52 Washer |
| 67-71 XLH | - | 60348-65 Plug | 704 Plug | 707 Plug 62702-52 Washer |
|
| 58-61 XLC/XLCH 66-67 XLCH | - | 707 Plug | 704 Plug | 704 Plug 6700 Washer (1967) 6700B Washer |
|
| 62-65 XLCH | - | 707 Plug | 704 Plug | 45830-48 Plug | |
| 67-71 XLCH | 707 Plug |
 |
| 04 Primary Drain Plug 13) |
Diagnosing where the leak is coming from
- Clean the area thoroughly. You want all the oil off the exterior surfaces. 14)
- Get some white face powder and a powder puff kit like grandma had on her dressing table (white finger print powder and brush works great too). 15)
- With exterior dry hit the inside with pb blaster, wd40, liquid wrench or kerosesne. Make sure you wet the suspected areas in the inside of case. 16)
- Now get the powder on the outside and you will see where the seep is coming from. 17)
- If the plug is leaking, is not loose / will tighten up, you may have some warped threads that aren't allowing the flat surface on the back of the plug head to seal against the flat machined outer surface of the case. Over tightening from here will damage the threads even more. 18)
- Try pulling the plug, clean the threads and use some anti-seize on them. The anti-seize should seal up the threads as long as the crank case isn't building pressure and causing it to push some seepage out. 19) Teflon tape can also be used on the threads to prevent leakage.
Drain Plug Sealing and Temporary Fixes
A tight mechanical seal on any of these plugs is what was intended originally from the MoCo as evident of how the plug was constructed.
However, when one of them leaks, it's not always cost efficient or convenient to have the threads repaired especially if your on the road with a bad leaking or blown out plug.
It may be just a drain plug, but results of a failed seal can be catastrophic. 20)
- Below is a collection of ideas for sealing up the plug until a solid mechanical seal can done.
If the health of the threads on the plug or in the case are questionable, only tighten the plug to just snug, plus a little.
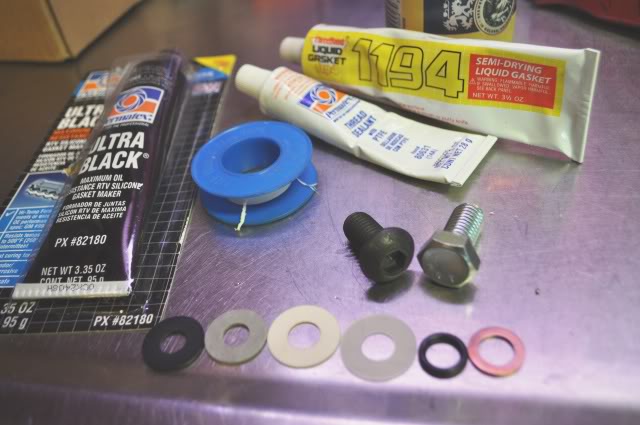
Try a thread wrap just under the head of the plug
Use only enough to get a seal. Using too much could crack the case from the extra pre-load plus normal torque.
Try a thread sealant
Clean the plug and the hole of all oil and debris to get a good sealant hold.
- If the threads are not stripped (as in a bad sealing surface causing the leak), Loctite (blue) can be used as a sealant between the threads.
However, if the threads are stripped or are in bad shape, they may break off upon the next removal of the plug. - Loctite PST 25) thread sealant sticks cure rapidly to provide immediate low-pressure sealing. 26)
The controlled lubricity prevents galling, protects threaded areas from rust and corrosion, and provides easy disassembly.
Recommended for sealing metal tapered pipe threads and fittings in automotive applications. - Cover the plug with silicone, put the plug in the hole, turn it to get a wedged fit and let it dry.
- Cover the plug with JB weld and let it set for about 2 days. 27) (you might want to use something else if you plan to remove the plug later).
- Cover the plug with RTV (black for oil). 28)
Add a washer or O-ring to the plug to bridge the gap between poor sealing surfaces
Washers:
The I.D of the hole needs to correctly match the O.D. of the plug to keep the washer sealing surface on center with the hole.
The ID of this washer is too big and will not seal properly.
 29)
29)
When using a soft washer like neoprene, rubber, fiber or nylon (plastic), first add a steel washer (if you have room) to spread the load on the soft one to keep it from distorting and possibly leaking.
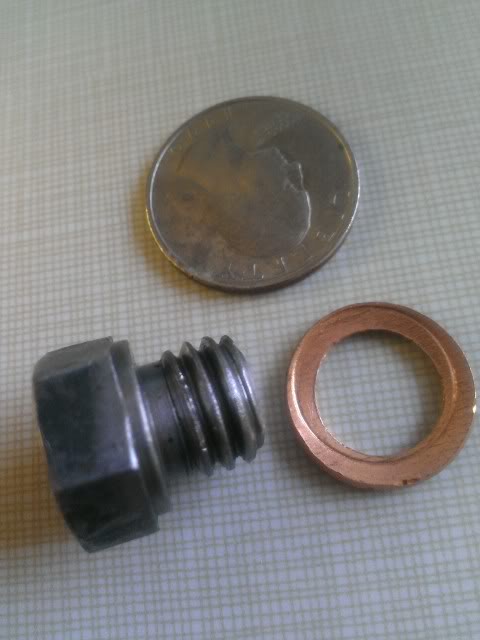
- A metal sealing washer (crush washer) made from copper or aluminum will compress when tightened to form a tighter, more durable seal than rubber washers (one time use). 30)
- Copper washers work well for sealing and the thin ones work much better than the thick ones. They meld in there better. 31)
- They are used on banjo-bolts, brake systems, oil pipes etc. where heat, force, pressure and strong chemical fluids are present. 32)
- A copper washer can be tightened too hard and it will leak. After distortion from over-torque, it can get to the consistency of plastic and brake into small pieces. 33)
- If used with proper torque, a copper washer can be reused many times. It is possible to flip it around and it will seal again. 34)
- If a copper washer gets hard, you can heat it to a glow (with a propane torch for ten seconds) and let it cool down on it's own to the point you can handle it. Then it will be softer and re-usable. 35)
- A metal-bonded neoprene sealing washer is a one-piece metal washer with bonded rubber on the sealing surface. These washers are reusable. 36)
- A high pressure metal-bonded sealing washer has a rubber or plastic insert surrounded by a metal washer (one time use). 37)
- The 316 stainless steel washers resist chemicals and salt water and may be mildly magnetic. They are bonded to a PVC insert. Pressure rated to 3,000 psi.
- The zinc-plated steel (O-ring washers) are corrosion resistant in wet environments and are bonded to a Buna-N rubber seal. Pressure rated to 3,000 psi.
- The Dowty Bonded Seal (Dowty Washer) 38) is a synthetic rubber sealing member that is bonded with heat and pressure to a zinc plated steel washer.
The flexing action of the lip under pressure provides a positive and leak-proof seal. Depending upon size, pressures up to 20,000 p.s.i. (1380 bar).
The face to face sealing eliminates groove cutting or special machining and reduced bolting torque.
When bonded seals are used to seal tapped holes, the thread relief should never be greater than 0.01 in. (0.25 mm) above the nominal O.D. of the screw thread. 39)
O-rings:
Use O-rings that are oil resistant for longevity of the seal. They should mesh into the sealing surface to stop a leak.
However, be careful upon installation. Lubricate the O-ring before installation or the sealing surface could rip it. 42) Also, not to over-torque the plug. This could result of distorting the rubber causing a leak or possibly squirting the O-ring out the sides of the plug.
There is a difference in the seating surface for a O-ring and a washer. The O-ring seating area is normally more precise to keep from squeezing or ripping the O-ring. 43)
 44) The lip of a Helicoil can catch and rip an O-ring that has been over-torqued into it.
- Ideally, there should be groove in both facing surfaces to assure a good seal and to prevent squeezing of the O-ring.
- Measure the length of threads left on the plug if you use an O-ring and a copper washer.
It's possible the plug would be too short to catch enough threads to tighten without stripping them. 45)
A copper washer vs an O-ring:
- A copper washer is made to seal with a larger force than an O-ring can handle. 46)
- An example is the Evo primary oil drain plug fitted with a O-ring. 47)
- If we just consider that a copper ring is better and change from O-ring to copper then we generate a problem because the copper ring needs a
harder momentum to seal and we are walking on a thin line between a good seal and shreded threads from over-torque into the cast aluminum case. - The plug screws in to soft aluminum and it takes very little force to tighten the O-ring and get a good seal.
It's all about using the right momentum.
Source a temporary or alternate plug
- A cork in the hole has been used with various results. Be sure to have an extra or two on hand in the case that the first one blows out.
- A self expanding rubber plug like the ones used for freeze plugs. They are removable and they expand by tightening the wingnut or bolt in the middle. 48).
- A bolt. Cut a (same thread size) bolt down to the length of the (measured) hole. Making it a bit longer than the original plug, should allow you to catch the last bit of original threads where the shorter plug wouldn't. Measure up in the hole and don't make it too long to protrude inside the engine and catch on moving parts. 49)
- A piece of oil or gas line hose that has an O.D. that will fit snug into the case hole. Find a bolt that has threads that are slightly larger than the inside of the hose. Screw the bolt into the hose and the threads of the bolt will expand the hose out against the case threads to seal the leak. 50)
- A word of caution when using automotive style self-tapping oversized plugs when dealing with the crankcase drain. It may be okay for the transmission or primary compartment, but the crankcase drains on Ironheads are little different. 51)
- The drain hole is very close to the edge of the case seam and more often than not the tapered self-tapping style will crack the case from the hole to the center seam of the cases.
- Once that cracks you will have a leak that you can't stop short of a complete teardown.
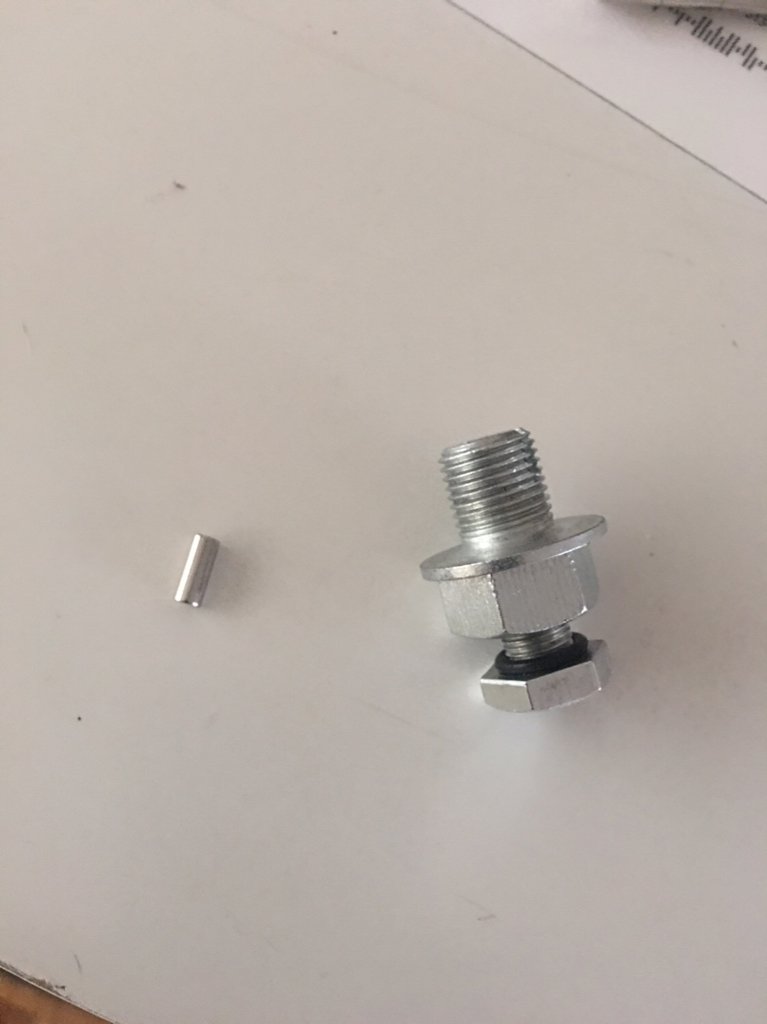
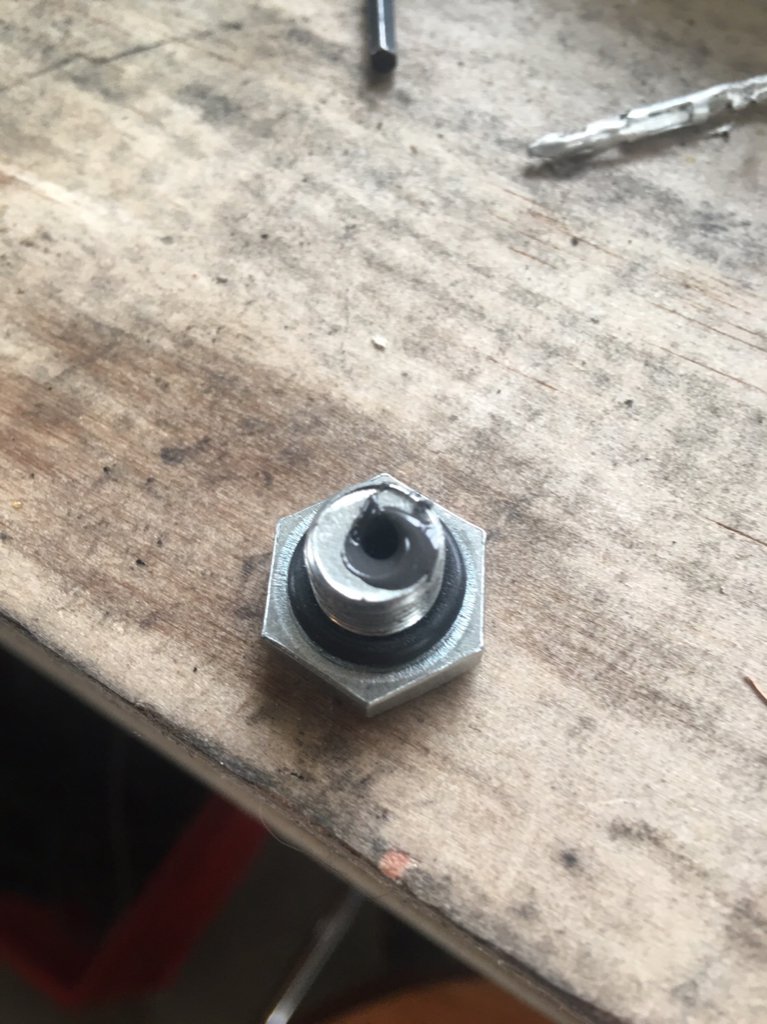
- Self-Tapping Oversized Repair Plug (piggyback style): This has two plugs in one. The outer plug is tapered to cut new oversized threads in the case and the center plug is easily removed to change oil. 52) These do not come with a magnet on the end to catch metal particles in the oil. You can also make your own Piggyback Drain Plug with a magnet with the mod below.
 |
| Self-Tapping Oversized Repair Plug (piggyback style) 53) |
Piggyback Drain Plug Mod for Stripped 1/2"x20 plug holes
This is to replace OEM (1/2“-20) drain plugs with a magnet on the end to catch any metal particles floating around in the oil.
Since most piggyback plugs do not have the magnet, you can install one on the plug and tap the hole for the next bigger size threads.
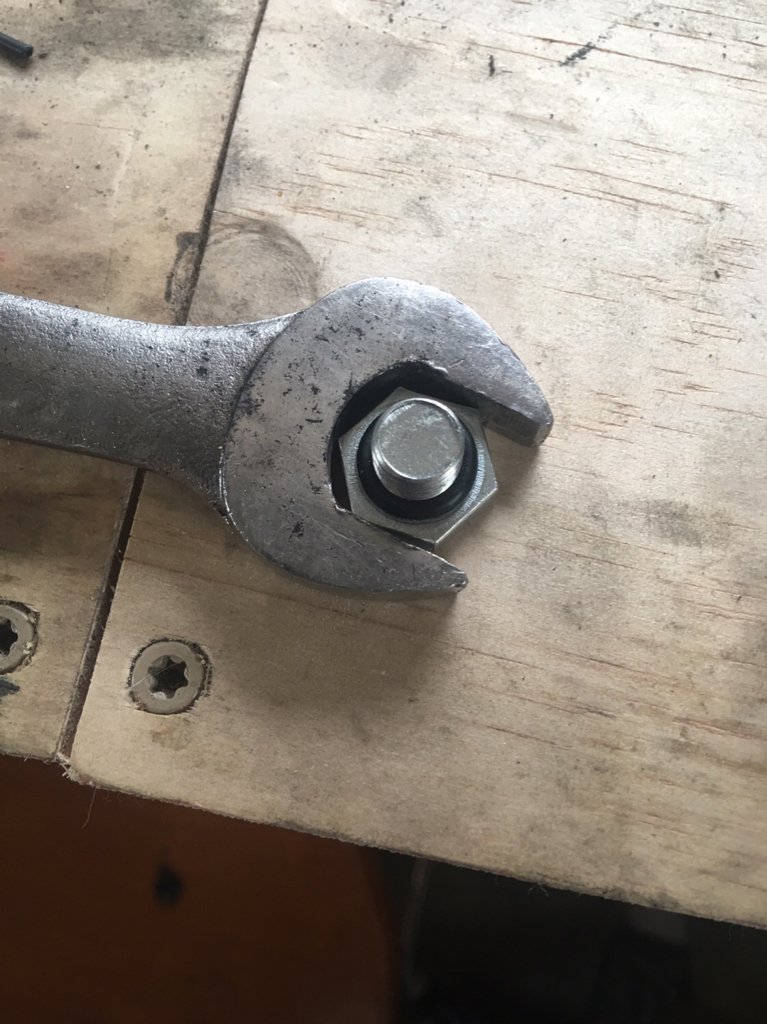
From then on, you just hold the nut from moving at the case end with a wrench and remove the inner bolt to drain the primary fluid which cuts the wear and tear on the case threads.
- A piggyback drain plug can be purchased at many auto parts stores and online.
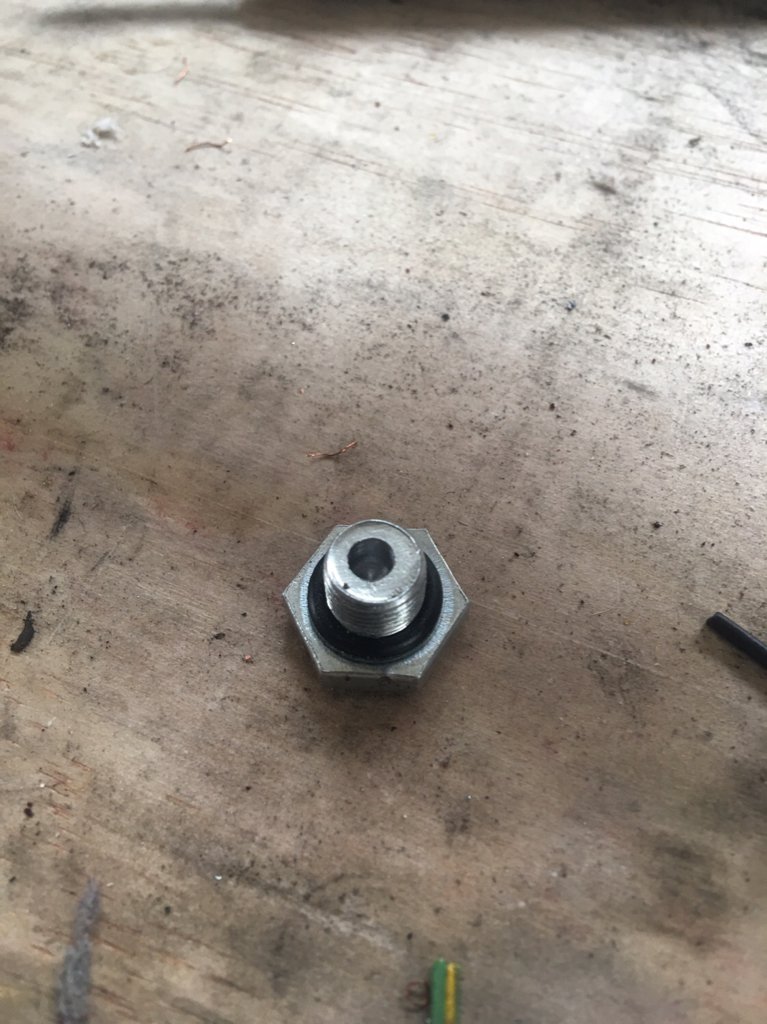
- It is basically a plug within a plug with a washer or rubber O-ring between them.
- Parts for this mod include:
- Dorman Oil Drain Plug - Piggyback 1/2"-20 S.O. (Single Oversize, which is next size up or 9/16”x18 threads)
- 9/16“x18 tap
- Drill bit sized (33/64” or .5156“) for a 9/16”x18 tap
- Even though the original threads are stripped out, you will probably need to drill the hole the correct size for the tap to make sure your not stretching the aluminum while cutting the new threads which equals no leak.
- 1/2“ copper washer to replace the O-ring
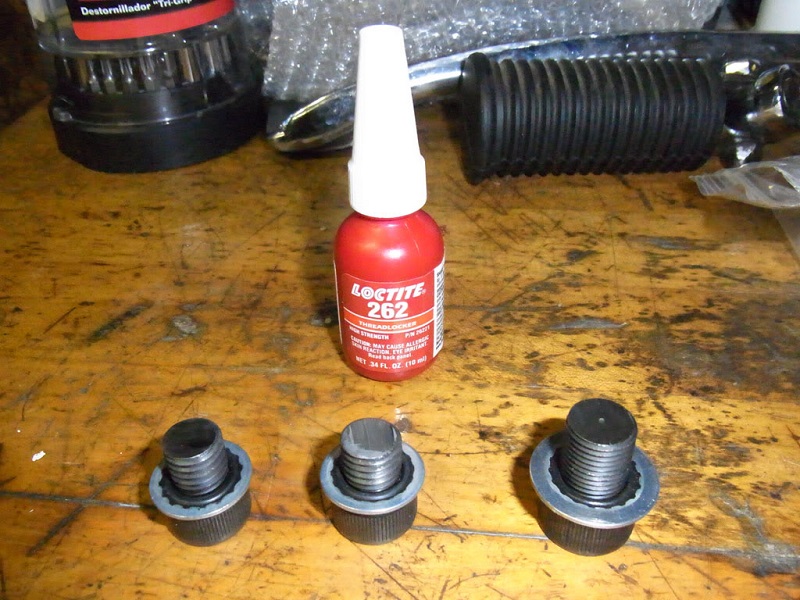
- JB Weld to glue the magnet into the plug.
- Loctite (blue) is all that is needed to lock the outer plug into the case threads but (red) is fine also.
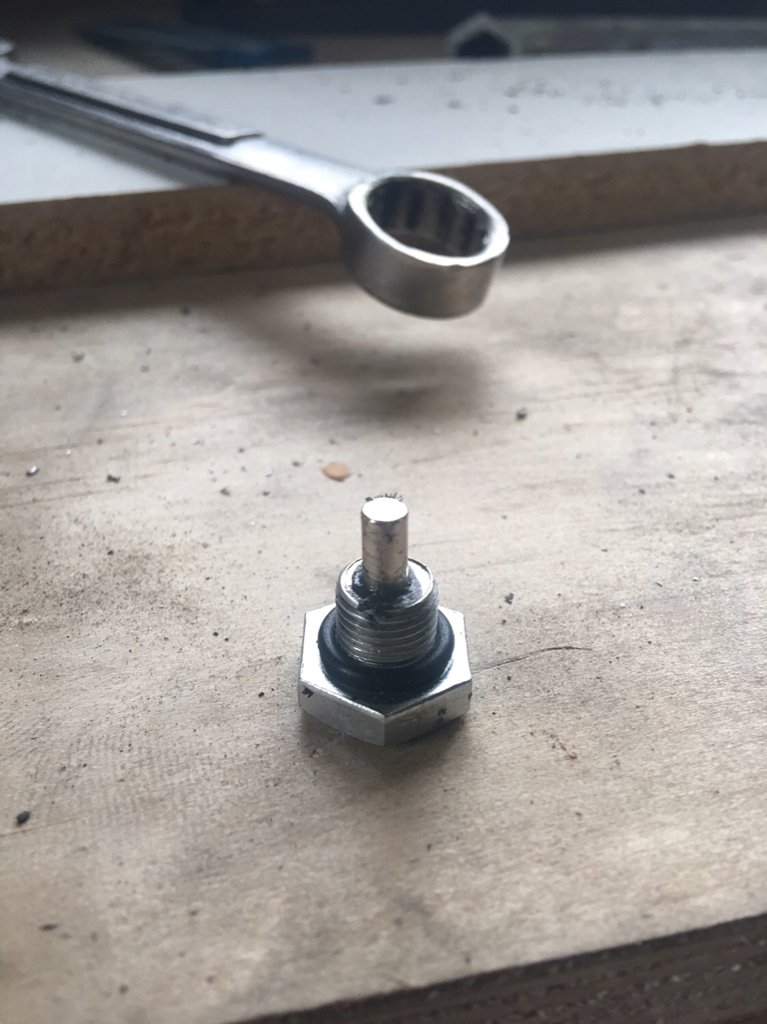
- 1 cylinder magnet which may be marketed to hold maps, whiteboards and refrigerator items from different vendors.
- The dia. of the magnet can be up 3/8” x 1“ long depending on what you can source (and how straight you can drill the hole in the plug).
It may be best to keep it around 5/16” in dia.
- Whether you hold the plug with a wrench (as in below) or in a vise to drill it, use a center punch to mark the hole first to establish a decent center point for the magnet.
- Drill the hole size for a slip fit for extra strength using dia. of the magnet you will be using (although this isn't a critical dimension).
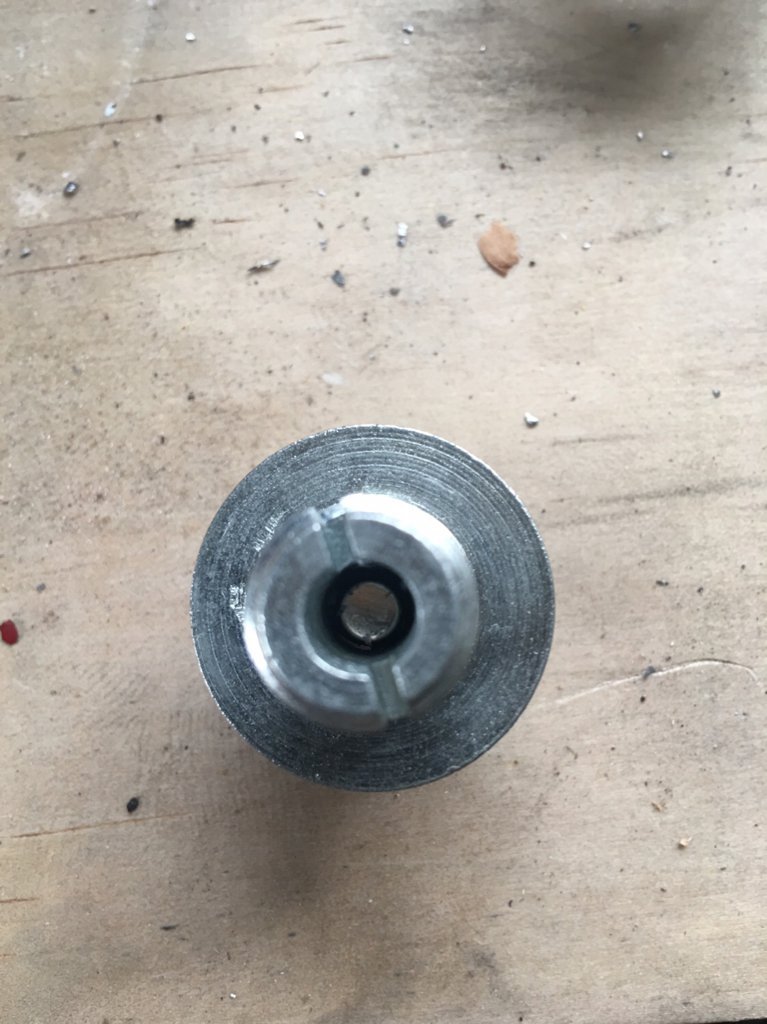
- Apply epoxy in the hole, insert the magnet and let it dry.
- This can also be done in a vise or simply pushed in depending on the clearance you made while drilling the hole.

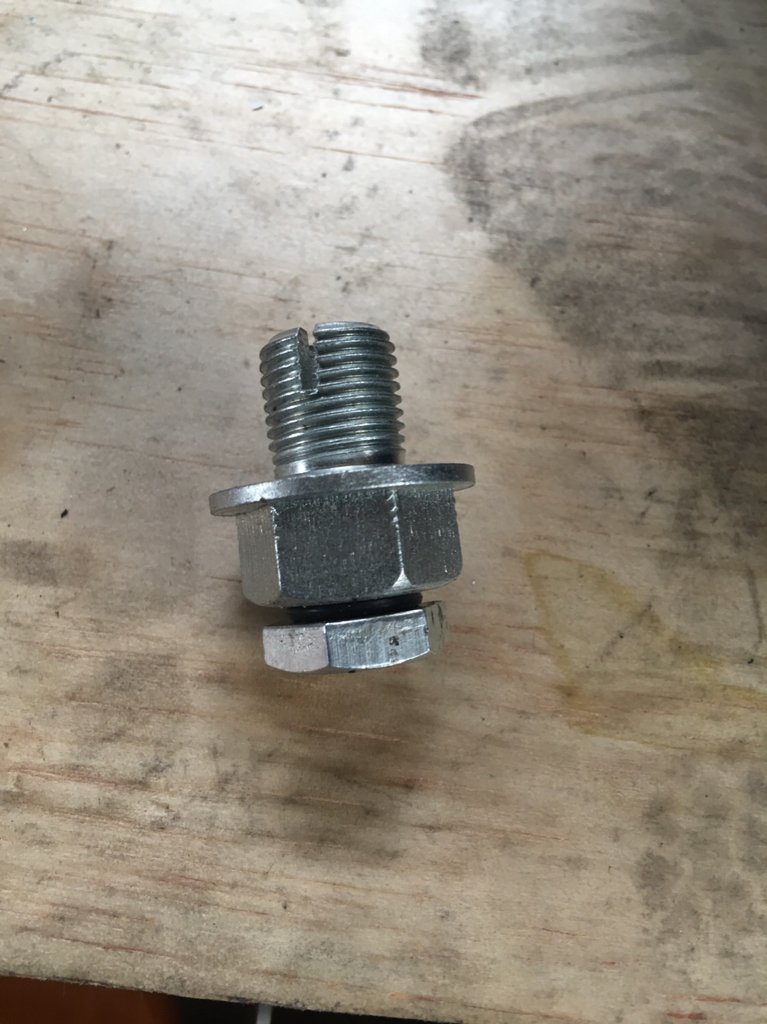
- The shank length on this plug is 0.549“. You can cut a slot thru any length of threads that protrude into the case past the hole.
- Measure the length of the hole in the case, mask that length starting under the head of the plug towards the end.
- Then, use a dremil tool or hacksaw to cut slots starting at the end of the plug down to the masked area to allow oil to flow thru to the sides of the magnet as well as the end.
- If you slot the bolt end too far, the portion of threads that will sit inside the hole that have been slotted can stretch or warp and cause distortion of the case threads if it ever has to be removed.
- Pull the primary cover so you can clean the debris out when your done.
- Drill and tap the hole in the case as straight as possible to allow a flat sealing surface between the 3/4” plug head and the case.
- A flat surface will allow you tighten the plug to the correct torque without extra warp-age to the case threads to get a good seal.
- Clean up any debris in the case and blow down the new threads with compressed air or WD-40 from the inside out to clean them of debris.
- Install the outer plug using Loctite and torque to 14-21 ft/lbs. 63)
- Install the copper washer and internal plug to 14-21 ft/lbs.
- Check for leaks.