Table of Contents

IH: Carburetor, Intake Manifold & Exhaust - Sub-01B
Rebuilding the Linkert Carb
See also in the Sportsterpedia:
Cleaning
- The general appearance of the inside of the carb is not necessarily a good indication of its condition.
It can look spotless and have clogged jets, or look cruddy and have clear jets. - It's good to clean each individual part rather than soak or boil the whole carb in carb cleaner.
But either way is good. Do not allow any solvents to contact any rubber parts (tip of needle, O-ring seal for bowl). - Make sure to take everything apart, jets, needle, accel pump, all rubber components especially.
- Examine all parts for excessive wear, damage, distortion, etc.
- Cleaning solutions/sprays vary based upon your location, needs, budget, preferences and quality.
Dismantle the carb down to the body before soaking. You will be surprised at all the dirt in the bottom of the soaking container.
Here are some helpful ideas:- An overnight soak in a solution of Pinesol and water followed up with a good brush down with a toothbrush then rinse and air dry. 1)
See also Soaking parts in the REF section of the Sportsterpedia. - A 20 minute to up to a few days soak in a gallon of Gunk (or other) Carburetor Cleaner that has a basket inside for small parts and lowers in the can with a handle, rinse, air dry, use.
- Soak it in mineral spirits for a few days. 2)
- You can use acrylic paint thinners for cleaning up carb parts. It melts the fuel varnish right off. 3)
- An aerosol spray carb cleaner will also work but may not loosen all of the build up in the jets or orifices in the carb body if they're not directly sprayed through.
- Blow out all holes, jets and orifices thoroughly with compressed air after cleaning.
A gallon of carburetor cleaner is very useful in cleaning out varnish from the channels and metering chamber.
It is especially useful for soaking stuck gaskets between parts and loosen the joint between them for dis-assembly.
Depending on how old or how 'stuck' the parts are, soaking for a couple hours may help to separate the old gasket in between.
Make sure to remove any rubber or plastic parts before soaking. Also check the label for safety precautions.
Parts that have been sitting for years may have to be soaked for about 24 hours or even days.
| Carburetor Cleaner 4) | |
 |  |
Note:
The use of wire to 'rod' out jets and orifices is discouraged in the FSM.
However, a hard wire such as a welding tip cleaner, has been known to open up stubborn areas at times.
Always use a wire smaller than the orifice cleaned so you don't widen the holes.
Doing so could create burrs or change the hole sizes.
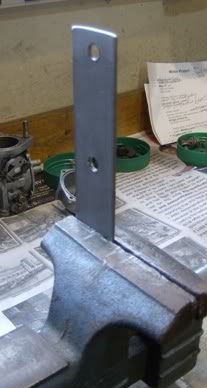
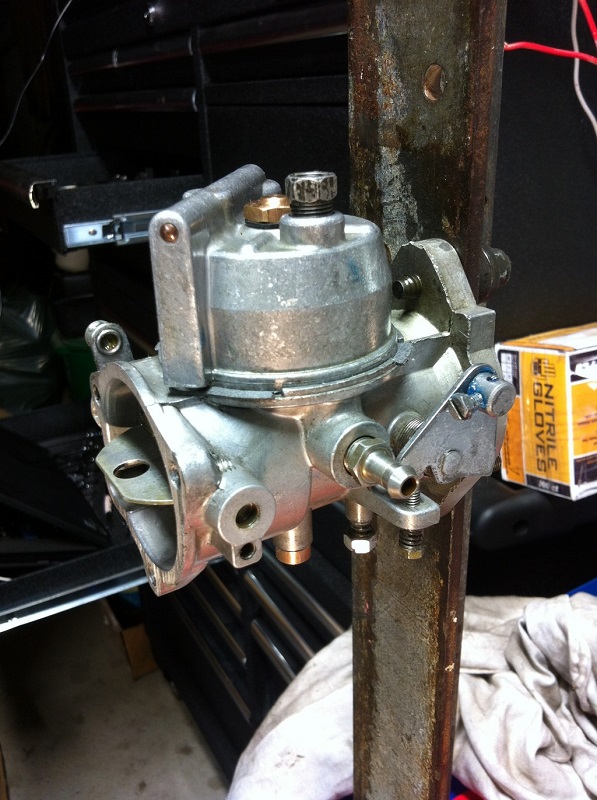
Carb Stand:
- You can put the carb in a vice to remove the screws, and for much of the following work.
Wrap in a shop towel; close the vice gently taking extra care with the choke and throttle linkages.
The vice is a needed extra pair of hands. - It can be very confusing trying to decide which way to bend the tang if it is not correct.
If the fuel level is low,Is the float high or low?, Do you need to bend the tang up or down? etc.
On the bench the carb is usually upside down, adding to the confusion. You should sort all this out before making an adjustments.
However, this setup works better than putting the carb directly into the vice.
The carb is set upright as 'in use' making adjustments more straight forward.
 5)
5)
 6)
6)
Welch Plug or Expansion Plug
- Inspection:
- A close inspection around the walls of a welch plug can reveal possible leaks.
- Removal: 7)
- Whenever a welsh plug is removed, a new one should be installed in it's place, especially since a large part of the time, removal of one means destroying or deforming it.8)
- Drill an 1/8“ hole thru it (just deep enough to break thru to the other side) off center and pry it out with a small punch. Be careful not to drill too deep which could destroy the nozzle assembly or casting. While prying it out, be careful not to damage the casting counter-bore edges around the plug.
- You can also drill a small hole in it and use a small tap just big enough to start in the hole. 9)
Thread the tap in the hole.
When it gets to the bottom of the passage, it will force the valve out with out damaging the bottom of carb passage.
Make sure to clean all the chips out to keep from plugging up passages later.
-
- The plug should be seated with a flat end punch that is slightly smaller than the diameter of the plug. The plug should be flat and not concaved to assure a tight fit. If leakage is suspected due to a rough or damaged welch plug seat in the casting, apply a small amount of epoxy or suitable sealant to the edges after installing it.
- Installation Recommendations from Hubbard Spring http://www.hubbardspring.com/install_reco.php?cid=45
Links,Parts and Services for Linkert Carbs
| Carb Assembly is HD Part Number: 27155-57B12) | |||
| Model (marked on carb) | Idle Port Hole Drill Sizes | Model (marked on carb) | High Speed Hole Drill Sizes |
|---|---|---|---|
| DC-1, 1L, 1M, 10 DC-2 | #70 (0.028 in) #56 (0.0465 in) | DC-1, 1L, 1M, 10, 6, 7, 12 DC-2 | #55 (0.052 in) #70 (0.028 in) |