Table of Contents

EVO: Suspension - Sub-01D
1200S Fork Rebuild & Hyperpro Spring Fitment
Article and Pictures by steelworker 1)
- The 1200S forks seem to be somewhat sought after, as the only fully adjustable forks ever fitted to a sporty in these year models. They are pretty good, but I always thought they could be better (a bit harsh over smaller bumps, and a lot of dive under hard braking), so I bought a set of Hyperpro progressive springs. The fitment will follow the same procedure as a full strip and overhaul,
Click on a pic to enlarge:
PART 1: The Parts
| The kit from Hyperpro comes with 2 springs, a tiny pot of magic Hyperpro grease, a bottle of 2.5 weight (very light!!!) fork oil, and a glossy booklet of fitting instructions and adjustment procedures. 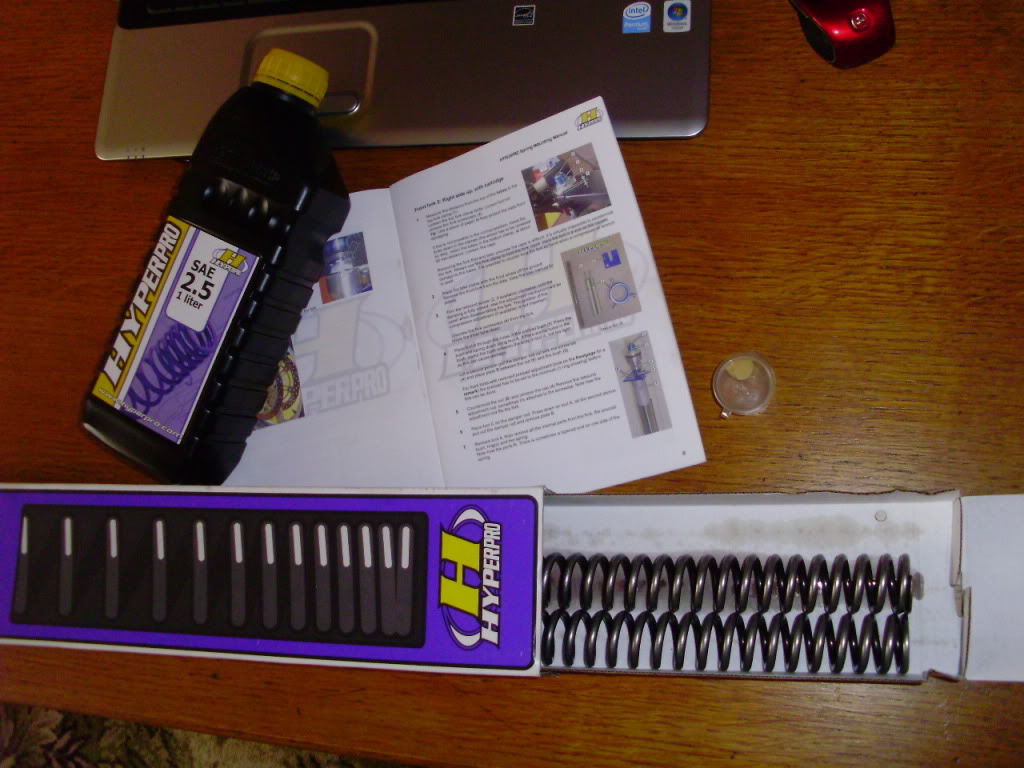 | The fitting instructions have a label on the front with specific settings for the relevant bike. 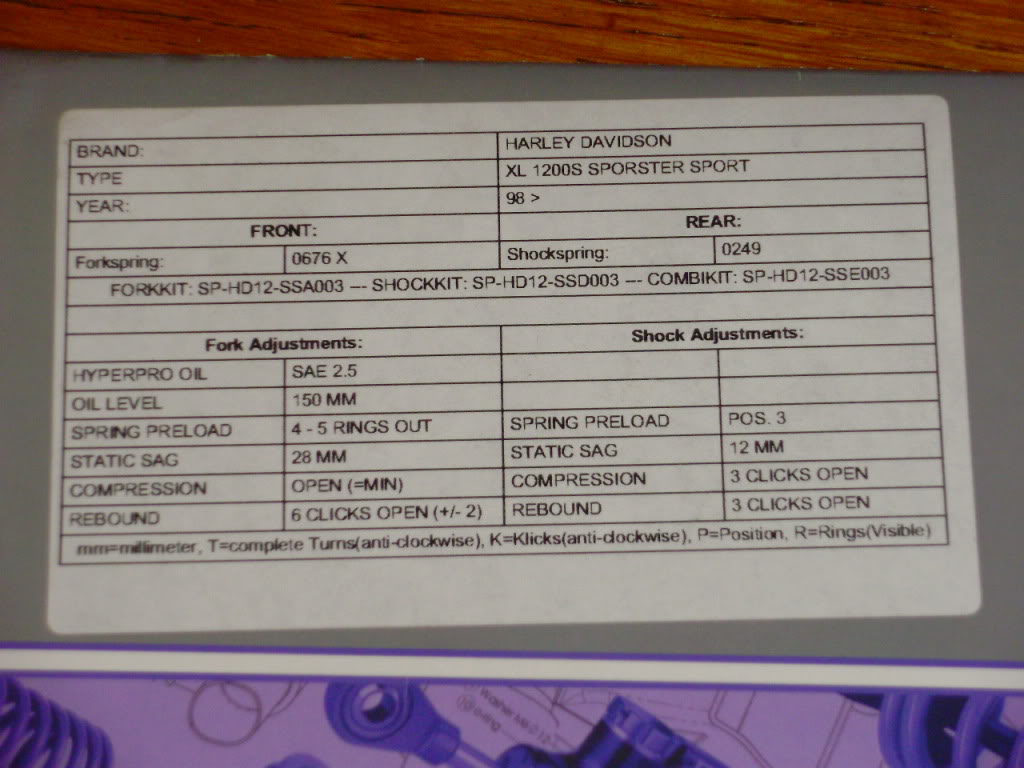 | Since the forks were to be stripped out, and in particular because the Hyperpro fork oil is so light, I thought it prudent to fit new fork seals and dust seals. I also bought an O-ring kit for each fork leg. 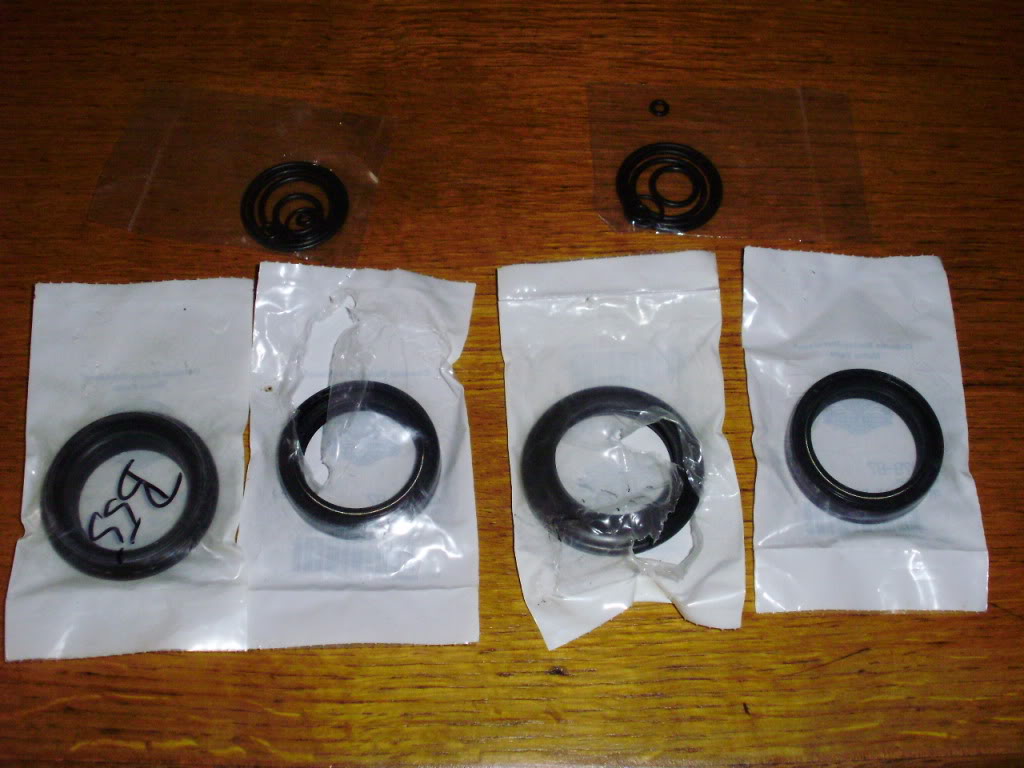 |
| When I was finished, I ended up with three O rings left over from the kit for each leg - the two tiniest ones, and the largest diameter ring. The two small rings I guess are for the shafts of the two damper adjuster knobs, but, since the knurled knobs appear to be located using tiny roll pins (which I don't have a replacement for), I left these well alone! The largest O ring appears to be larger in diameter than anything else on the forks! I saw nothing like it, I have no idea what it's intended for, and I'm not going to lose any sleep worrying about it. |
| The stock springs are progressive rate springs. A quick comparison shows the Hyperpros are 400mm overall length, versus 414mm for my 12 year old stock springs. The factory manual says to replace the stock springs if the free length is less than 407mm. Stock spring in the middle. 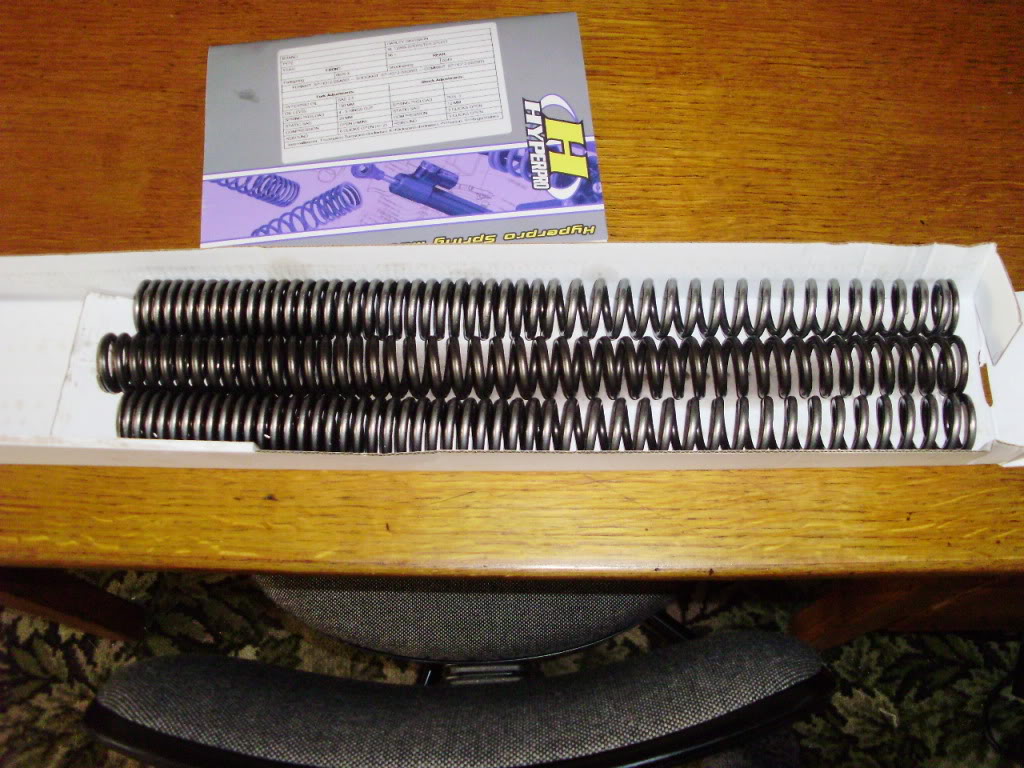 | As well as the shorter length, the coil windings are different, with a much greater range on the Hyperpros  | On the heavy end, approximate coil spacing is: Hyperpro 12mm; Stock 10.5mm. 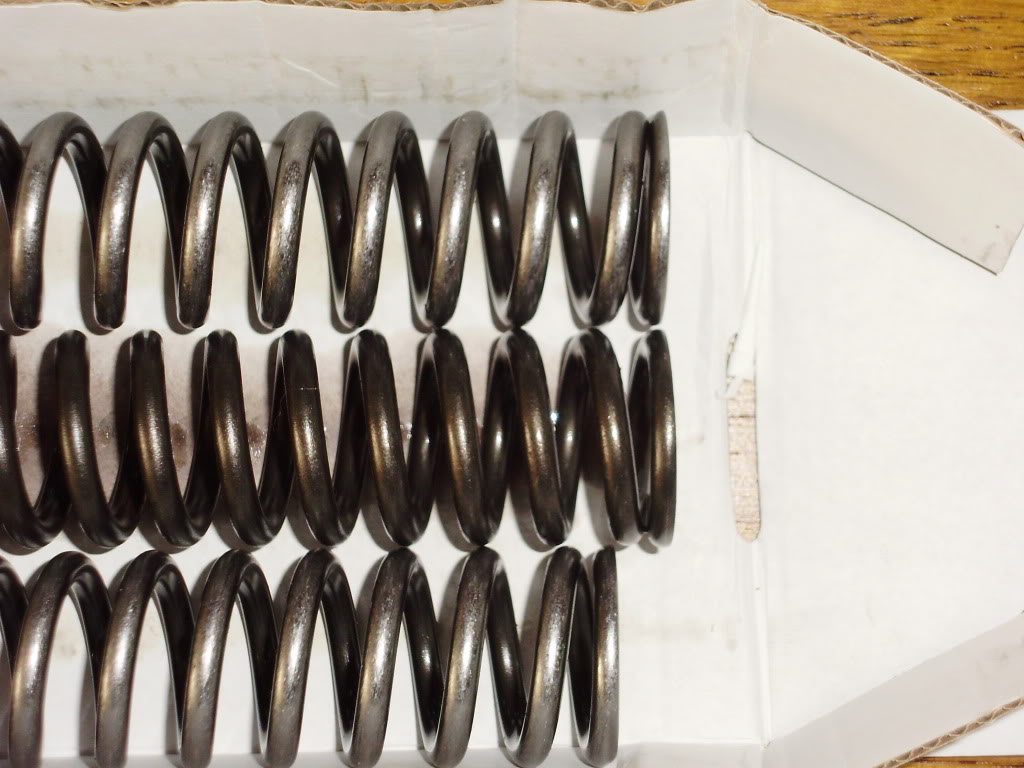 |
| On the light end, spacing is: Hyperpro 5mm; Stock 8.5mm. 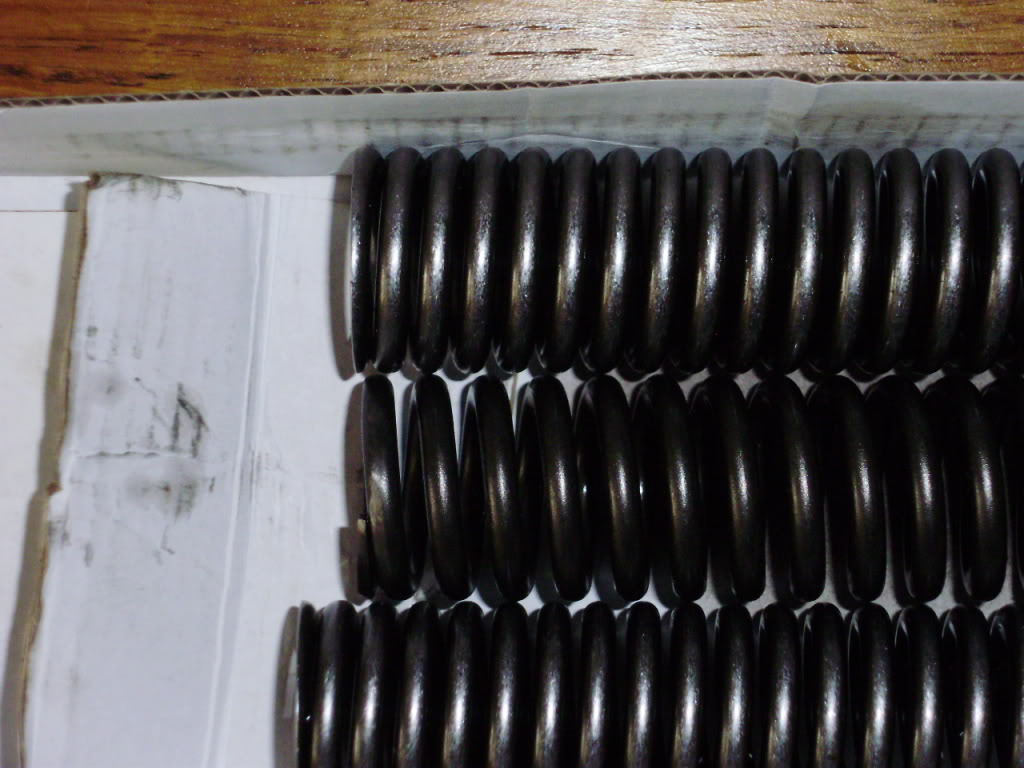 |
Part 2: Special Tools You'll Need
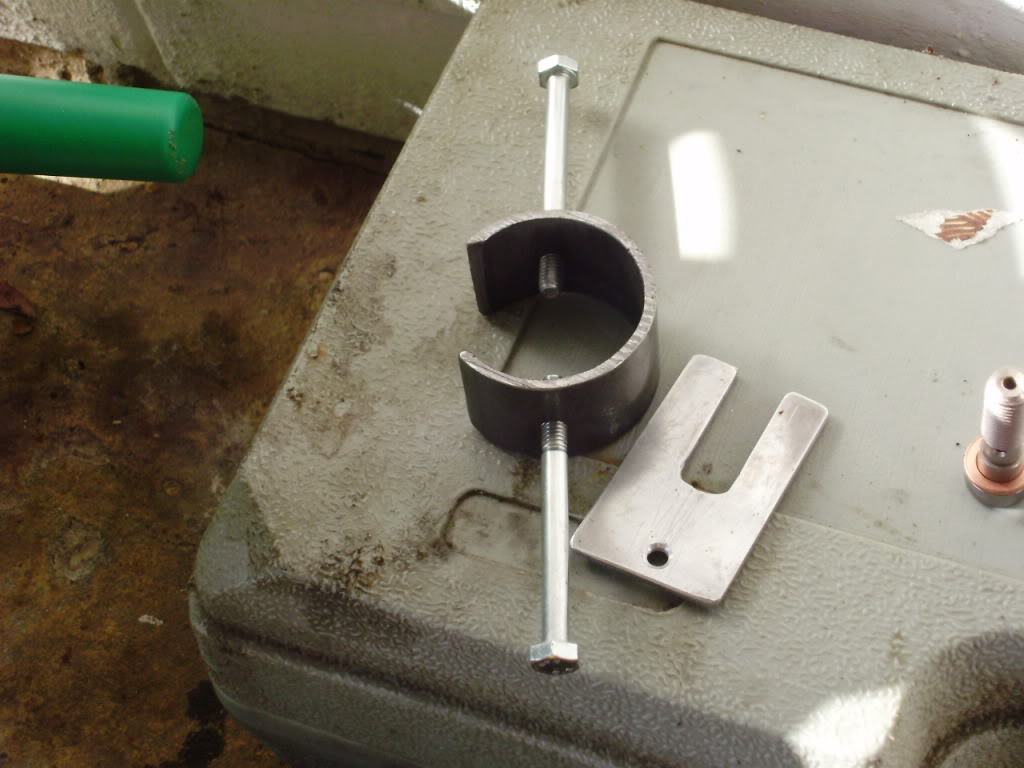
- Firstly, a fork spring compressor, and a slotted plate (Lower Left Pic)to retain the spring while you remove the top nut and preload adjuster. This homemade compressor is made from 50mm diameter pipe (this is 2.5mm wall thickness, but thicker would be better), 30mm long, drilled and tapped to take a couple of M6 bolts. The slot cut out of the wall is approx. 28mm across. A thicker wall and larger diameter bolts would be better, but this tool did the job admirably. Wear leather gloves when using the tool to prevent pinching that particularly sensitive piece of flesh between your thumb and forefinger!
- The slotted plate is 55mm x 35mm, with a 12mm wide x 33mm slot. For the sporty, a slighty narrower slot would be better / safer. It has to fit around a 10mm rod, so make it as close to 10mm as possible.
- The only other special tool you'll need is a fork oil level dipstick. We made one out of a gigantic zip tie. From the underside of the head, mark the tie at the recommended oil level (150mm for Hyperpro; 144mm Stock), then trim the tie about 100mm below the mark. This will enable you to slowly add oil and see when the level is approaching the mark. We looped a smaller zip tie through the head of the “dipstick” to prevent any “Oh , where did that go?” moments further down the line.
- Apart from these expensive special tools, the only other oddity you're likely to need is a long 8mm allen socket for the fork bottom screw (the one which bolts the damper rod to the bottom of the fork slider). Or do as we did, and use a cut down old 8mm allen key and use with an 8mm socket.
- A copy of the factory manual is invaluable when doing anything like this. Apart from the illustrations and instructions, it gives torque settings for a number of items - top nut to damper rod, top nut to stanchion, and bottom damper bolt.
Part 3: Remove The Forks
- First, loosen the front brake caliper bolts and remove the front fender. Loosen the front axle nut, and the pinch bolt on the other side.
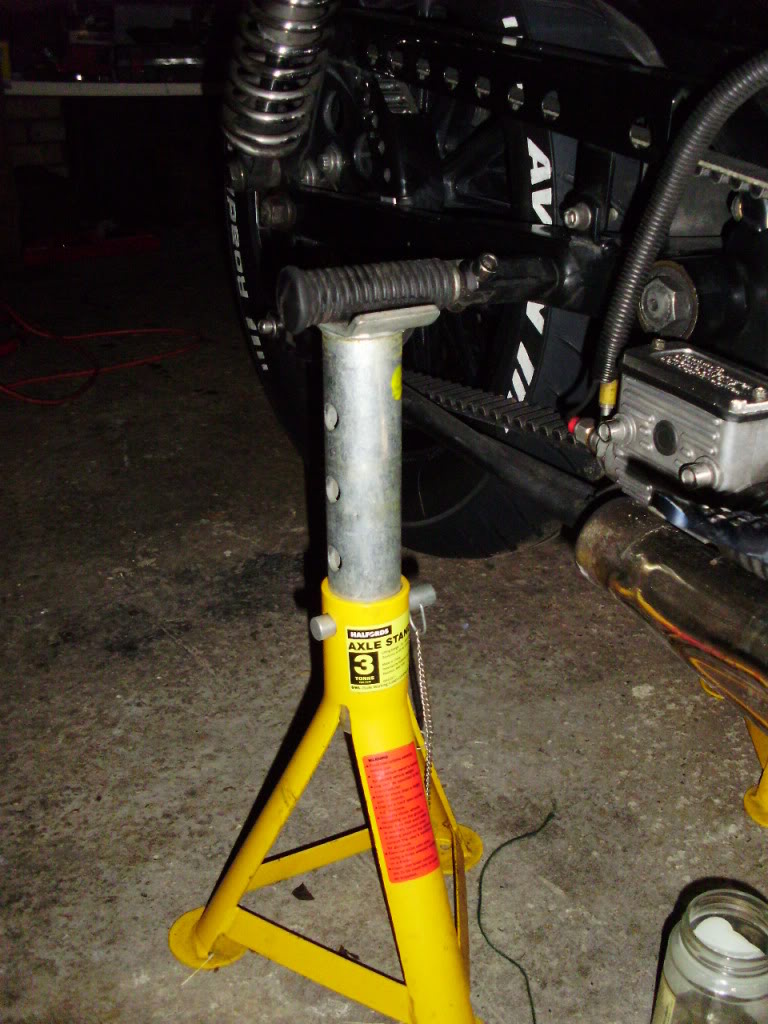
- Now we have to get the bike off the deck. If you have a bike lift, that's fine. I don't, so a little trick is called for, as taught me by my mate Sparkin':
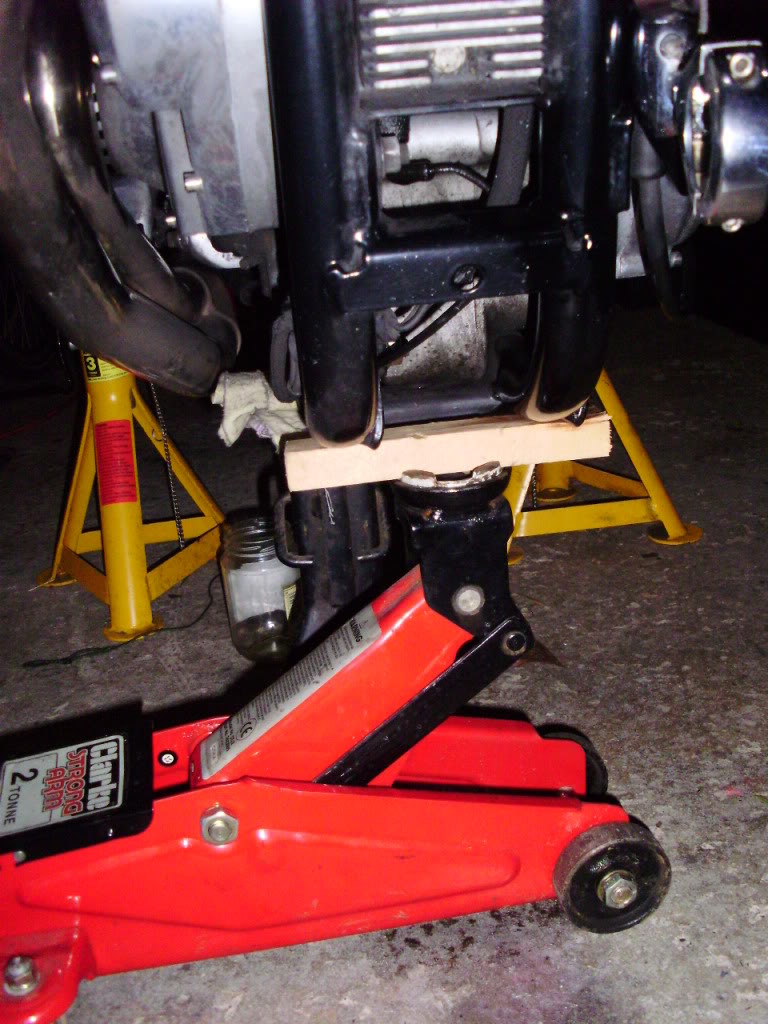
| Remove the passenger footpegs and replace them upside down (so they fold down, not up). With a trolley jack under a piece if timber at the rear of the frame, jack the rear of the bike up. Place an axle stand under each footpeg, then lower the bike onto them. Works a treat - gives a wide, stable platform, and you don't need to remove mufflers to clear the axle stands | Now transfer the trolley jack / timber to the front of the frame, and lift the front end. As insurance against the hydraulic jack going down on me, I placed a smaller axle stand under the frame. | First, loosen the top triple tree pinch bolt. Then supporting the stanchion to stop it sliding out, loosen the bottom yoke pinch bolt. Drop the slider until it's just above the bottom triple tree, then re-tighten the bottom yoke pinch bolt. |
 |  | 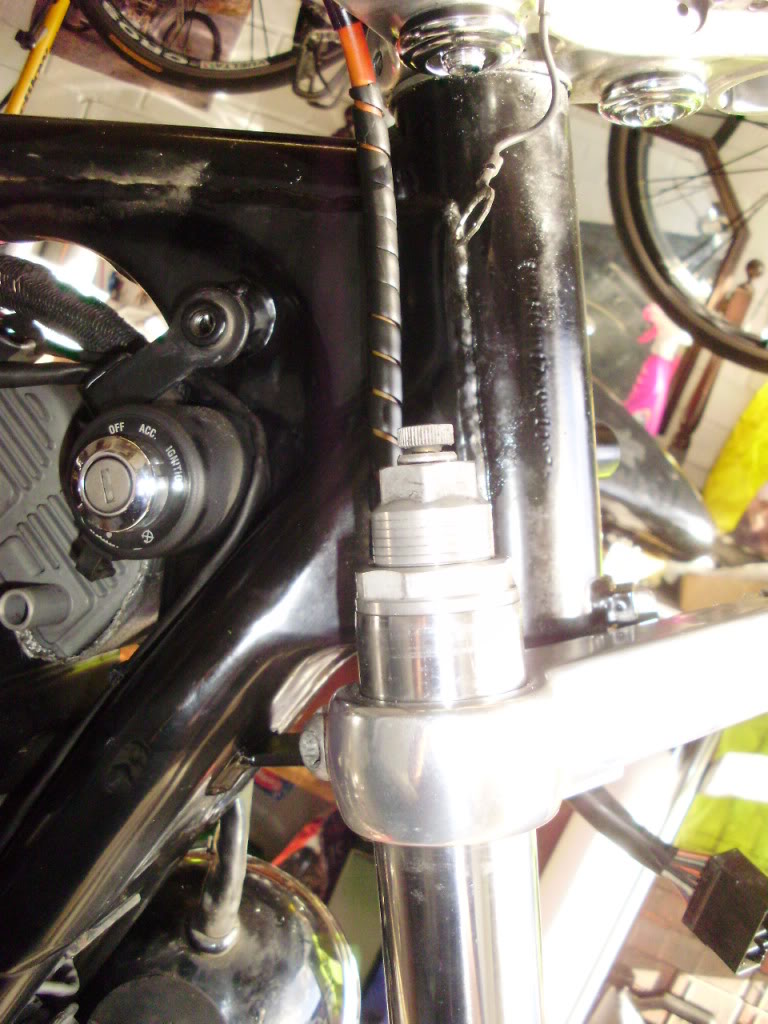 |
| You can now crack the top nut. I had a socket that fit, but a ring spanner (or even an adjustable wrench) would do the job. Just loosen it - do not remove it fully yet. |
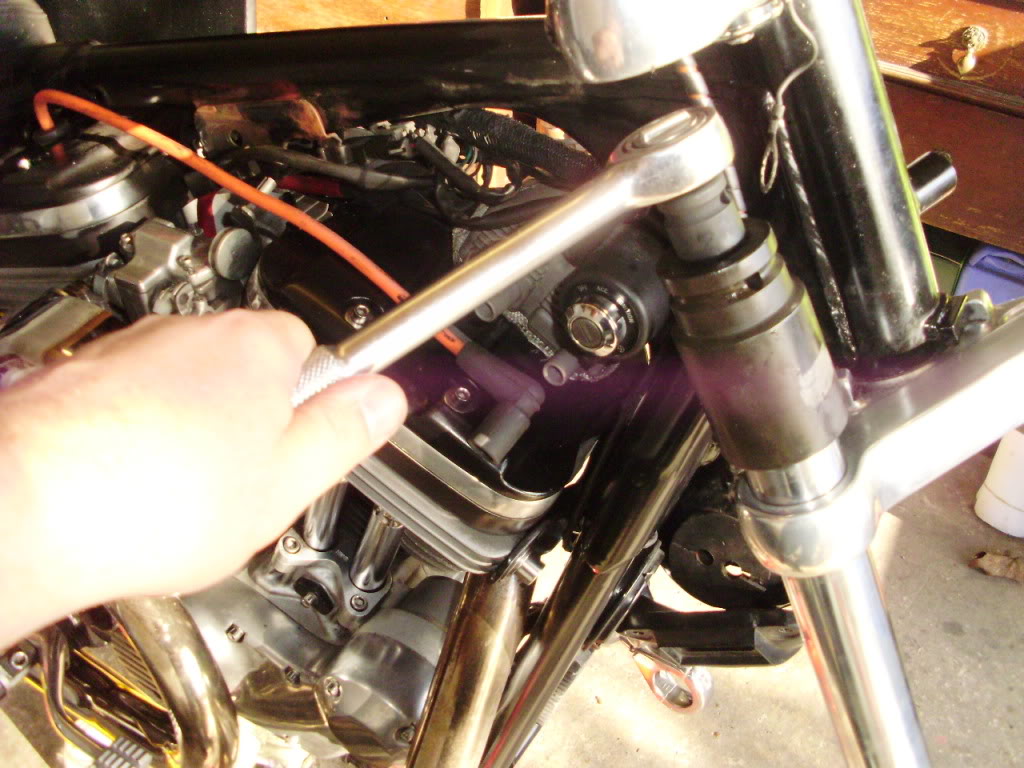 |
- With the fork still supported, now is a good time to crack the bolt in the bottom of the forks (the one you cut down the 8mm allen key to fit). It has a very shallow head, so be sure you have the allen key pushed well into it to avoid rounding it off and suffering the pain that would surely follow.
- You can now loosen the bottom yoke pinch bolt and drop the stanchion out and put it to one side.
Part 4: Dismantle The Forks
- It's best to do this one leg at a time to keep down confusion
- Before you start, back off all the adjusters (preload, compression and rebound) to their minimum settings.
- Now the stanchion is off the bike, you can fully undo the top nut. For those with experience of fork top nuts, under massive spring pressure, stripping the last few threads as they are propelled upwards to embed themselves in your forehead or garage roof, you're in for a pleasant surprise; because this doesn't happen with 1200S forks! As you're undoing the nut, support the stanchion, which will now drop down into the fork slider, revealing the rebound adjuster assembly and spring.
| Note that the holes in the spring spacer are towards the bottom of the spacer. Remember this when re-assembling. The factory manual also stipulates that the “burred” side of the pressed washers either side of the spring spacer should be towards the spacer when reassembling. | At this stage, if you plan to change the oil without further dismantling, (referring to an article from the old sportster.org website). Basically, you have to tip the fork, pouring the oil into a measuring container, pump the fork a few times to empty the damper tube, pour again and repeat until you've emptied it; then refill with the same quantity of clean oil. |
 | For those of you continuing this journey into the heart of your forks, just pour the oil into a waste container and dispose of it responsibly. You will definitely need an assistant for the next part. → |
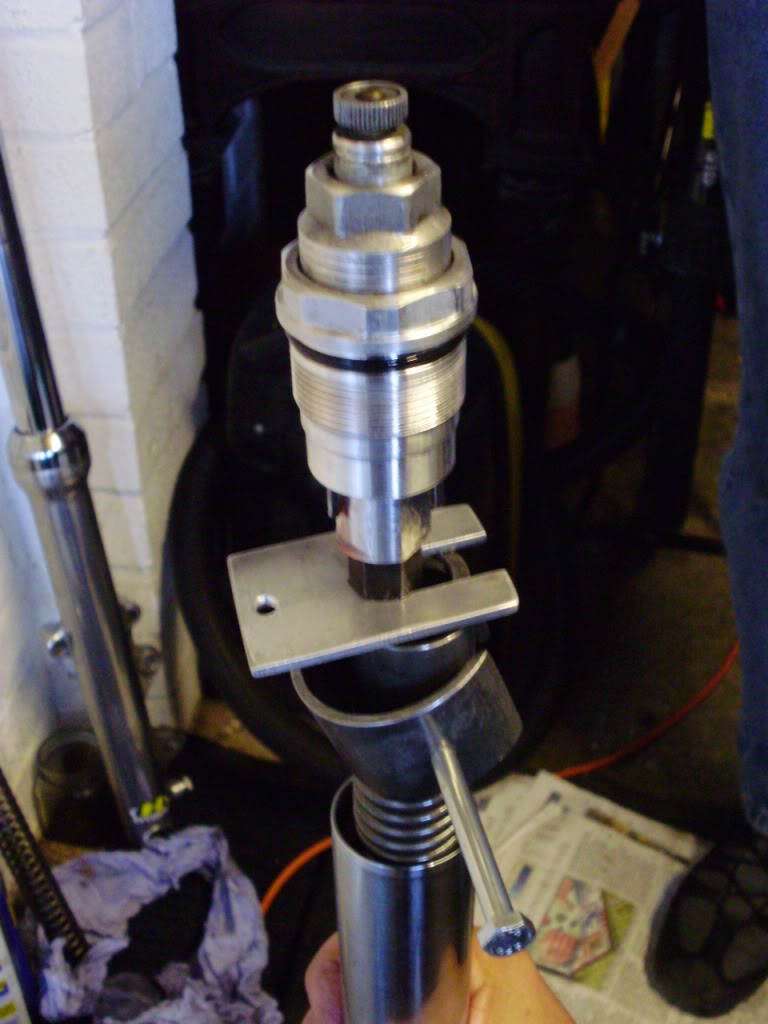
| Slide the fork compressor tool over the top of the fork, and turn the screw “handles” until they engage in the two holes in the spring spacer. Your willing assistant, wearing gloves, now needs to push down hard and steadily on the compressor, while you hold the top of the damper rod up and slide your slotted plate between the top of the spring spacer and the steel nut below the rebound damper. | Don't remove the compressor - you'll need to use it again in a few minutes. With the pressure off the preload adjuster, turn it clockwise to reveal the small spring clip just under the damper adjuster knob. Pick this spring clip out of its groove. It's already removed in the previous photos, but you can see the small groove where it fits in the adjacent picture. |
|
 |  |  |
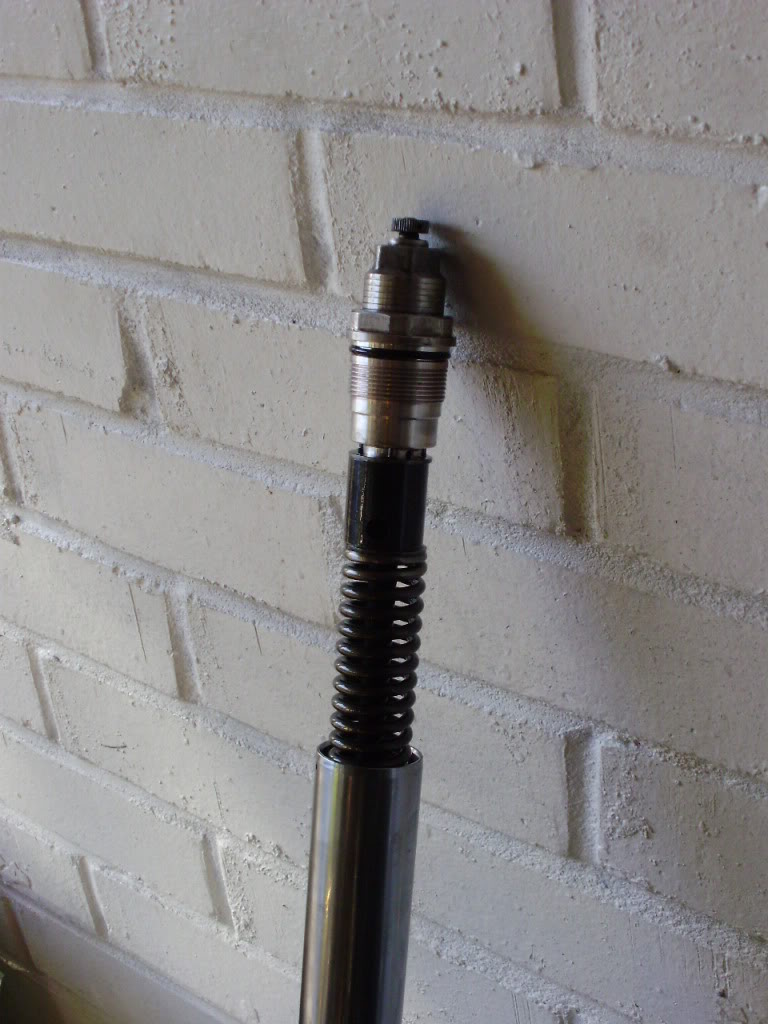
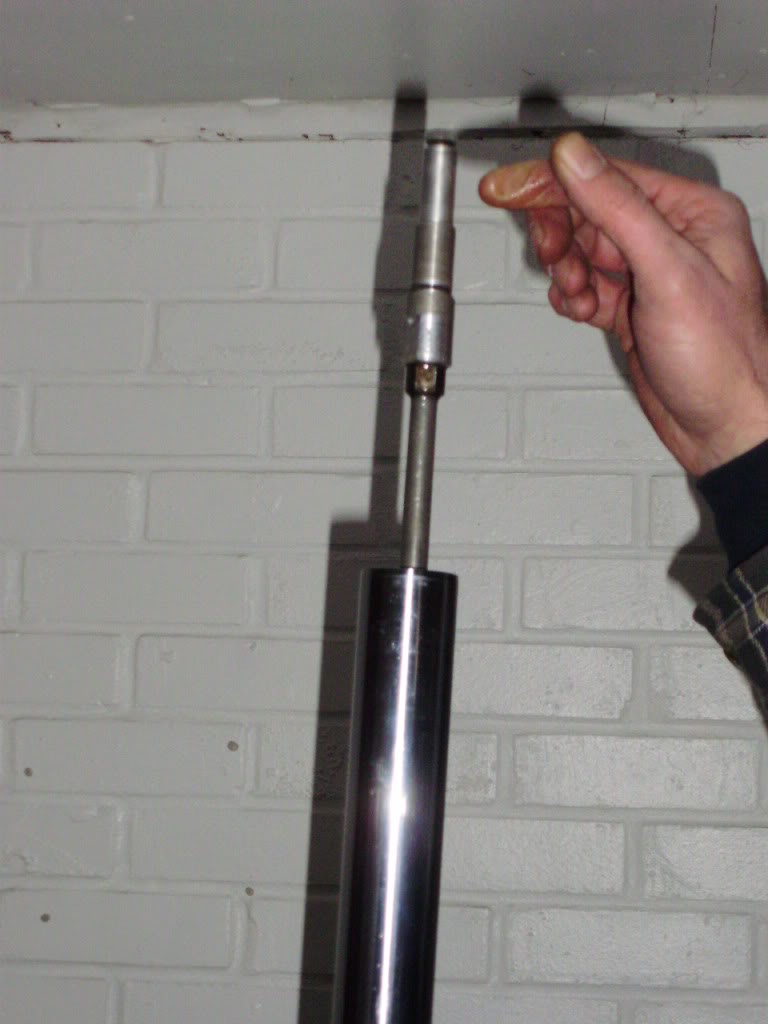
| Steadying the damper with a 17mm spanner on the flats just above the steel nut, unscrew the top nut from the damper and pull it free from the top of the forks. There'll be a bit of resistance as the preload adjuster has an internal O ring to seal against the damper. |
||
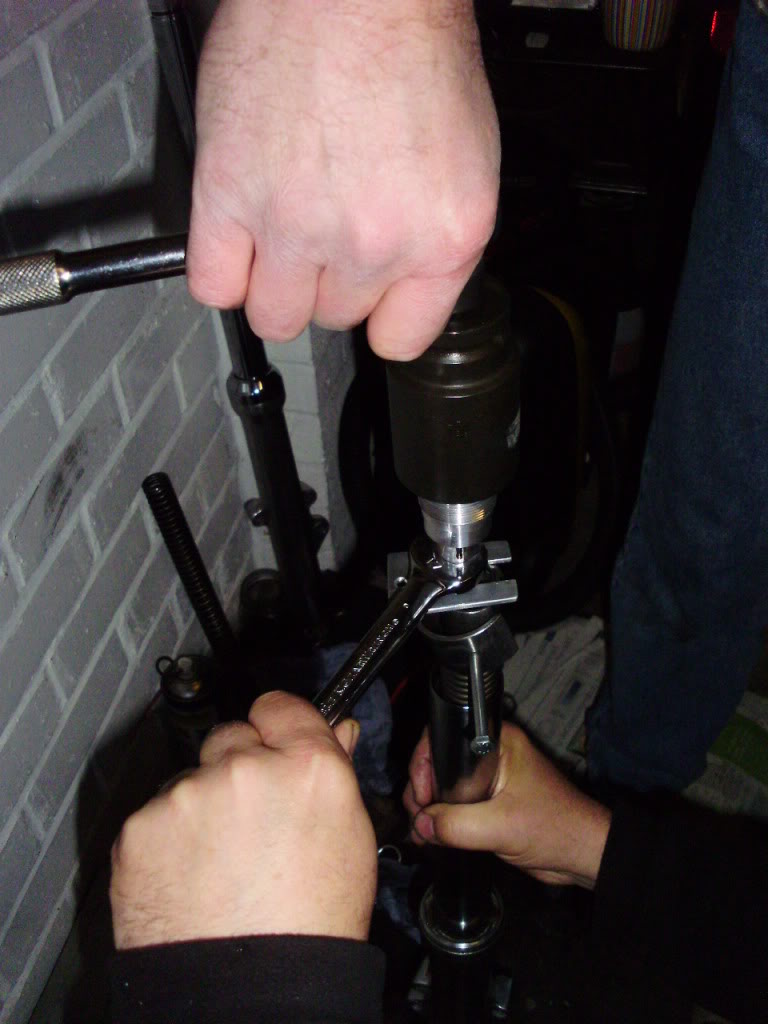
- Now we have to use the spring compressor again. Note that the “handles” should be only just inside the holes - too far and they will foul the damper assembly as you release spring pressure. It helps if you can turn the spring space so the holes line up with the flats on the damper above, to give a bit more clearance.
- With your assistant pressing down on the spring, hold the top of the damper rod and remove the slotted plate. Your assistant should now gradually let the spring up, while you guide the spring spacer / washers / spring past the damper (mind your fingers!).
- Remove the spacer and washers, then pull the spring out of the fork.
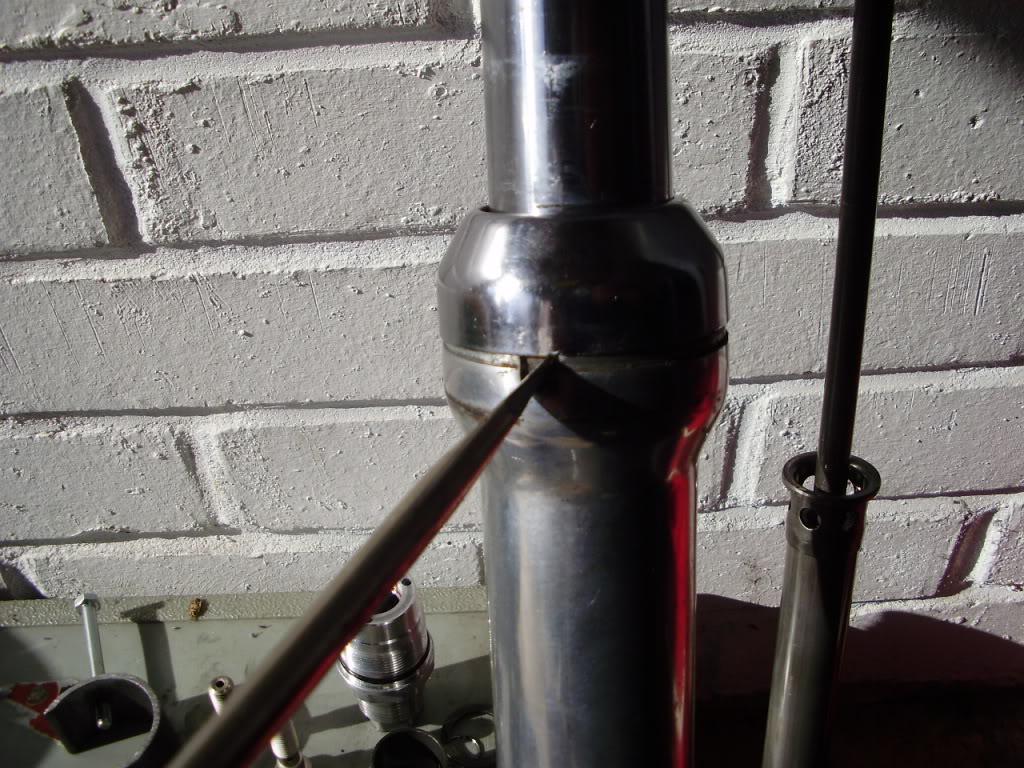
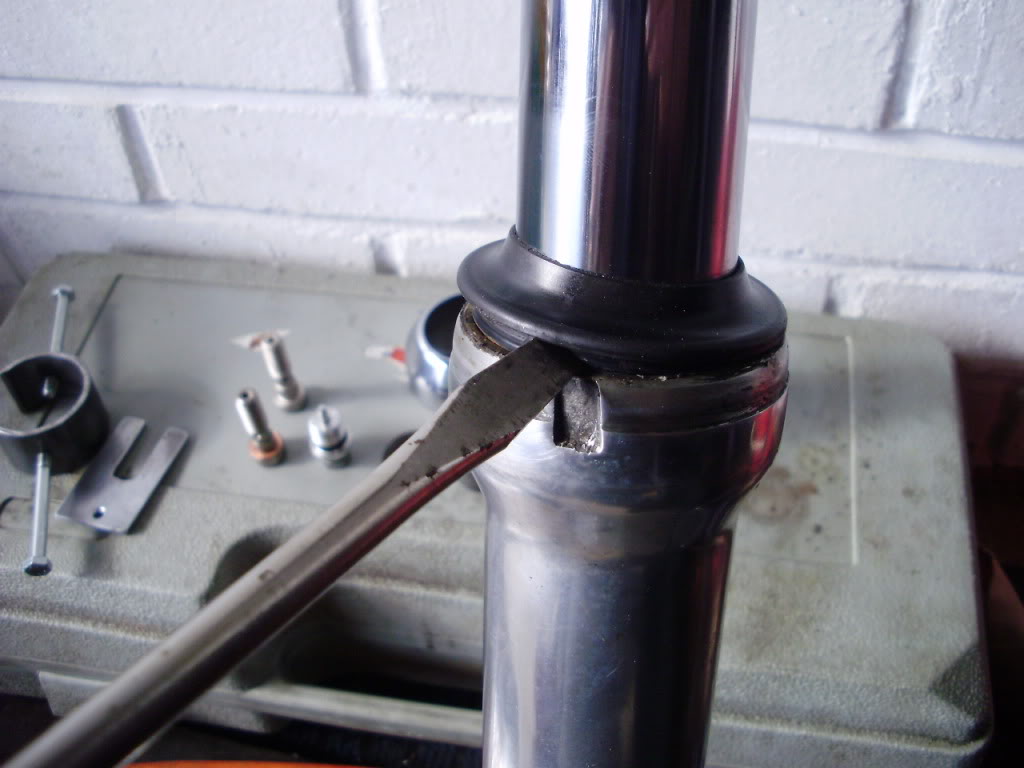
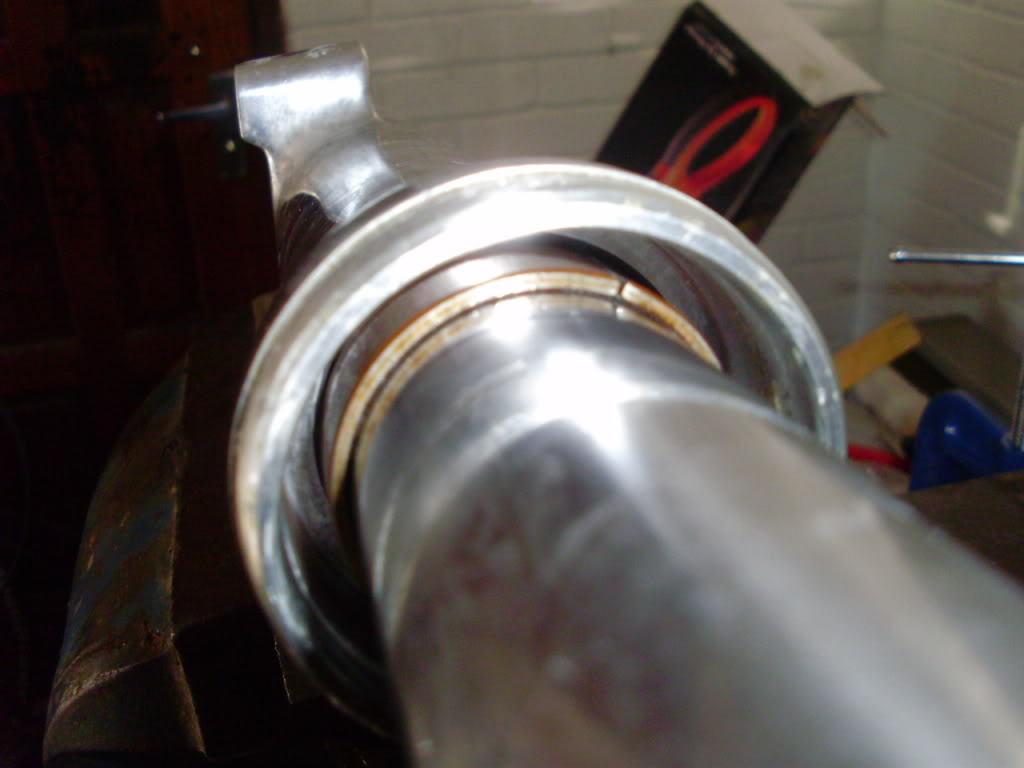
| Fully loosen the screw in the bottom of the slider, and remove the damper rod/tube. You should now have something that looks like this | Rebound damper (do not dismantle further, i.e. do not loosen the steel locknut or the aluminium damper body) | Now to remove the fork seals. Pry the chrome cover loose with a screwdriver in the slot shown, then carefully work your way around it to free it fully. |
 |  |  |
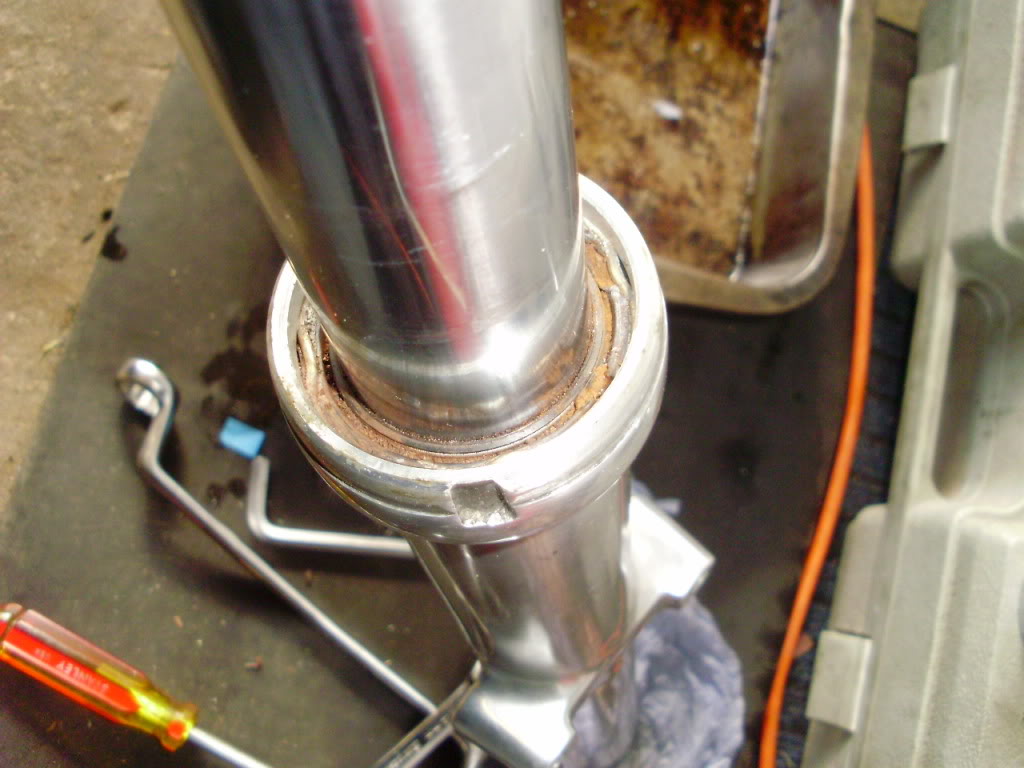
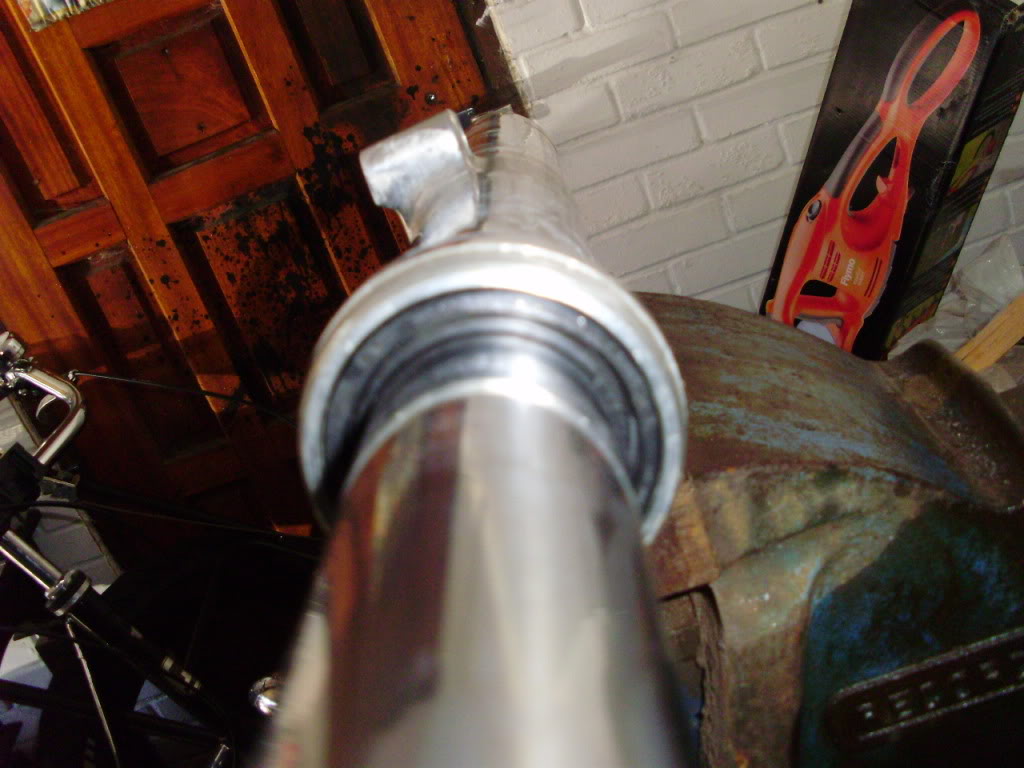
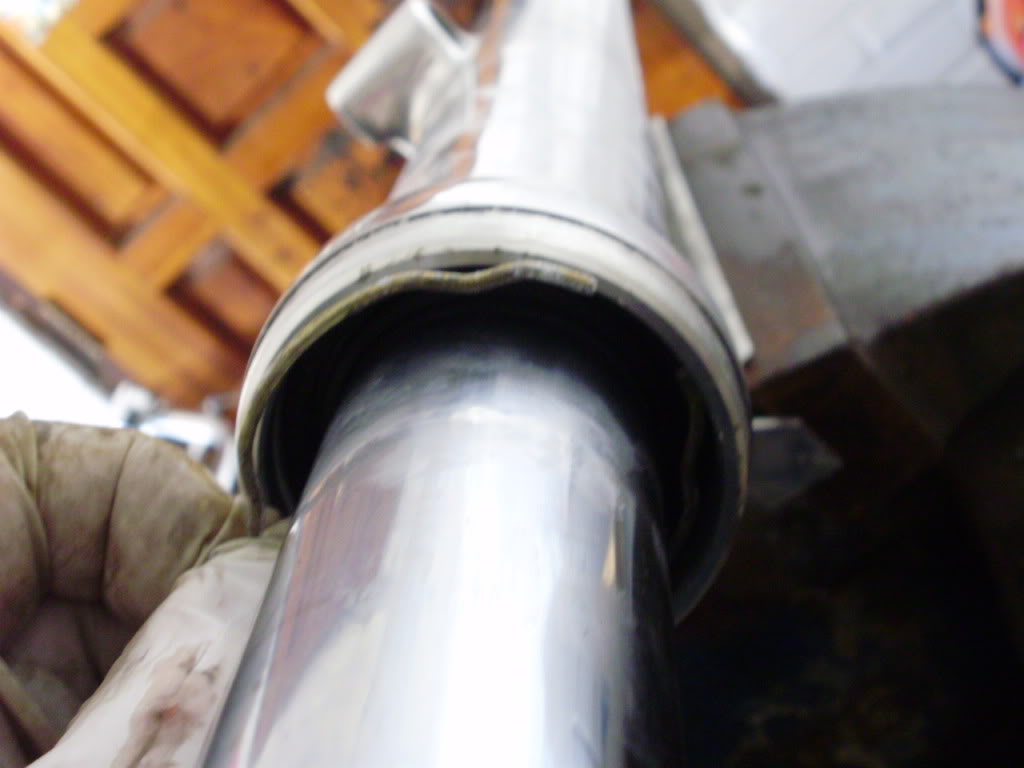
| Now you can see the dust cover | Remove that in similar fashion | Now you can see the fork seal and retaining ring, covered in 12 years worth of road grime that the dust cover didn't keep out. |
 |  |  |
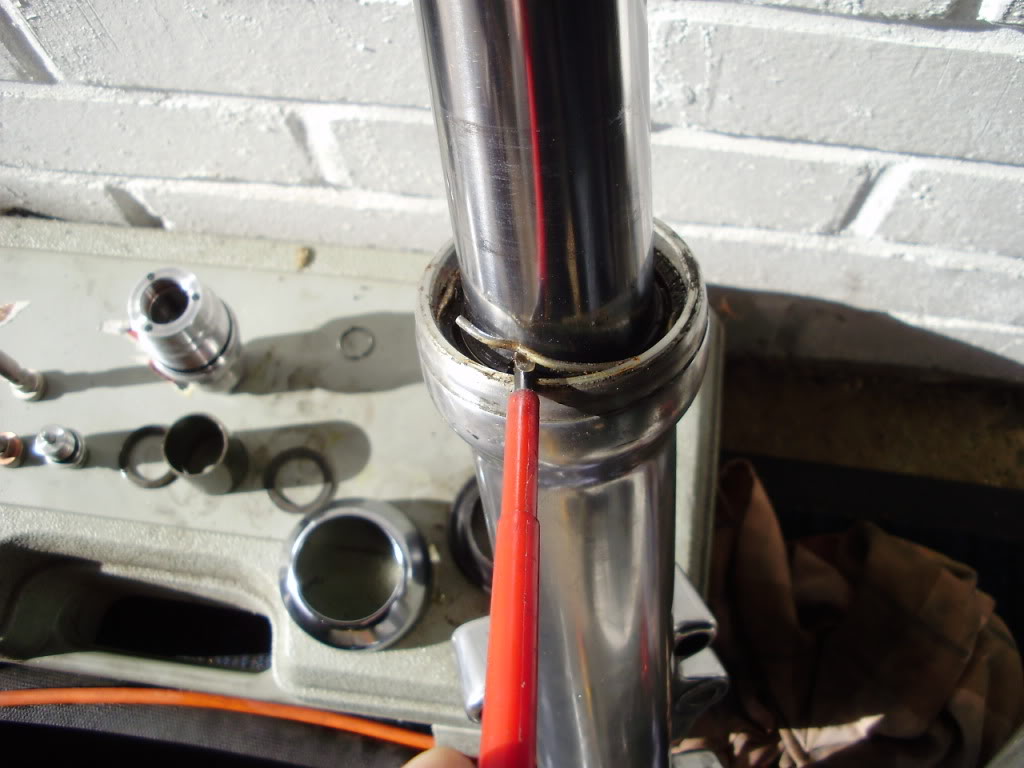
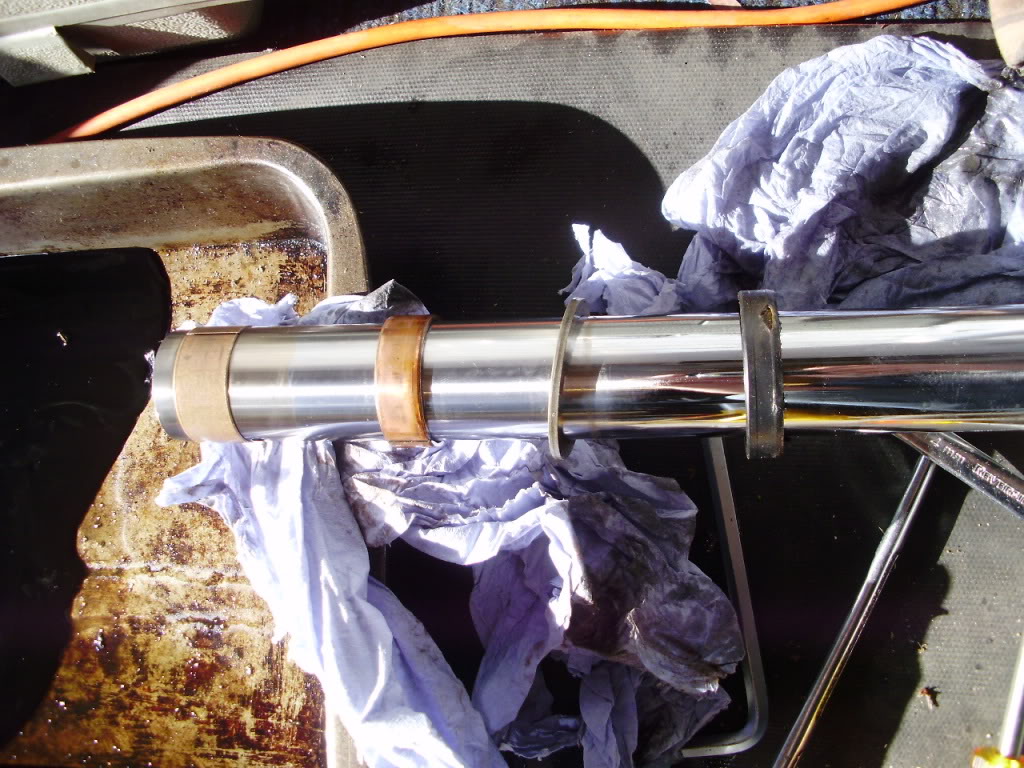
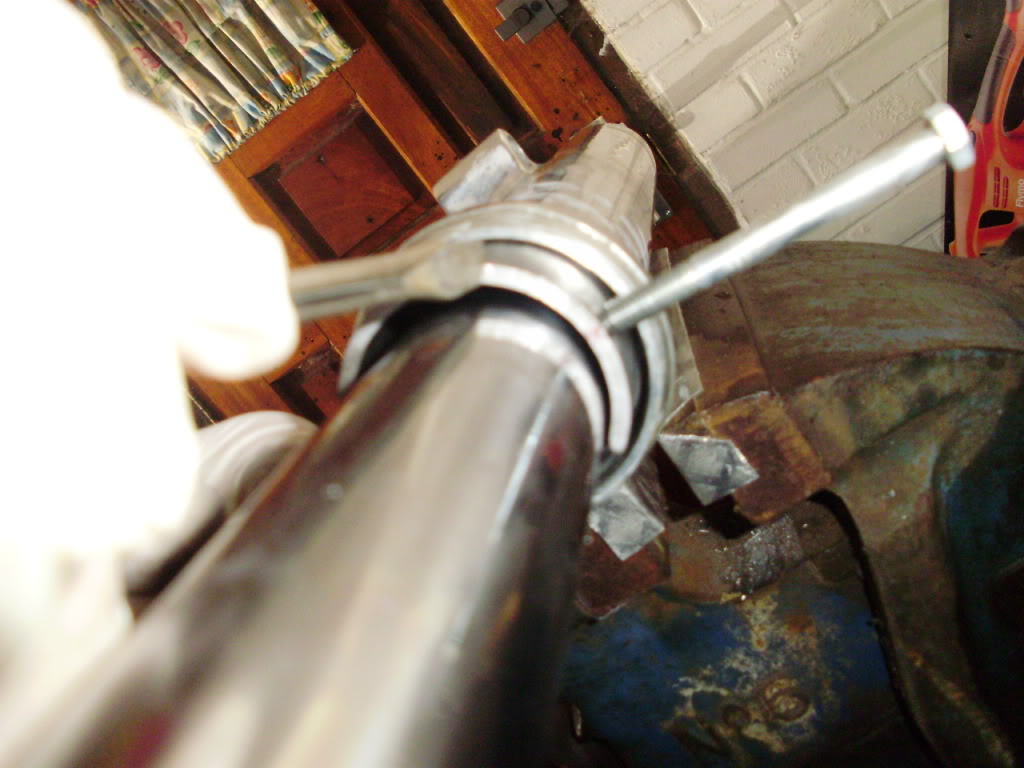
| With a pick or small flathead screwdriver, pry the retaining ring out of the slider. | The next bit requires a two-handed action shot, so I couldn't photograph it. With the fork slider in one hand, and the fork stanchion in the other hand, pull them repeatedly apart. You're using the bottom fork bush (which is attached to the bottom of the stanchion) to knock the top bush and seal out of the slider. It sounds brutal, but they do come apart reasonably easily. | This is what you'll be left with when the slider is removed. From left to right: Bottom bush, top bush, spacer, fork seal. Make a note of which way round the fork seal fits (or leave it on there until you're ready to fit the new one - old seal off, new seal on). |
 |  |
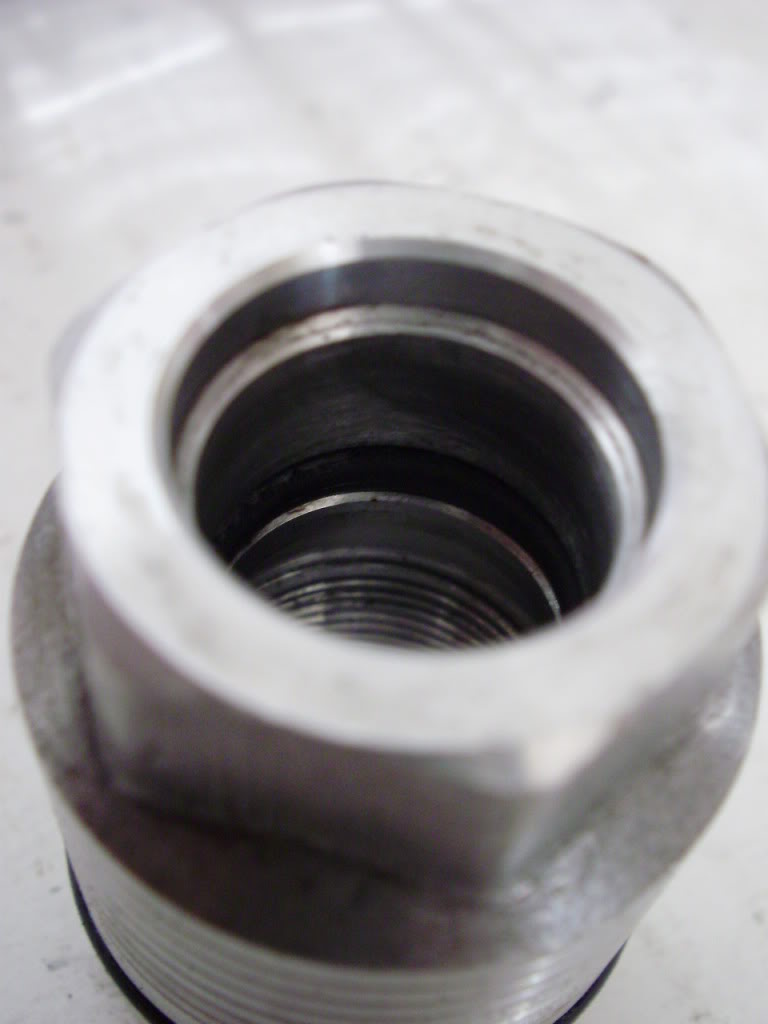
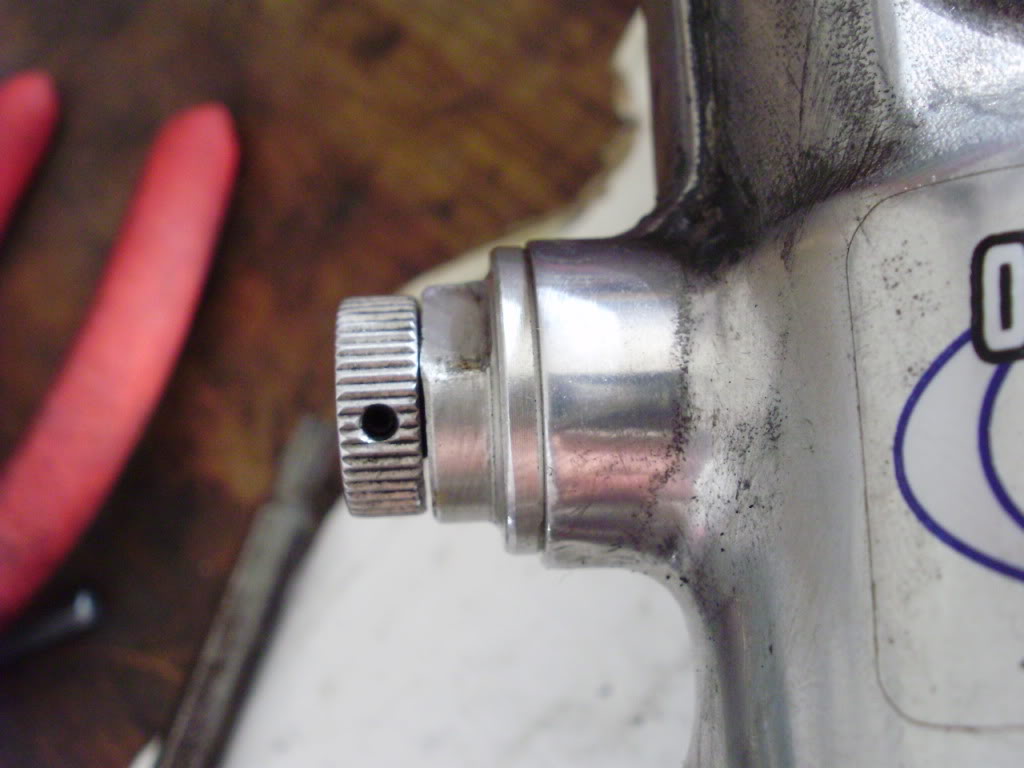
| The final part to remove is the compression adjuster from the bottom of the slider. First slacken it right off (anti-clockwise), then remove using a 12mm spanner on the flats. | This is what it looks like. | And the hole it came out of. |
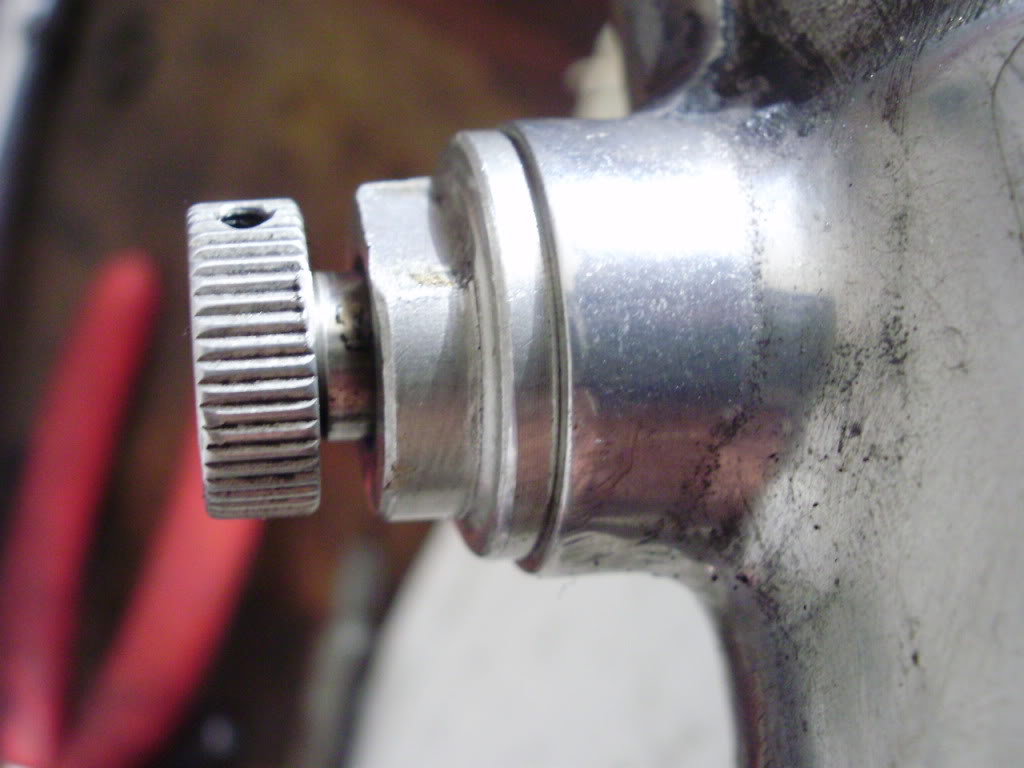 |  |  |
Part 5: Replace the O-Rings
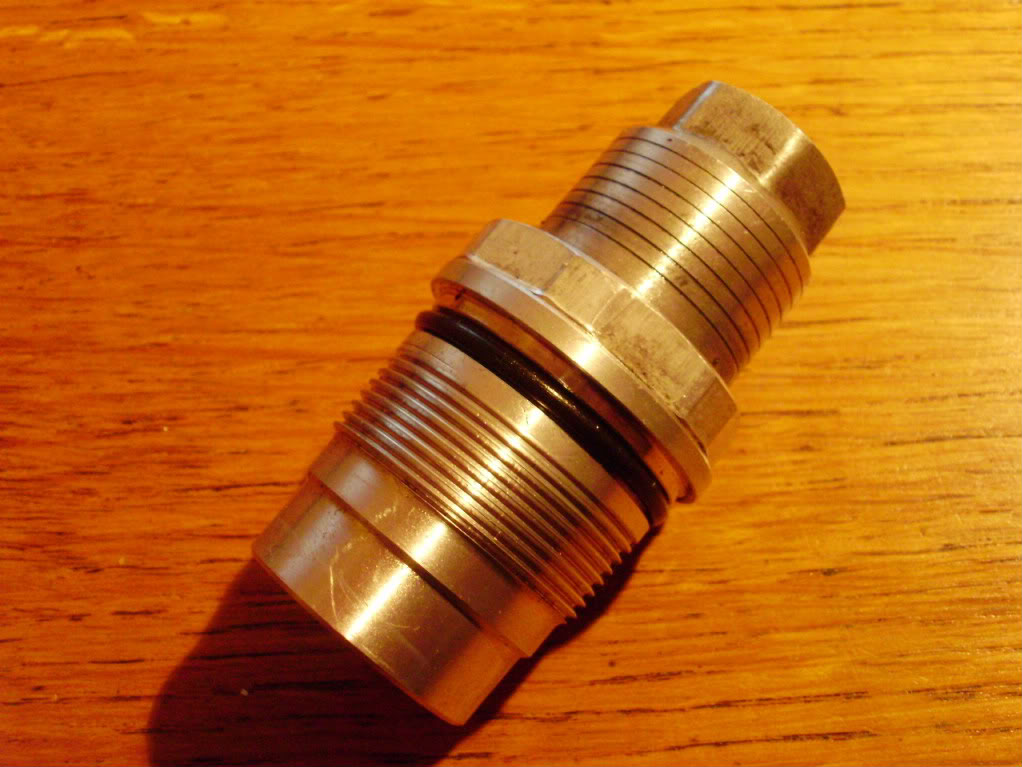
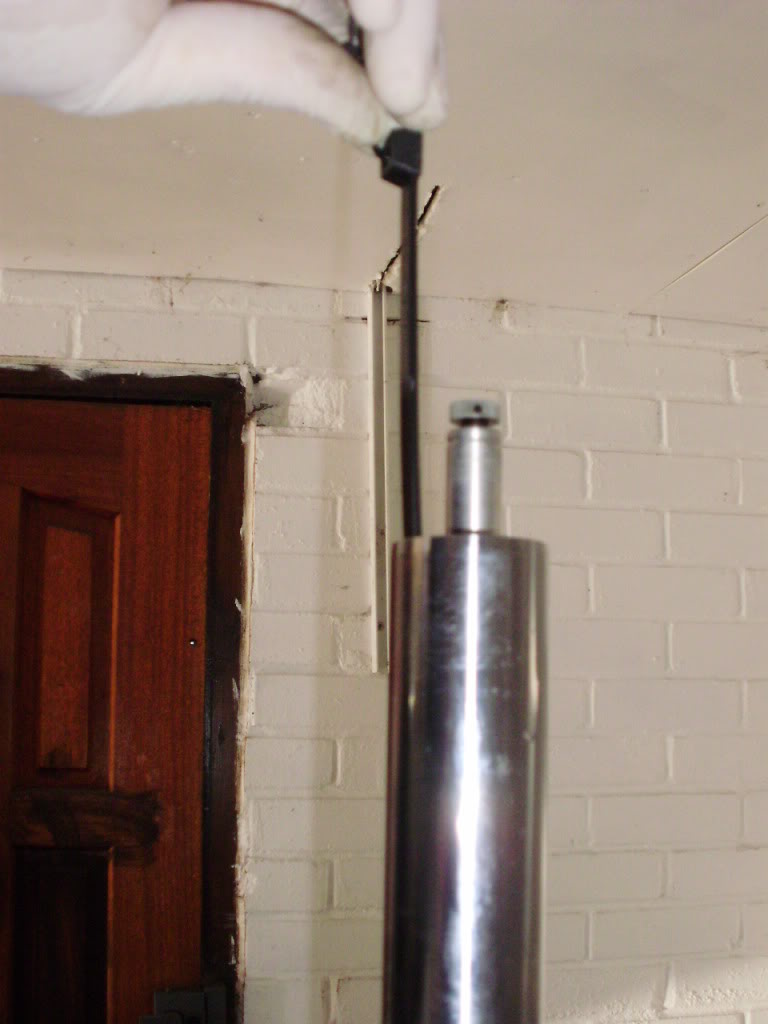
| Pull the preload adjuster out of the top nut. | To reveal…Replace the large diameter O rings on the outside of the preload adjuster and top nut. |
|
 | 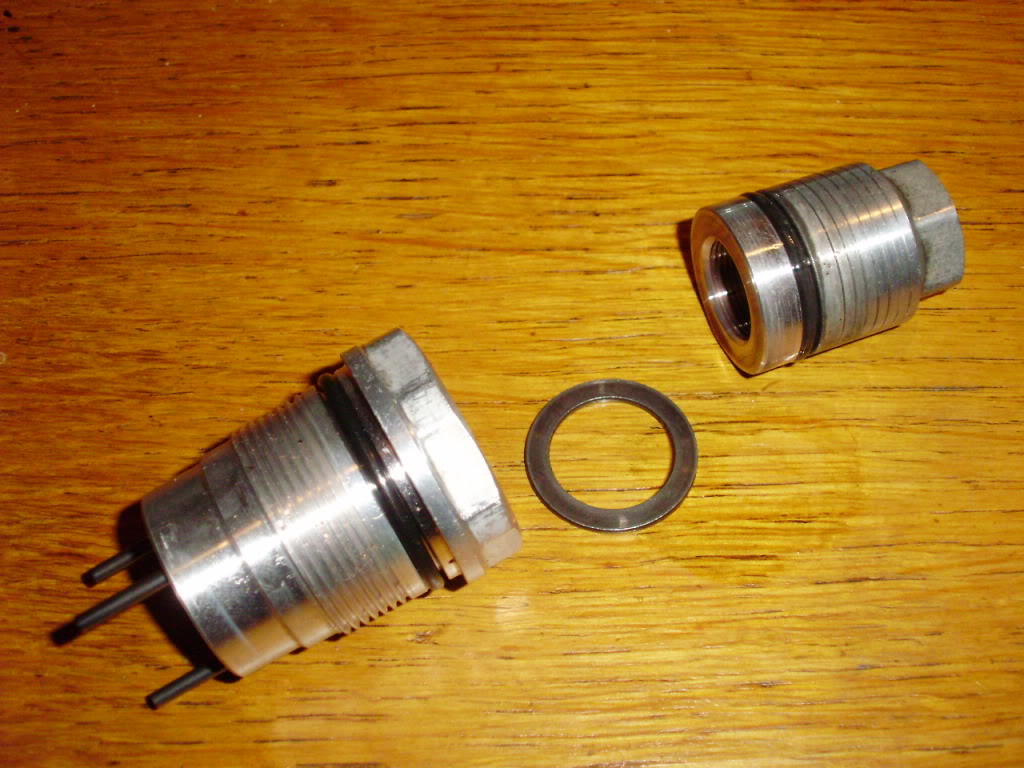 | 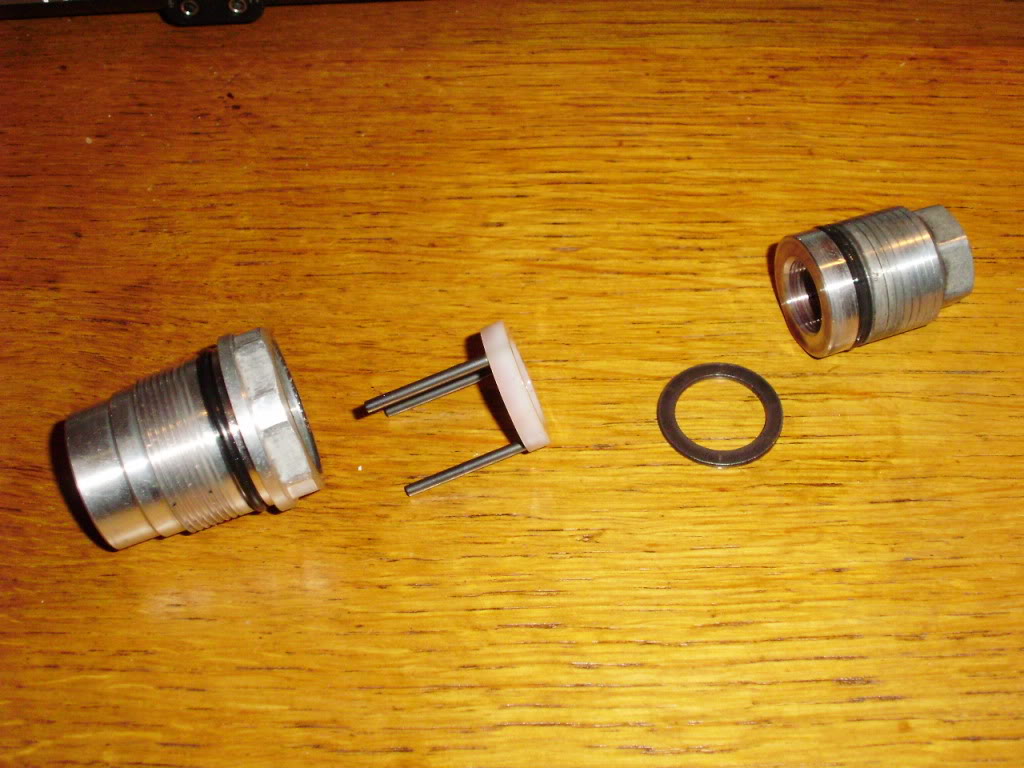 |
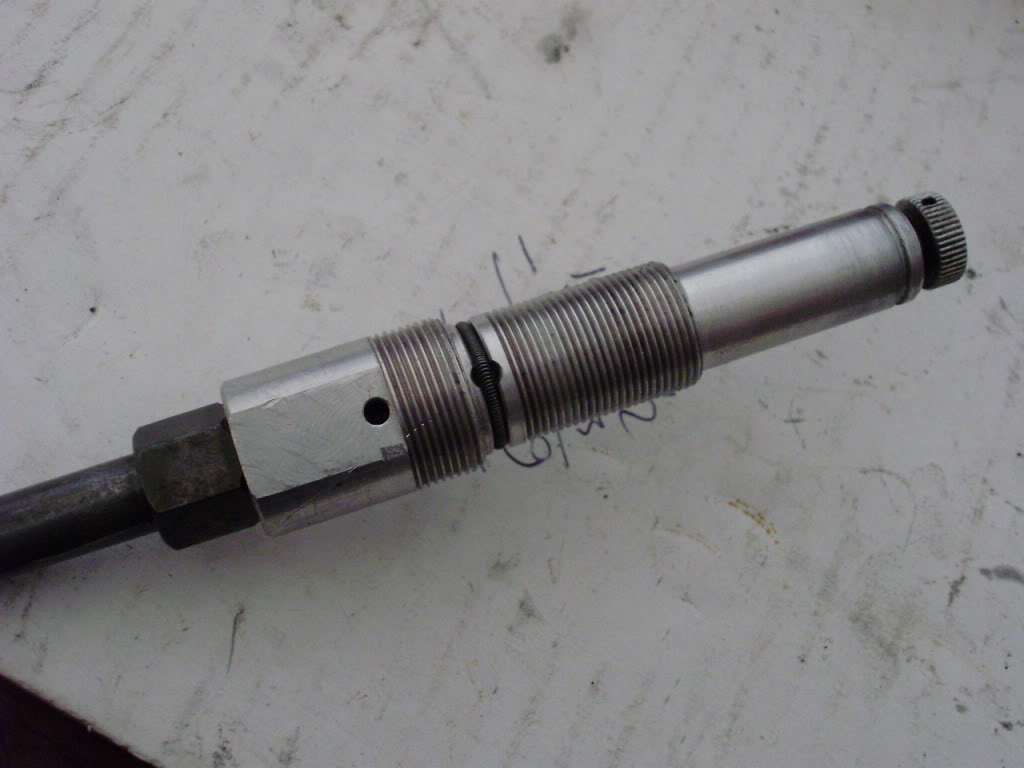
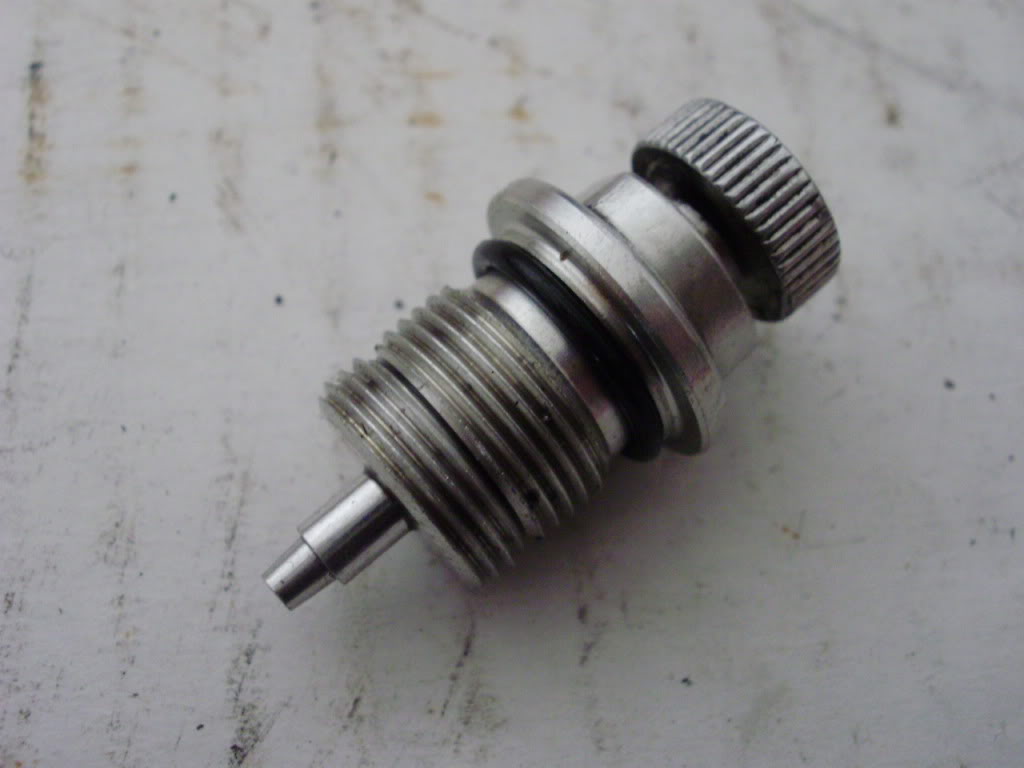
| Also replace the small diameter O ring inside the preload adjuster | Reassemble all the parts (a little grease or, preferably, fork oil on the O rings helps), and put the assembly to one side - we'll fit it later. | The compression damper can be clicked or pushed through the body |
 | 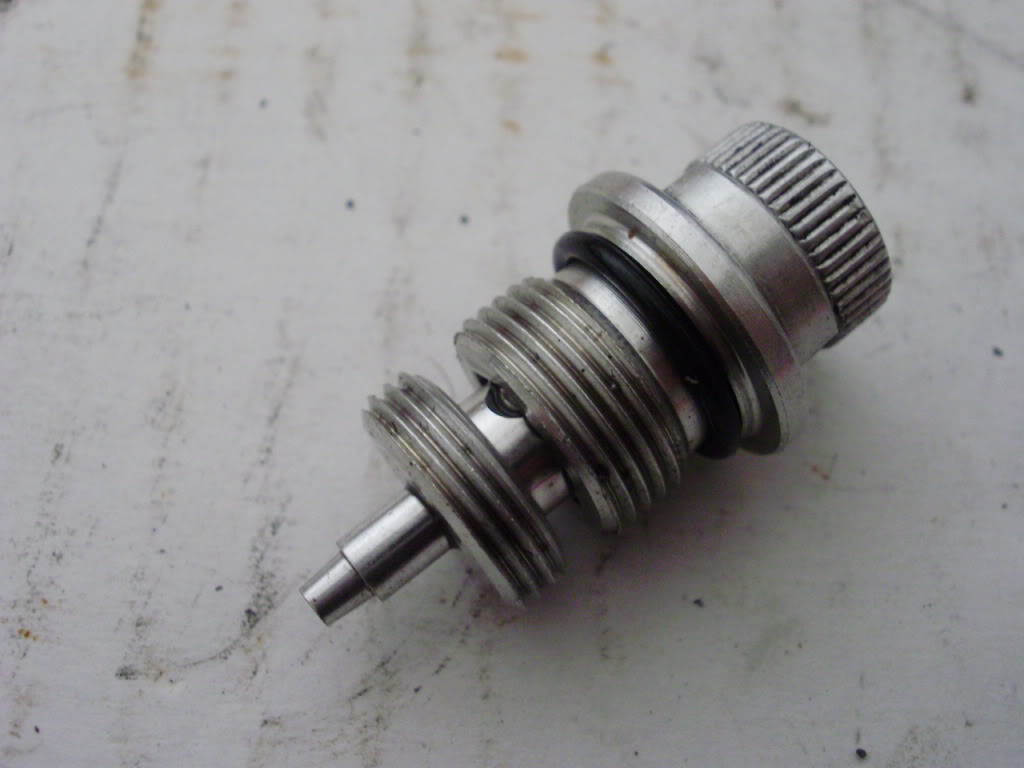 |
| As you turn the adjuster knob, the inner threaded portion extends the pin to gradually block the oil hole in the fork leg. | Replace the O ring on the adjuster, and make sure the adjuster is in the fully open position before screwing it back into the fork leg. | After it's in place, check that you have the full range of adjustment. There should be 13 positions / 12 click stops between softest and hardest positions. |
 |  |  |
Part 6: Reassemble Fork Tube
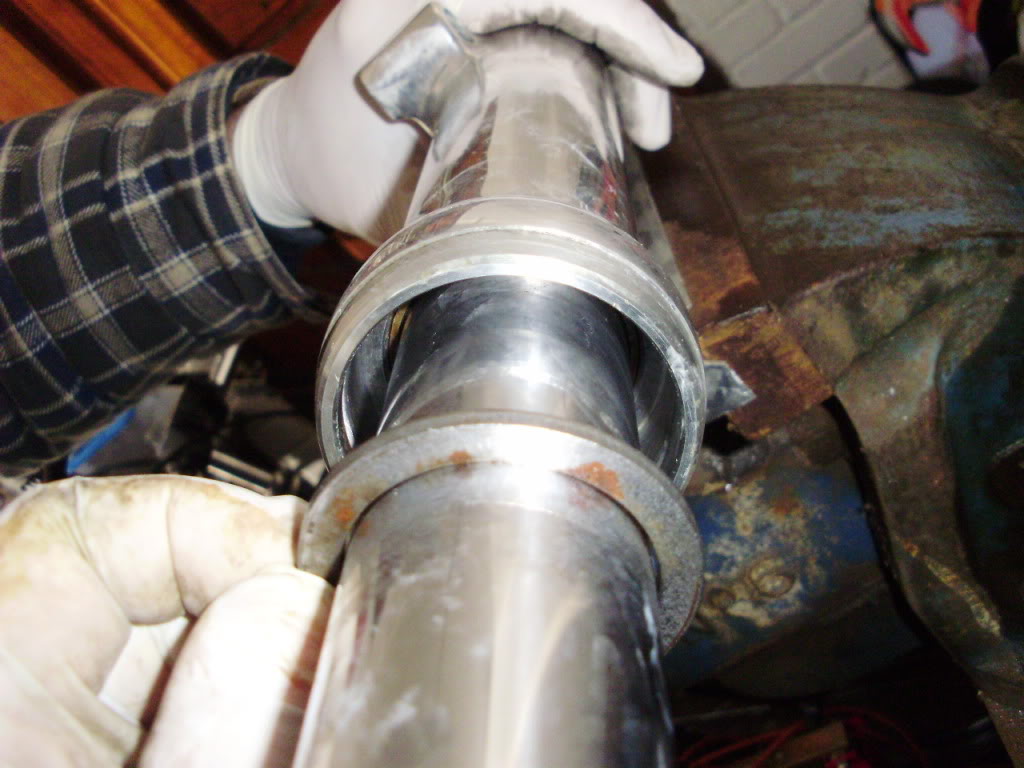
| We held the fork slider steady by clamping one of the caliper bosses in a vice. Do not clamp the main body of the slider tube, or you'll distort it. Coat the stanchion in fork oil and slide it (complete with bottom bush) into the fork slider, then slip the top bush down over the slider. Position the opening in the guide bushing to one side, NOT to the front or rear. | If you have a factory fork seal installer (a tubular slide hammer), fit the spacer next and use the installer to drive the top bush into place. We didn't have one, so we used the time-honoured method of gently tapping around the perimeter of the bush with a screwdriver. It goes in fairly easily, with only light taps required. | Next, fit the spacer. |
 |  |  |
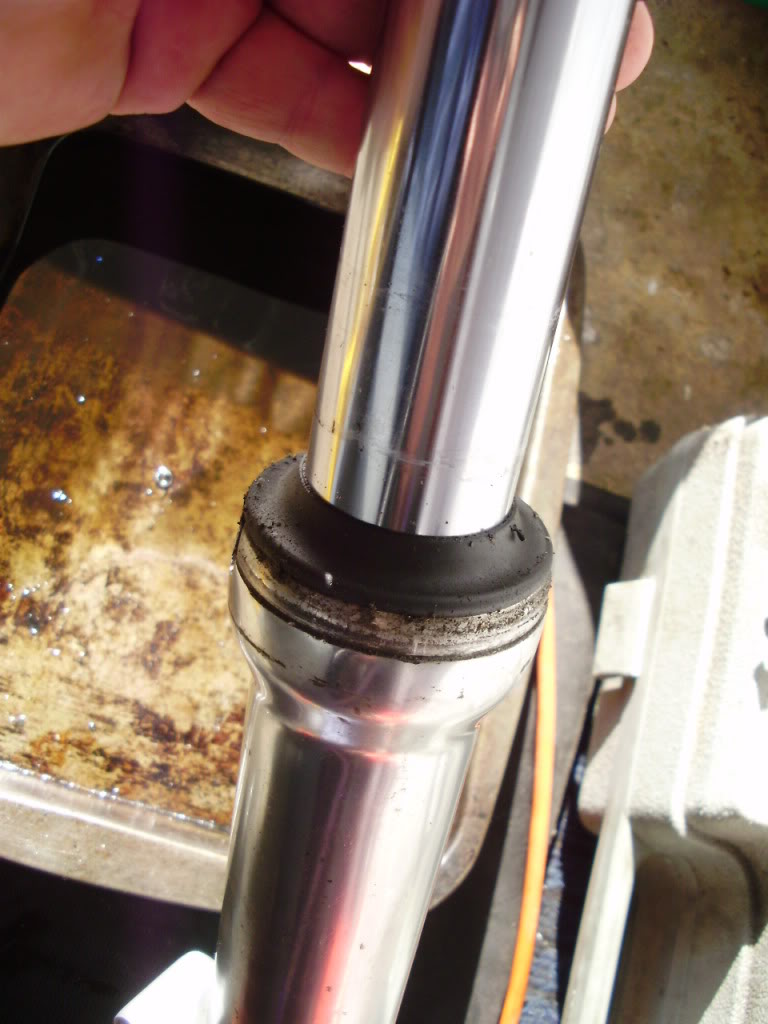
| Now grease the new fork seal with the Hyperpro magic grease and slide it into position. Make sure you fit it the right way up - so the visible spring is to the top. | We used Mo's home-made spring compressor tool to gently tap the seal fully home - until the groove for the retainer clip is visible. | Fit the retainer clip… |
 |  |  |
| Ensure it's fully seated in its groove. | Fit the dust cover. | Finally, fit the chrome cover.Install the damper rod into the fork tube, and the (banjo) bolt through the bottom of the fork leg (with a new 10mm copper washer). |
 | 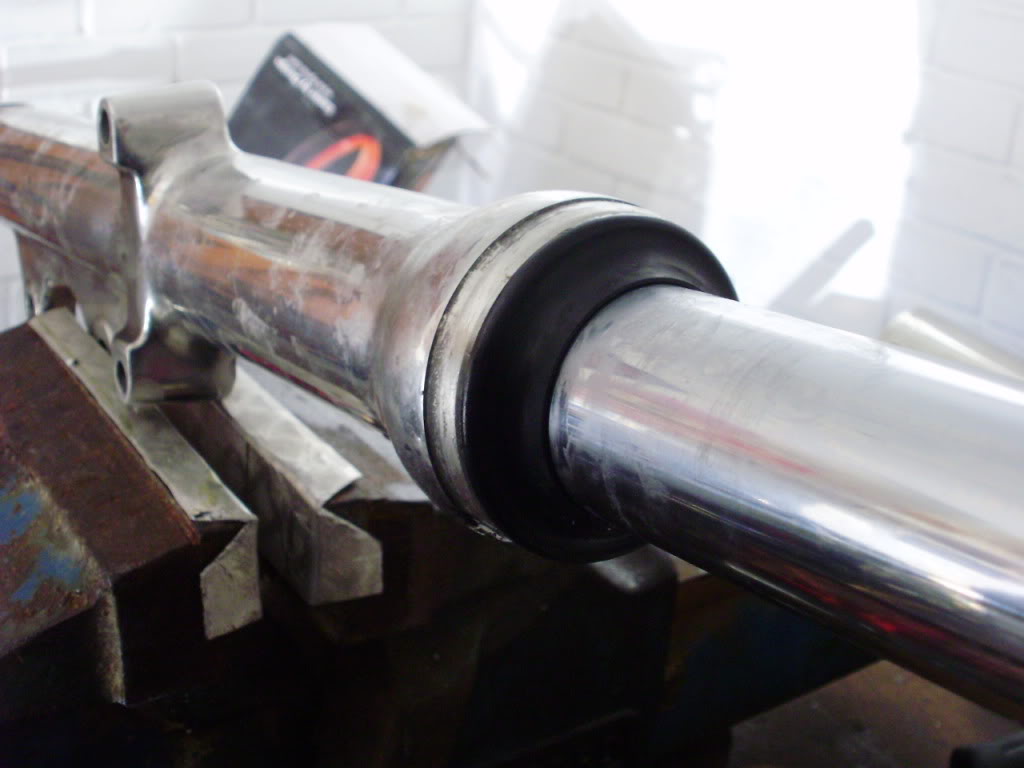 |  |
- There is no way to hold the damper tube in place as you tighten the bolt (20-29 ft-lbs), which is not a great thing. The bolt in one of my fork legs did torque to 25 ft-lbs, but the most we could get on the other one was about 10ft-lbs before the damper tube started spinning (even after fitting the spring and compressing the fork to put some pressure on it).
- This may be a function of the shorter Hyperpro springs with lighter initial spring pressure.
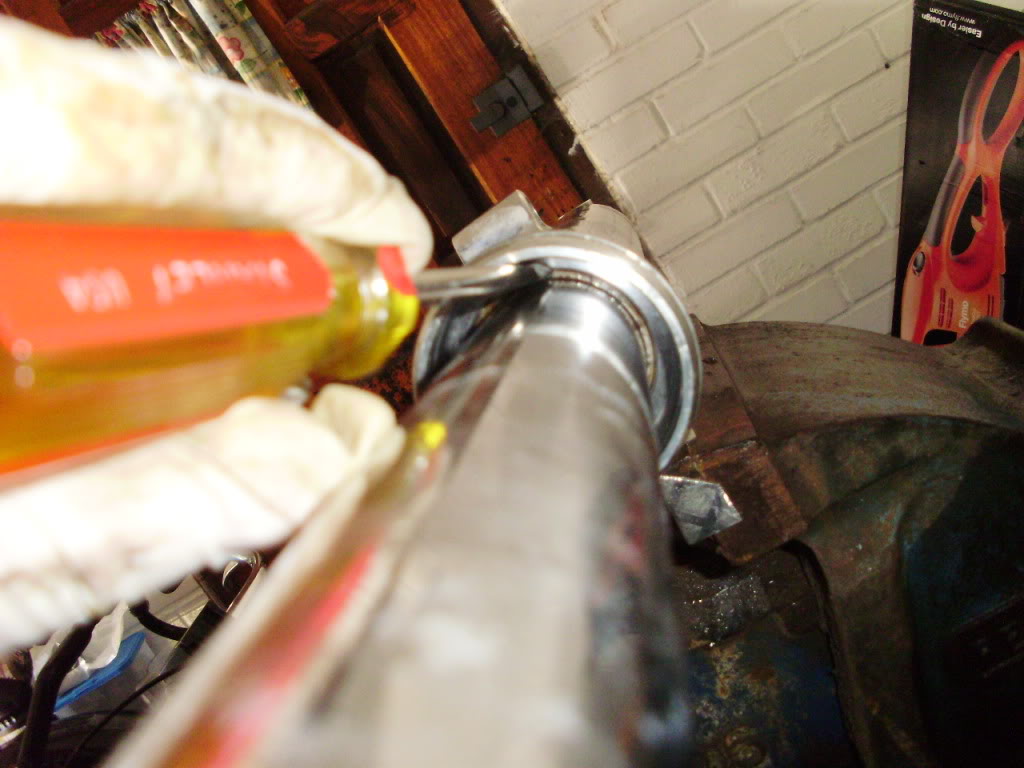
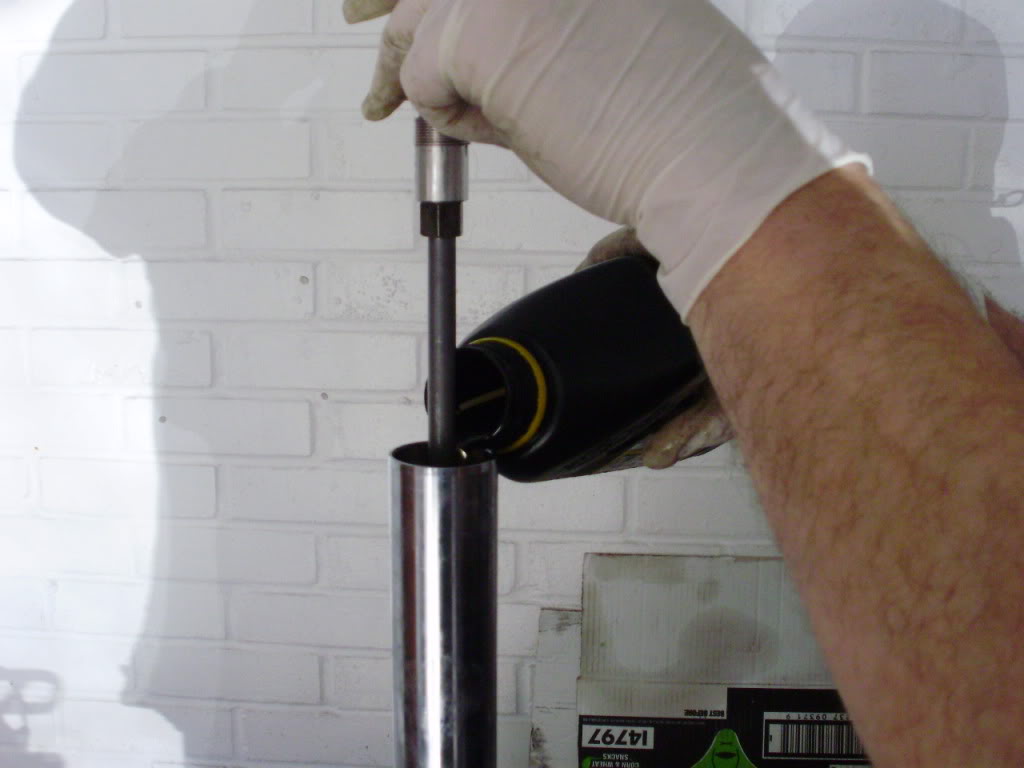
- Next, we have to fill the fork with oil. The stanchion has to be fully bottomed in the slider whilst doing this, and the fork leg held vertically. Again, we clamped a caliper boss in the vice to hold it steady.
| To reach the level specified by Hyperpro, we used approximately 350 milliliters, but not all at once. Lift the damper rod and pour in a little at a time. | Occasionally, (slowly) pumping the damper rod to prime the fork. If you pull the rod up too fast, you'll squirt oil all over the place, so slowly does it. | The factory manual recommends pumping the rod 10 times, but that's an absolute minimum. If the system is not fully primed, then your oil level will mean nothing. We pumped it about 20 times, occasionally adding more oil to the fork tube, and keeping an eye on the level with our zip-tie dipstick. If the damper rod still spits air out of the side holes when you reach the top of the stroke, you need to add more oil and keep pumping. When you're getting close, a little oil can make a big difference in level! |
 |  |  |
- When you've reached the correct oil level, it's time to install the spring. You'll need a second pair of hands again for this operation.
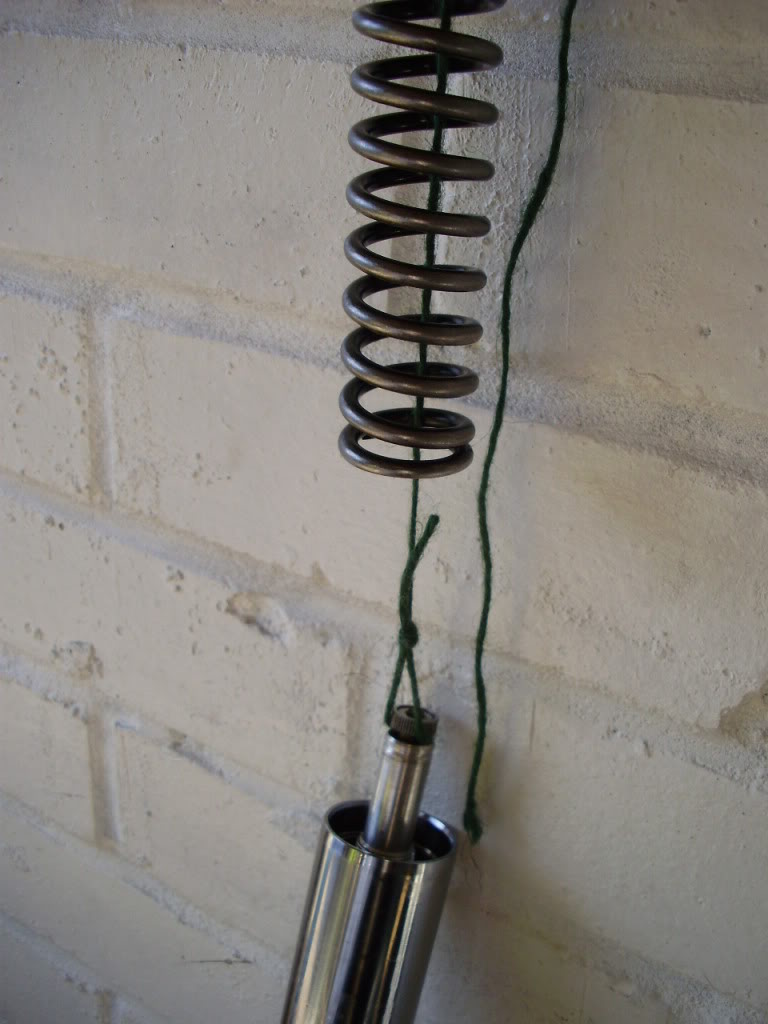
- Feed a piece of string through the spring, and loop it around the rebound adjuster knob. This will allow you to raise the damper rod as you install the spring.
| Fit the spring WITH THE TIGHTER WINDINGS TOWARDS THE TOP. Feed it s-l-o-w-l-y into the fork tube, and raise the damper rod above it. |
 |
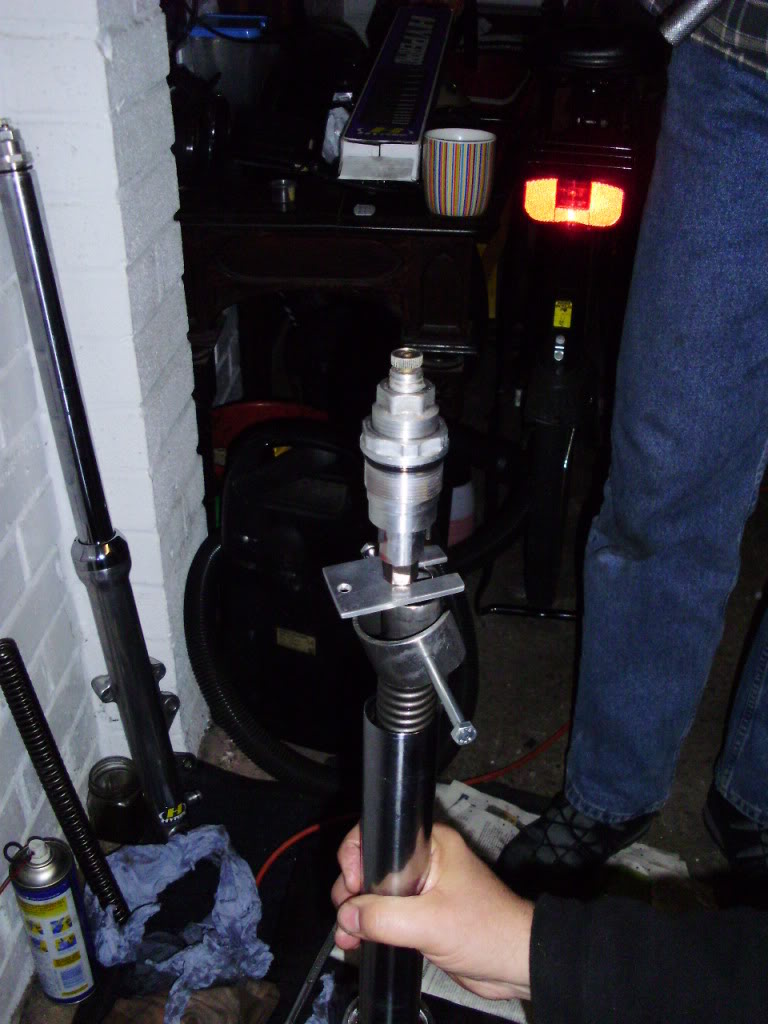
- Slide the spring spacer, with a washer either side of it, over the damper tube. Whilst you hold the damper rod up, get your assistant to compress the spring, until you can again fit the slotted plate beneath the steel lock nut under the damper assembly.
| Then screw the top nut / preload adjuster assembly onto the top of the damper rod. We did this all in one, but the FSM says to install the top nut first, then install the preload adjuster assembly after the spring pressure is released (which makes more sense). | With a 17mm spanner on the flats of the rebound adjuster body, tighten the top nut. |
 |  |
- Now get your assistant to compress the spring again, while you remove the slotted plate, then slowly release the spring pressure as you guide the spring spacer and washers into place below the top nut.
- With the top nut in place, raise the fork stanchion to the nut and screw the nut into the fork tube.
- Adjust the preload, compression and rebound adjusters to Hyperpro recommendations:
- Spring Preload: 4-5 turns out.
- Compression: open (minimum)
- Rebound: 6 clicks open (+/- 2)
- These are starting positions. The Hyperpro booklet contains detailed instructions for suspension set-up, which I won't go into here.
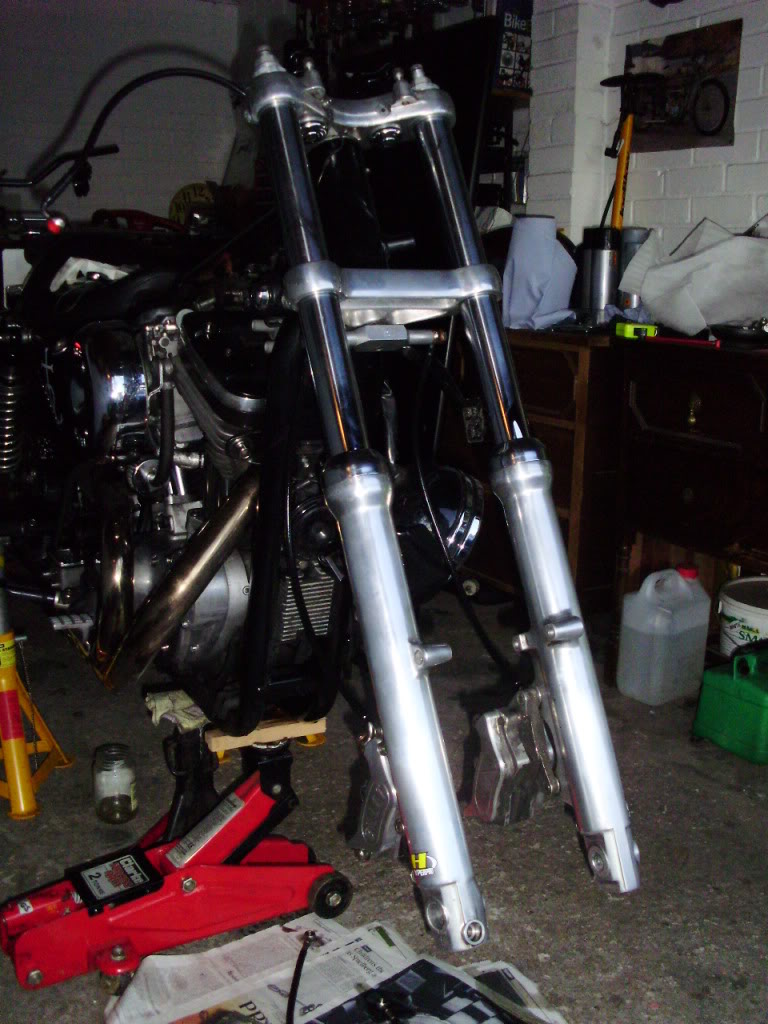
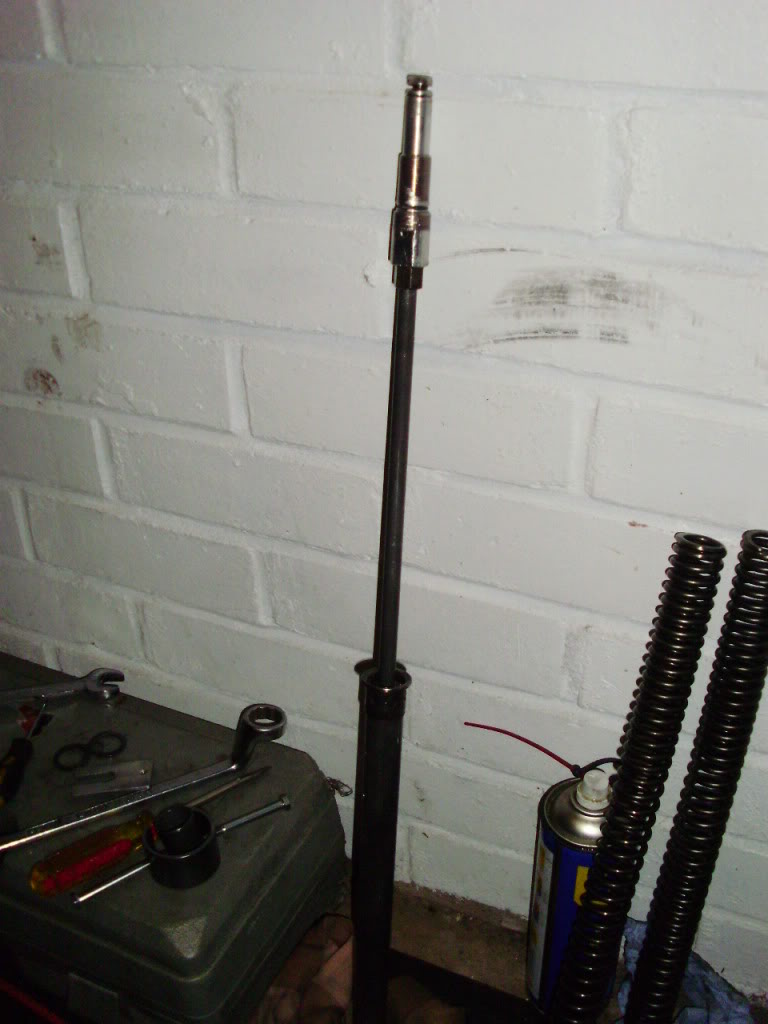
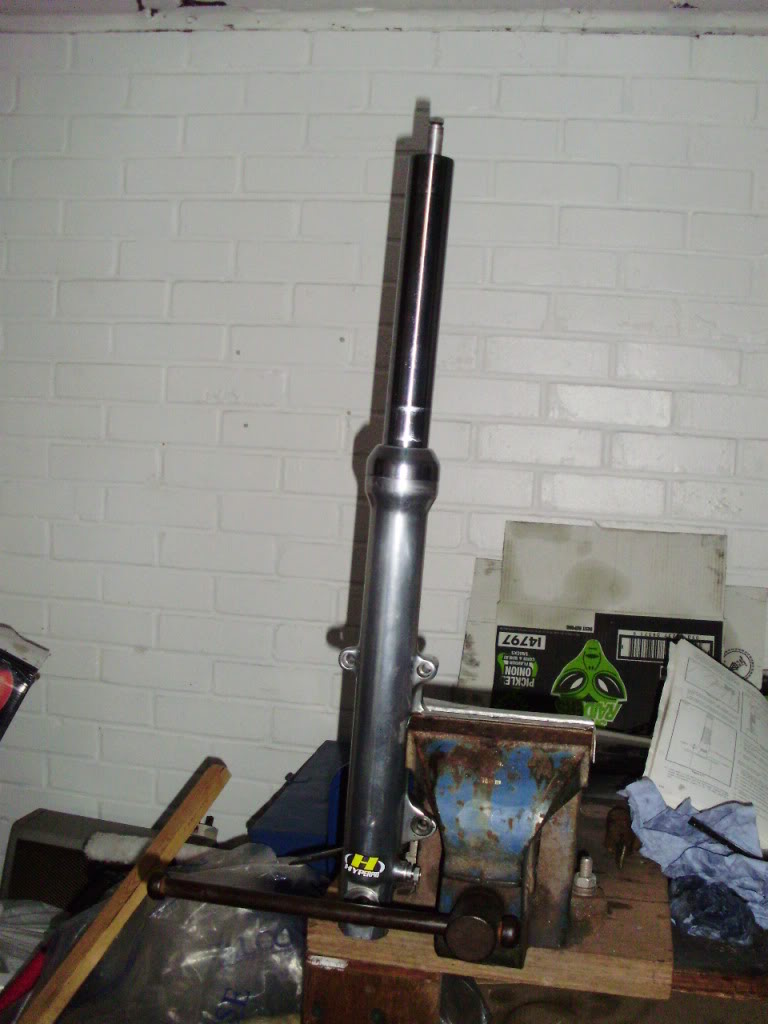
Finished Product.