Table of Contents

REF: Electrical System
Ironhead Wiring Mishaps and Meltdowns
See also illustrated 1959-1985 Sportster Main Wiring Diagrams (created with reference to the OEM manual) in the REF section of the Sportsterpedia.
It's important to have some sort of fail safe mechanism whether a fuse wire, fuse or circuit breaker inline between the battery and the voltage regulator. 1)
Else you can unsuspectingly experience a dead short, melted wiring or even watching your bike go up in flames (literally).
It appears that HD's quick fix in 1974 to the meltdown was Service Bulletin #659 adding a fusable wire inline from the battery.
Clich here to see more on the fuse wire in the Sportsterpedia.
It's important to have some sort of protection on the main circuit.
If it applies to your ride, you can ward off a potential meltdown in multiple ways. Do whatever works for you:
- By following HD Service Bulletin #659.
- Installing an extra circuit breaker.
- Installing an inline fuse.
- Or all of the above.
Broken Horn Bracket
The horn bracket that is mounted along with the key switch between the cylinders has been known to cause meltdowns.
The fact of the bracket breaking (due to being loose, vibration, age etc,) isn't the problem (electrically speaking).
The key switch terminals are bare ended (no insulation).
Should the horn bracket break, the horn will (most likely) swing down & rest on the back of the ignition switch for awhile, shorting the terminals.
The subsequent dead short heats up the wires, melting them and triggers the carnage shown below.
At this point, the motor is dead, no lights, no nothing. You're stranded on the side of the road, wondering just what happened.
The Doctor71's 1974 xlh
This happened to my 74 XLH and all initially started by a broken horn bracket:
This particular bike did not come with a fuse wire installed from the factory. So the main circuit was unprotected.
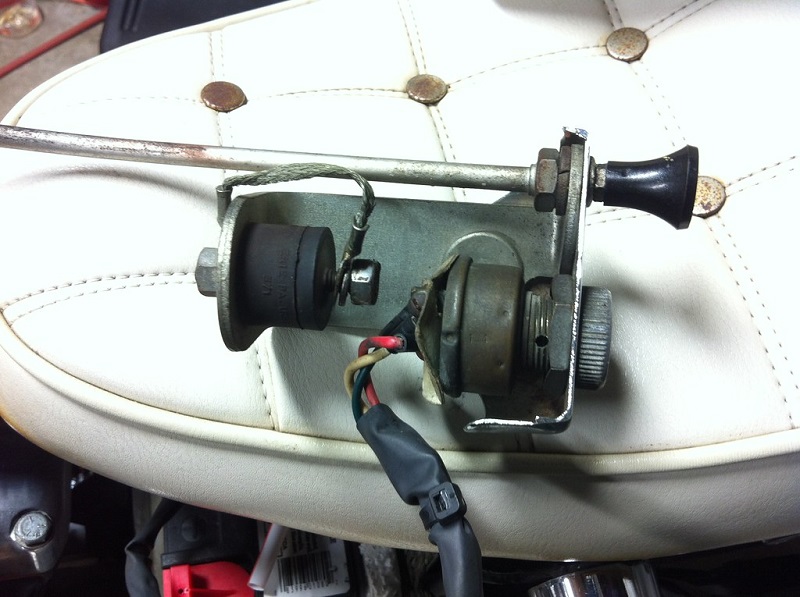
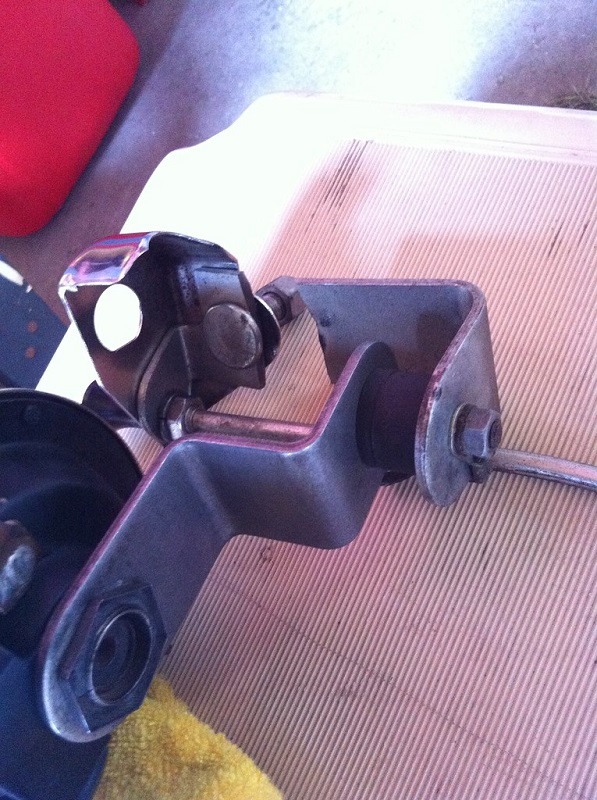
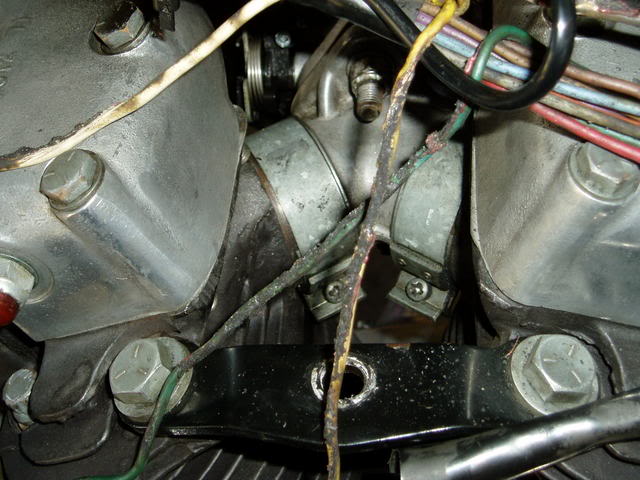
See the 'before' pic of the horn / switch brackets below (taken ≈ 8 months prior to my catastrophic event).
The ends of the ignition switch wires were heat-shrink'd immediately after this pic was taken.
Note the exposed screws on the back of the ignition switch.
Next, the meltdown occurs. I phone my son to bring tools, wire, etc etc. I re-wire enough of the bike, while on the side of the road, to get me home.
For the fix, I added a reinforcement to the horn bracket & TIG welded it up, replaced all those wires, & added my own fuse wire.
Before pic. Note the relative pristine condition of the horn mounting bracket, p/n 69129-72. 2)
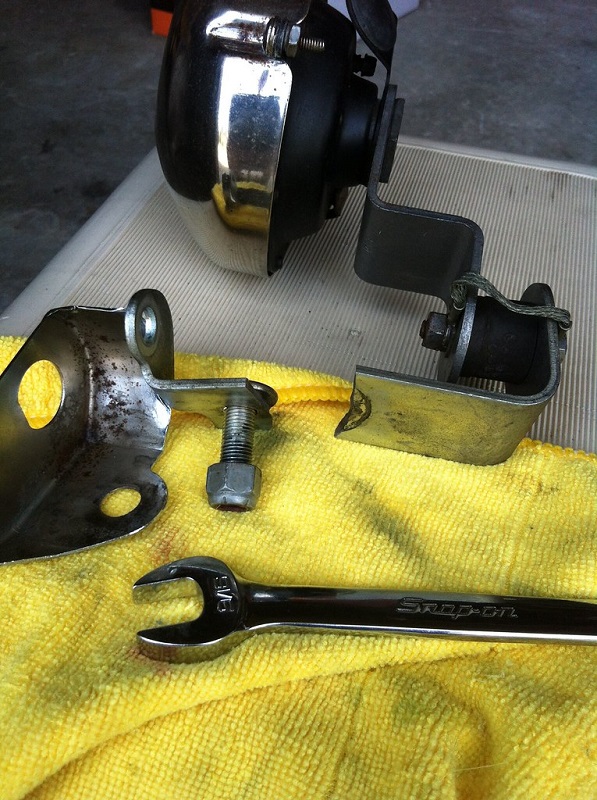
After pics. Back in the garage, with pics of the horn mounting bracket, et al, after removal. 3)
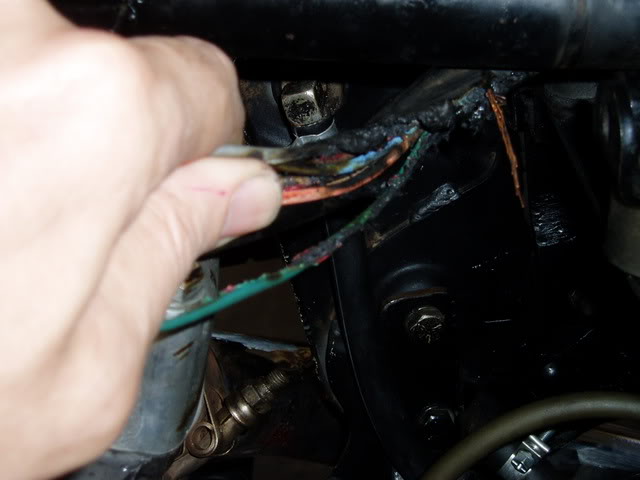
First pic below is the RED wire from the solenoid to voltage regulator, note the insulation (on what was the RED wire) has evaporated.
On a '74 XLH, this wire is the main feed that runs from the solenoid to the Delco voltage regulator.
I fully expected this wire to be burnt thru. It wasn't. Another RED wire burnt thru first, otherwise I'm certain it would have burnt thru.
The outer black sheath is mostly in tact.
The second pic shows the wire with the outer sheath removed. Insulation jacket was totally smoked, end to end.
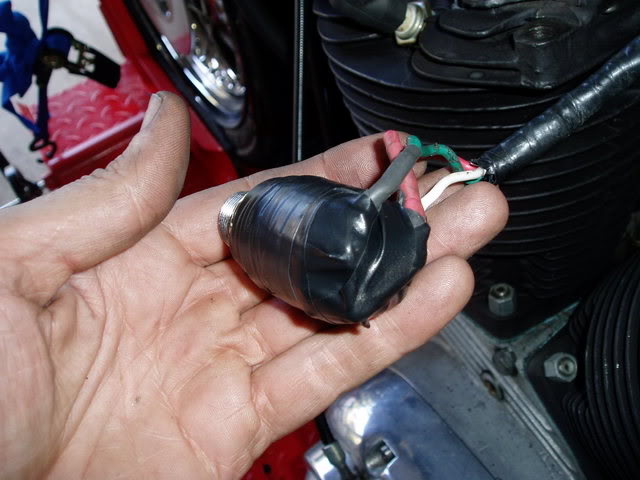
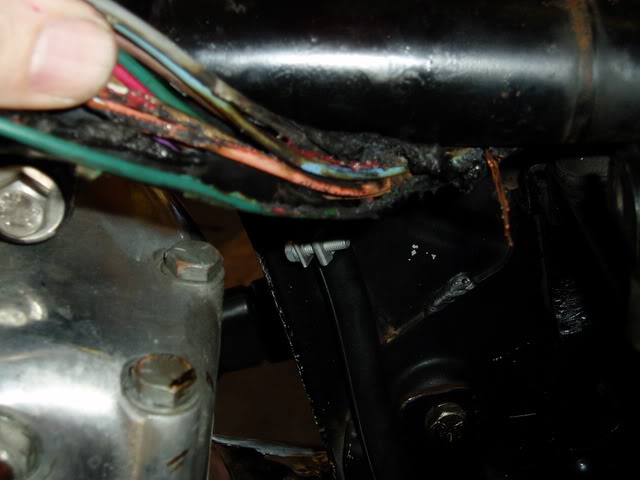
Below is what was left of the RED ignition switch wire (about 12 inches was damaged and/or evaporated), which runs from the voltage regulator to ignition switch.
The WHITE wire (feeds the accessory & ignition circuit breakers) and the GREEN wire (feeds lighting circuit breaker) were intact.
(although still damaged due to heat on RED wire)
The outer black sheath housing the RED, WHITE & GREEN wires is mostly in tact except for the damaged 12 inches at the end.
(which had been discarded by the time I took this pic)
Note the RED wire has all the insulation evaporated / melted off in the second pic below. The heat-shrink I installed 8 months earlier is more or less intact.
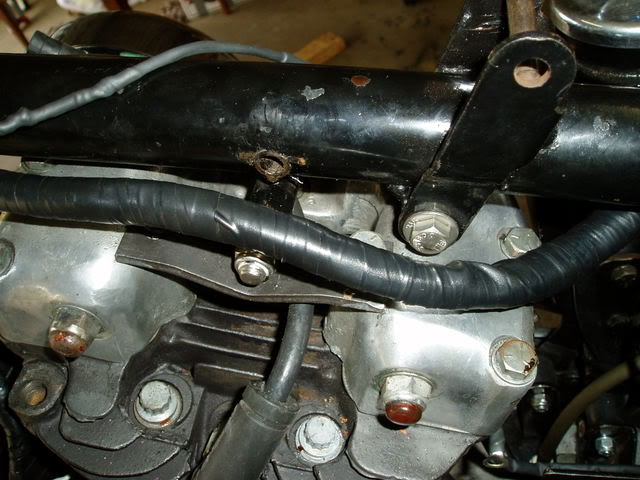
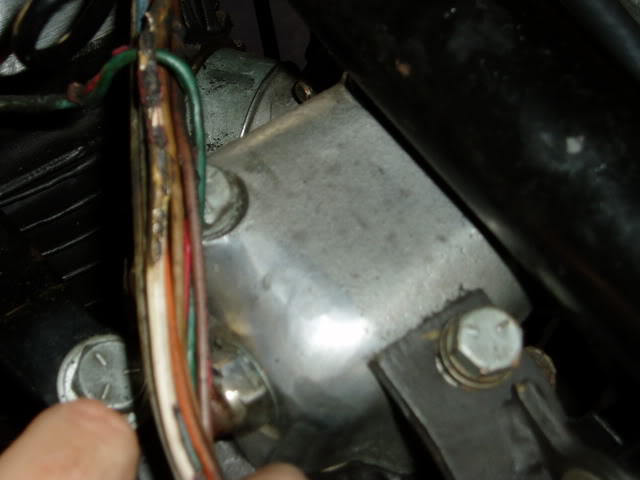
Here is the black sheath that houses the RED, WHITE, & GREEN wires running along the backbone of the frame.
The wires inside are “crispy & damaged to various degrees” but not burnt thru in this area.
Hopper's 1977 XLCH
Or: Most carb problems are electrical. 4)
Hopper had been fine tuning the Keihin carburetor to get a nice reliable idle without carb farts, stalling, or unwanted high-idling.
Riding around the back roads in the sugar cane fields near home. Coldest morning of the year (50 degrees F , perfect for breaking in a new engine).
I lean out the idle mixture screw so it is idling beautiful, but then it gets a misfire in the midrange.
I head for home. The misfire starts happening at full throttle too. Maybe some of that carb cleaner I sprayed in the idle mix screw hole has dissolved an O-ring?
Or is sitting in a gob in the float bowl and acting like water in the fuel - I have had that happen before.
So I pull into my buddy`s driveway - the aircraft engineer and BMW restorer - to see if maybe he has a 0.80mm drill I can open my intermediate jet up just a tad with.
I let the bike sit there and idle for a good minute or more. Beautiful. Perfect in fact.
I kill the engine and get off. Ferkin ell, there`s smoke coming off the battery.
I look and see the positive wire from the battery to the regulator is glowing red hot.
Then before my eyes, flames start licking up the battery.
The rubber battery box mount is on fire and the flames are licking at the rubber mount above it.
As I look for the nearest hose, there is a cloud of smoke about 6-foot high and six-foot wide covering the whole bike. I cant even see the seat.
Hose, hose, hose. My buddy is not home. Where is the damn yard faucet? There are hoses lying all over the drive.
I follow one to the end - a sprinkler. The other end - nothing.
Just lying in the garden. He has bore (well) water and the pump switch is inside the (locked) garage.
The cloud of smoke is getting smaller, but I can't blow the flames out, or get a glove in there to beat them out, behind the battery.
The fire is burning quite well in there.
I am getting ready to stand back and watch a bike I have owned for 31 years and just spent six months restoring go up in flames before my eyes.
The English language simply does not have the words to describe that feeling.
I ain`t taking this lying down. Around the side of the house, bucket, bucket, bucket.
My buddies` home brewing kit is there, with 5-gallon plastic buckets for washing bottles in… with water in one of them.
Kersplash, problem solved. Whew, no English words to describe that feeling either.
At first, I am cursing the recently installed Accel regulator, which is too hot to touch.
There were plenty of English words to describe that feeling. Many starting with F and C and of Saxon origin.
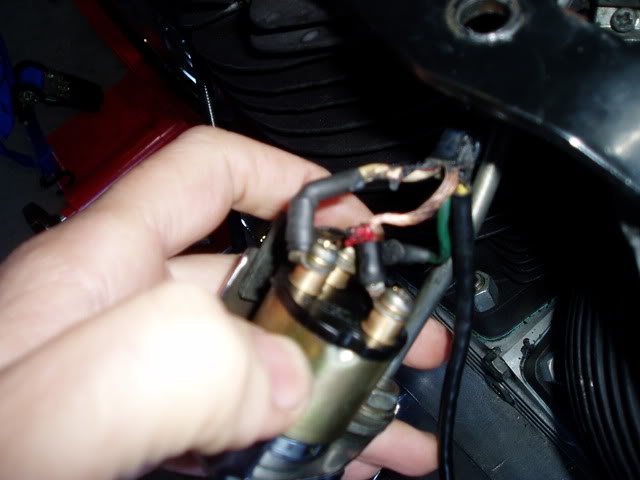
Then I am checking out the fried wiring to the ignition switch and see the horn bracket has broken from vibration.
(the one between the two cylinders, right above the ignition switch)
The highly conductive metal horn bracket has lobbed straight onto those bare screw connections on the back of the ignition switch.
(right on , of course, the main power wire from the battery). More words of Saxon origin.
Lucky my BM riding buddy was not home to see all this. And he lives uphill from my place, so I roll the bike home and into the shed.
Had time before work to strip off the seat and ignition switch and remove the battery.
Fried wires up through the main loom from the battery area to the ignition switch.
Looks like I can splice in new wires without replacing the whole loom. Bummer, original unmolested factory loom - well, was.
And as usual, the circuit breakers did not break. Or were breaking temporarily and resetting straight away - causing that misfire, I would bet money.
I will be wiring an inline fuse into that main battery wire.
Oh well, just another day with the Ironhead. Gotta go and buy some heat shrink tubing.
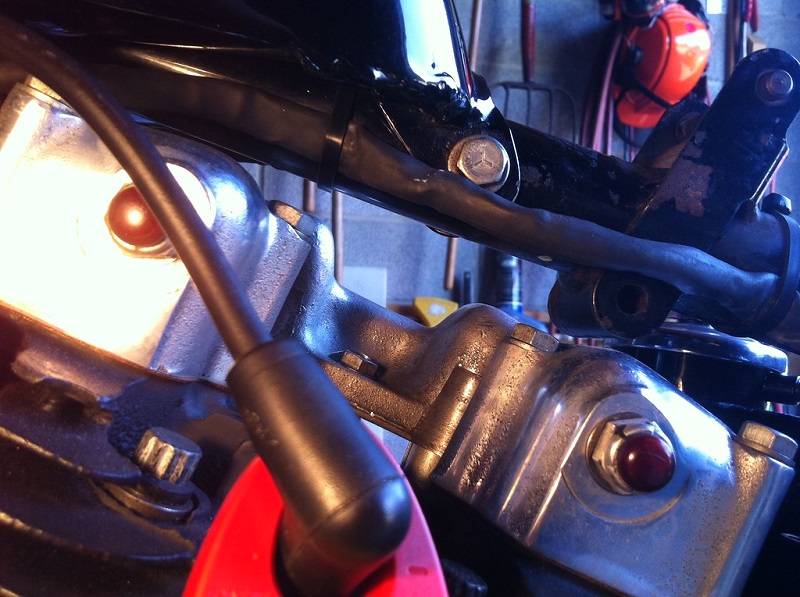
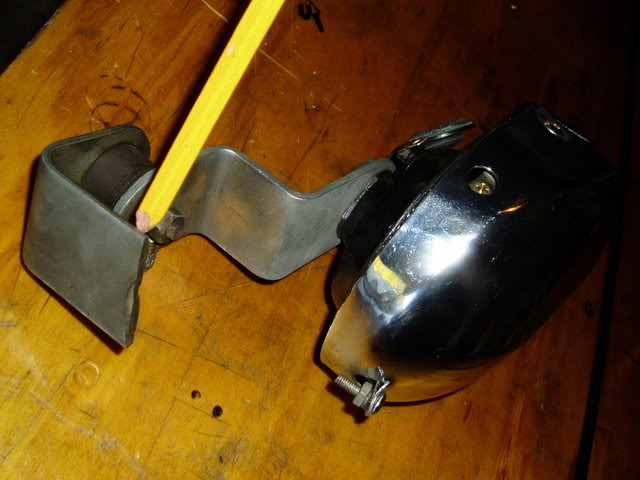
The bracket is rubber mounted.
The part that broke was the top part that bolts to the big heavy bridge bolted between the two heads, and the rubber bobbin attaches to it.
So the actual horn and small bracket are isolated from the vibes.
It broke right where the thin (.080“ or so) bracket stuck out past the heavy (3/8”) bridge.
The bracket is sort of roughly chromed so it looks like there was some hydrogen embrittlement from the chroming.
That combined with HD vibration. Poor design that lets the bracket flex in use and the repeated heat cycles of the between the cylinder location.
The break is crystalized and you can see it was broke 3/4 of the way through for a long time before.
A TIG weld repair with gussets should work to stop future flexing, and a properly insulated ignition switch set up will stop it from happening again.
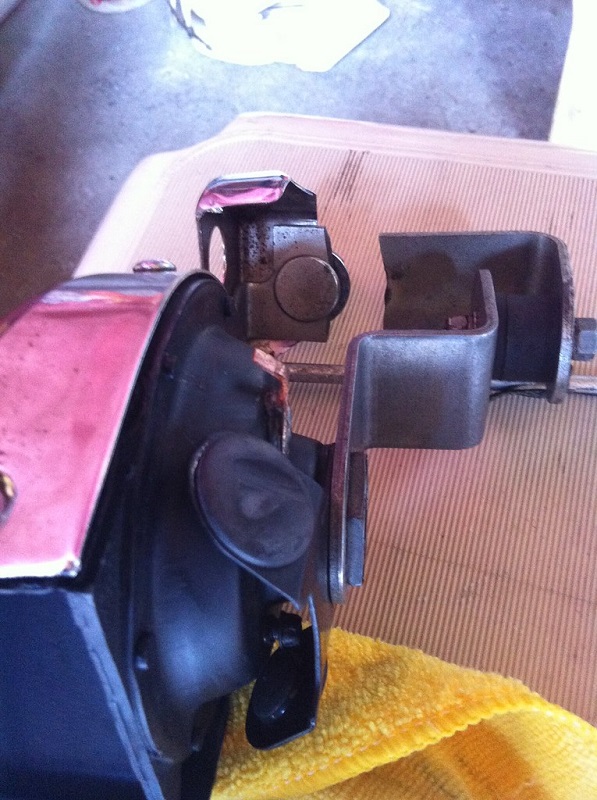
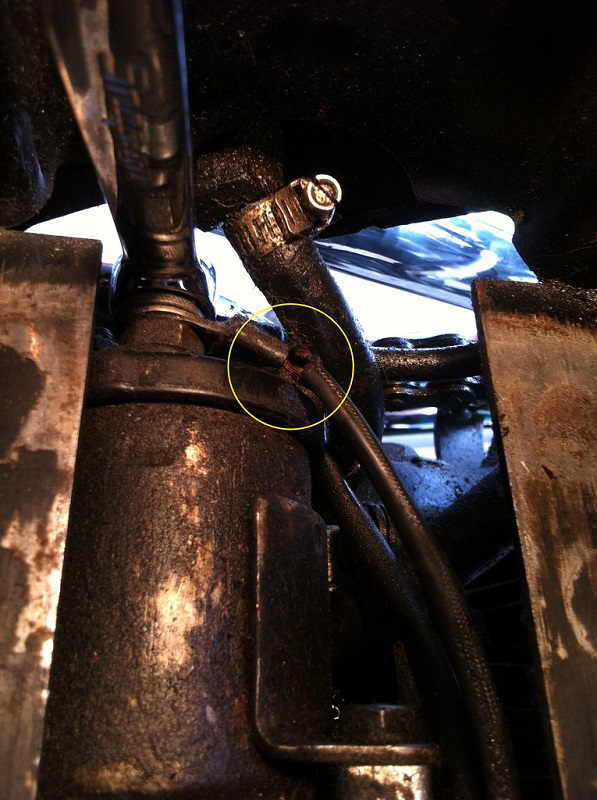
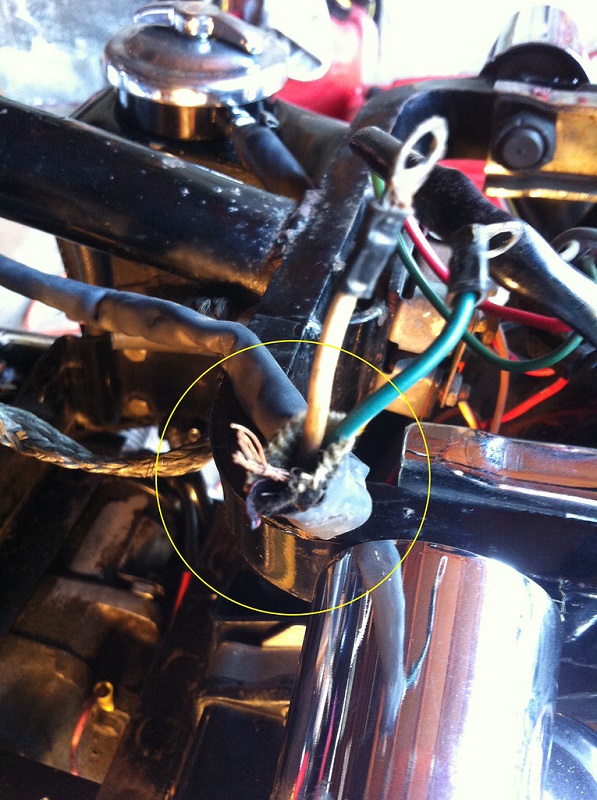
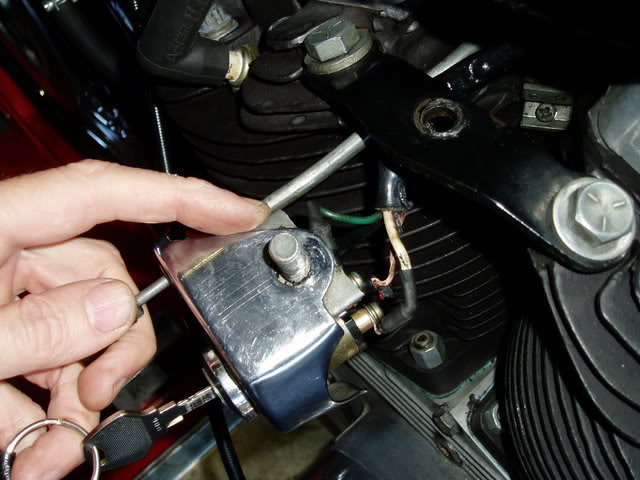
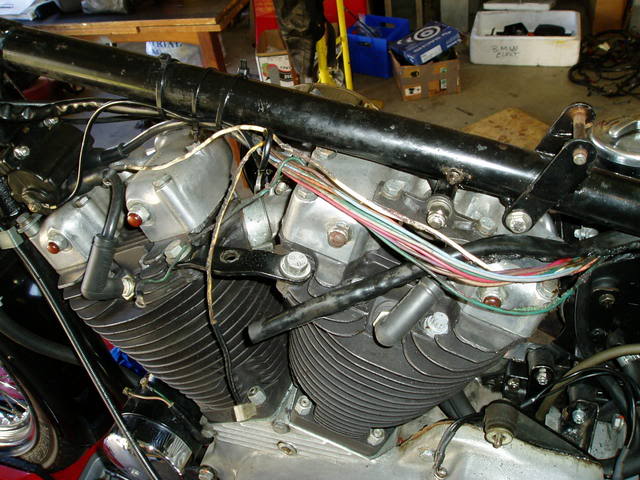
See that broken horn bracket right where my finger is pointing in the pic below.
And the bare terminals right below it. And the shiny copper wire direct from the battery, that used to have red insulation on it.
Well toasted. Nothing to insulate those terminals if something goes wrong.
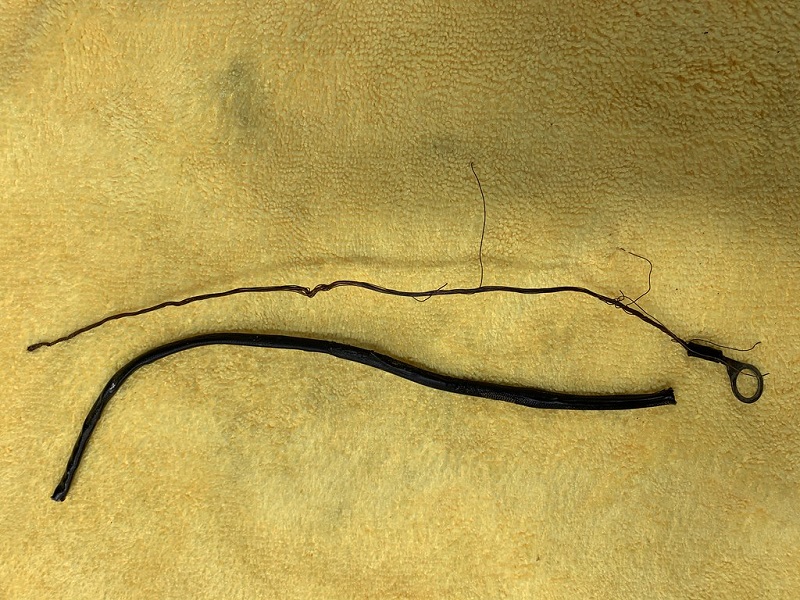
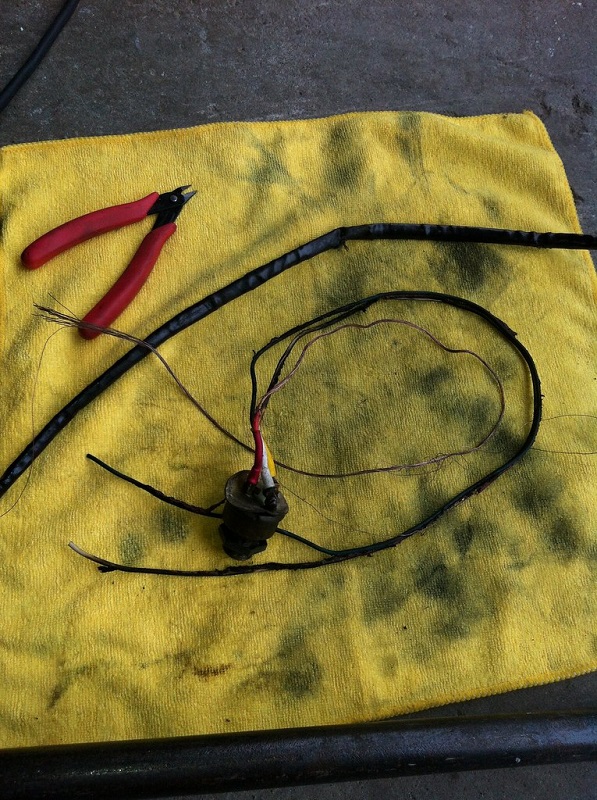
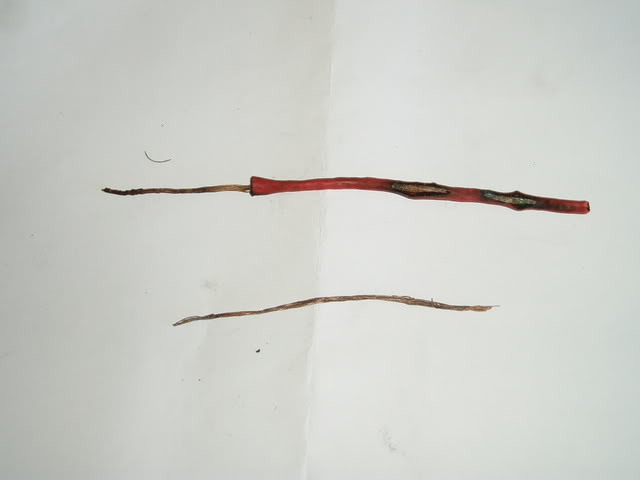
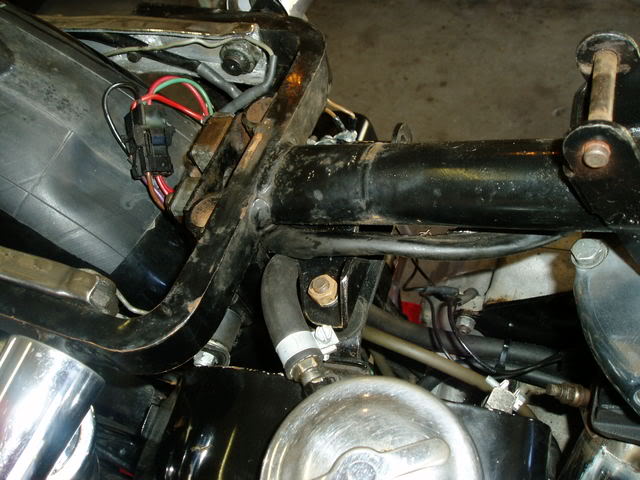
In the third pic below is what fractured and fell down on top of those bare hot terminals.
This is all that was left of the main power wire from the battery to the ignition switch.
A good foot of copper simply vaporized and disappeared.
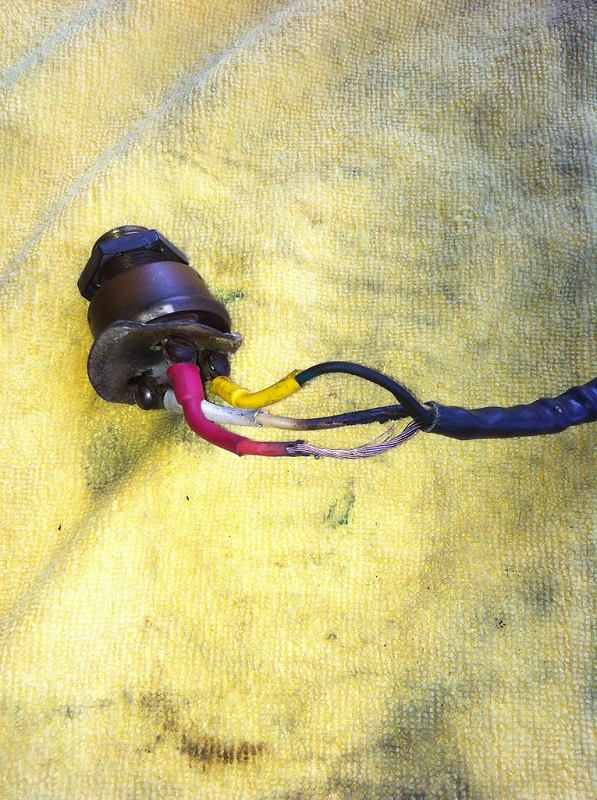
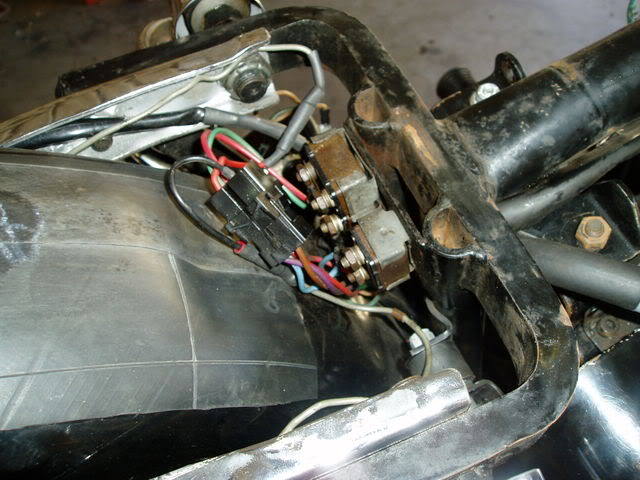
Nearby wires were well fried too, the ones going to the breakers after they leave the switch in the first pic below.
The others are the other end of the main loom going under the seat post area.
Took some fixing.
I opened the melted outer cover, replaced the fully toasted wires, patched some singed ones with fusion tape and Nitto tape, heat shrink and whatever it took.
Had to solder some new sections in some.
The rat's nest under the seat survived unscathed except the wires to the ignition breaker and lights breaker.
I added another fourth breaker, a 30amp job, right next to the battery so this cant happen again.
The closeness of wires and terminals and steel frame and fender parts is absolutely terrifying.
But I figure the master breaker right at the battery will prevent any meltdown if a bottle cap or something should blow in there off the road and arc those terminals.
And the ignition switch now has a cocoon of fusion tape and Nitto tape to insulate those terminals plus some super heavy duty heat shrink to go over top off all that.
Also the patched and spliced main loom with a couple of layers of Nitto tape wound around it in opposite directions.
And the TIG welded horn bracket with a strengthened patch so hopefully it won`t break again.